Print Interactive Schedule
This dialog box is opened with the File > Print command if a Schedule window is active.
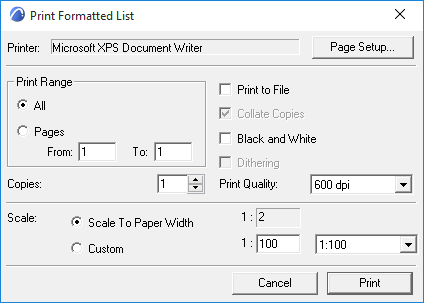
Printer: This field displays the printer driver currently set up for your machine. To change the assigned printer, choose the Page Setup button at right.
Page Setup: Click this button to open the Page Setup dialog box, where you can choose a printer and set paper size and orientation.
Print Range: Choose either All to print all pages, or choose a page range for multi-page output.
Print to File: Check this box to save the output as a print file on your computer.
Collate Copies: Check this box if you are printing multiple copies, and would like each copy to be output in sequential order.
Black and White: Check this box for black and white output. With this option, colored elements will be output as follows:
- Lines: All colored lines will be black; white lines remain white.
- Fill: Foreground will be black; background will be white. Fills using RGB colors will be gray.
- Zones: All will be displayed in grayscale cover fills.
- Images: All will be displayed in grayscale.
Dithering: Check this box to reduce the total number of colors present in the output while retaining visual fidelity. Dithering may be necessary due to a limited number of colors available on the display device. For example, if your fills turn out solid black, the Dithering effect may help.
Print Quality: Enter a dpi (dots per square inch) setting to define print quality.
Copies: Enter the number of copies you wish to print.
Scale: Choose the layout output size.