Model Compare compares 3D views from two different models or versions.
To define exactly which 3D views, use the Select View dialog. You can choose a 3D view that is common to both of the models, or a different view from each.
View selection can be significant for Model Compare:
An element can be visible in one view but not in another (e.g. due to Renovation status, Design Options, Layer Settings, Partial Structure Display, etc.)
•Intersecting elements can be considered modified in one view, yet not modified in another view, depending on the view’s Layer Combination.
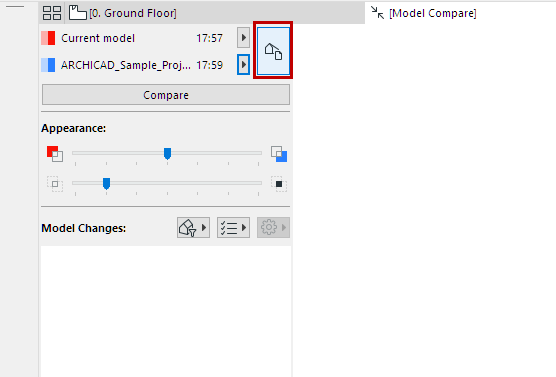
1.Use Design > Model Compare to choose the two model versions.
2.From the Model Compare palette, click the View Selector button.
3.The Select View dialog opens, showing the combined View Maps of the two selected projects.
4.Select a view (here, a view that is common to both compared models), then review its General View Properties in the panel below.

To compare two different 3D views:
1.Uncheck “Apply Common View Settings.”
2.The 3D views of each model version are now listed separately, side by side.
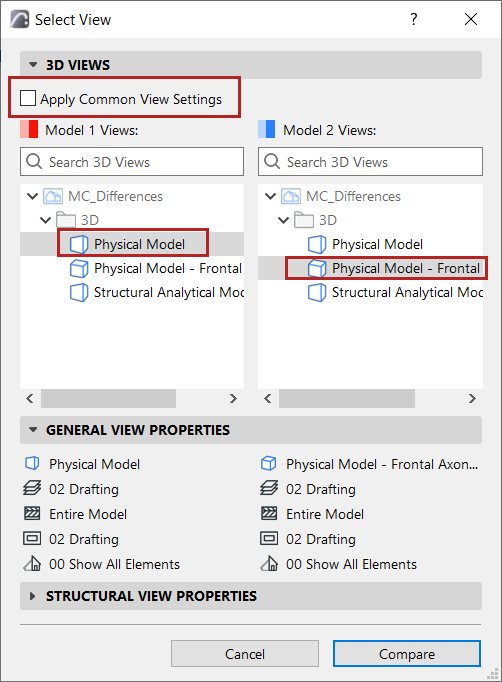
3.Review their General View Properties in the panel below.
4.For each model, select a 3D view, then click Compare.