The CALHYDRA Connection Add-on in MEP Designer enables users to leverage the full power of CALHYDRA for precise hydraulic calculations and simulations based on European and German standards. CALHYDRA provides comprehensive analyses for potable water, wastewater, heating, and cooling systems. Import the calculated results from CALHYDRA to automatically update the nominal diameters of the pipes in your MEP Designer project.
The CALHYDRA software is created by Dendrit, a software company owned by Kemper. They are well-known in Germany for their precise, standards-based calculations. CALHYDRA also collaborates with Graphisoft’s DDScad software.
Useful settings for best results (by discipline)
Standards supported by CALHYDRA
To use the CALHYDRA Connection workflow, you must have:
•A license for:
–Archicad Collaborate or MEP Designer
–CALHYDRA
•An MEP Designer project with MEP pipe systems modeled (drinking water, heating, cooling, waste water, rainwater, etc.)
•Required data packages imported to the MEP Designer project
CALHYDRA Classification System
1.Download the CALHYDRA Classification System from: Graphisoft BIM Data
2.In the Classification Manager, click Import, then browse for the downloaded file.
Important: Do not delete or rename this Classification System. Its name is used internally when mapping to CALHYDRA.
MEP Route Specifications
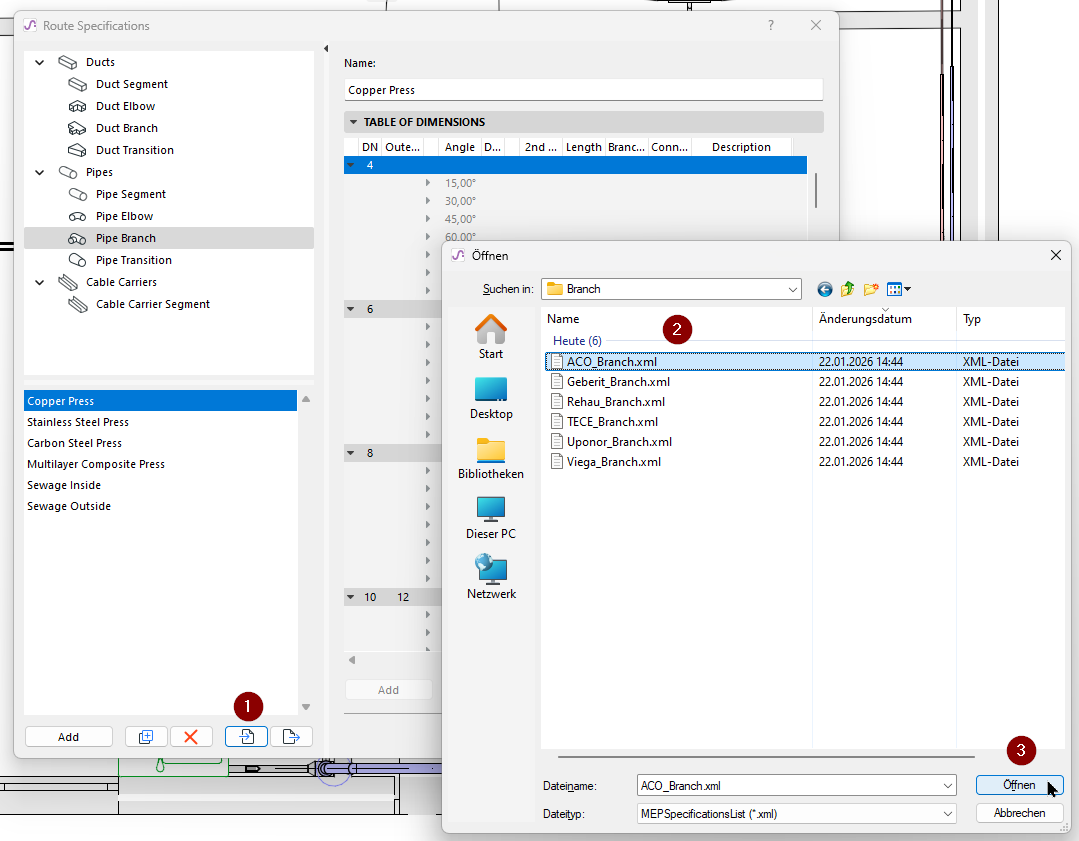
For realistic calculations and correct dimension mapping, use the manufacturer’s Route Specifications prepared for CALHYDRA.
1.Download the CALHYDRA – MEP-Route-Specification Material package from: Graphisoft BIM Data. This file includes MEP pipe and fitting materials from manufacturers supported in CALHYDRA.
2.In the Route Specifications dialog, click Import, then browse for the downloaded package and import the files you need:
Important: The same Route Specification set should be used in both MEP Designer and CALHYDRA.
1.Classify elements in MEP Designer
2.Configure the CALHYDRA Translator in MEP Designer
3.Export the project from MEP Designer
4.Open the project in CALHYDRA
5.Run the calculation in CALHYDRA
6.Export results from CALHYDRA
7.Import results and update pipe dimensions
In Teamwork: Make sure to reserve the piping elements to be updated. Otherwise, no update will occur.
The following sections walk through each step in order.
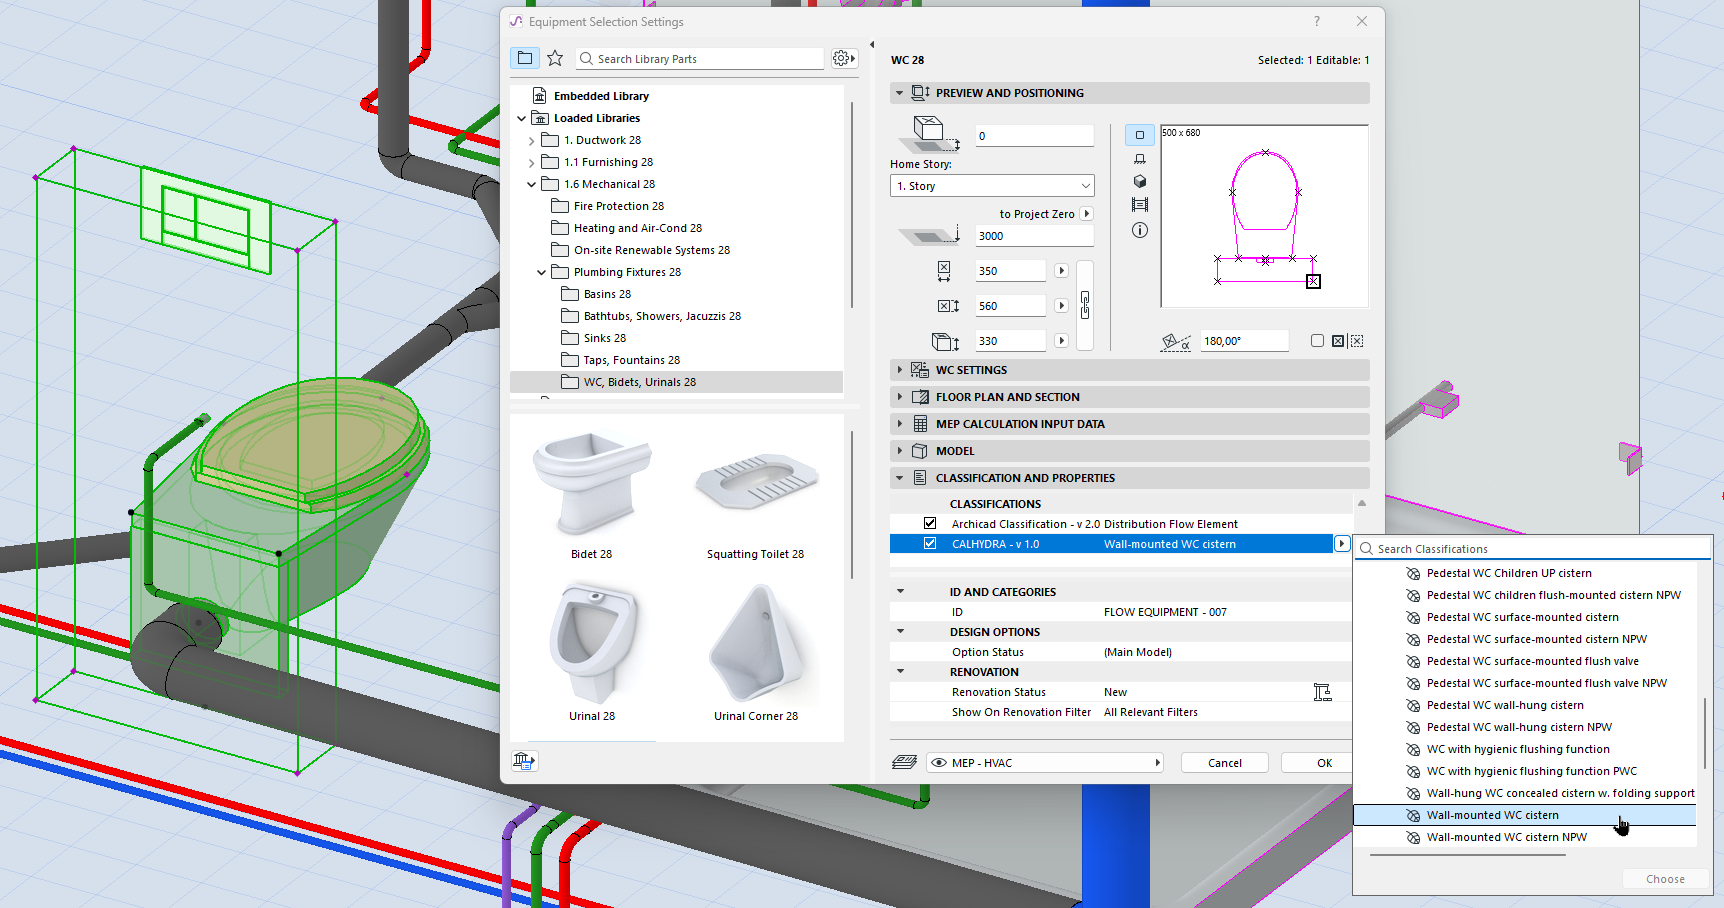
Step 1 – Classify elements
CALHYDRA relies on Classifications to understand what each element represents (pipe type, fitting type, discipline, etc.). Therefore, before exporting to CALHYDRA, you must classify your MEP model elements in MEP Designer, using the CALHYDRA-specific Classification System.
1.Select MEP elements (pipes, fittings, equipment) in your model
2.In Element Settings, open the Classification and Properties panel
3.Assign the appropriate CALHYDRA Classification entry to each MEP element:
You can speed this up with:
•Find & Select – to identify elements without CALHYDRA Classification
•Interactive Schedules – to list and bulk-edit classifications
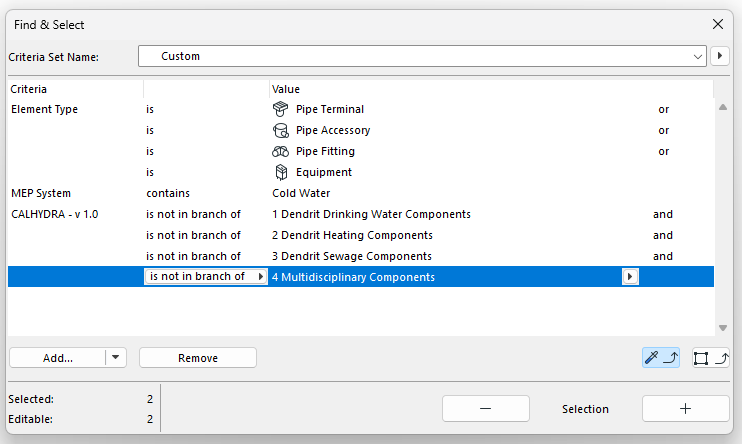
Find unclassified elements
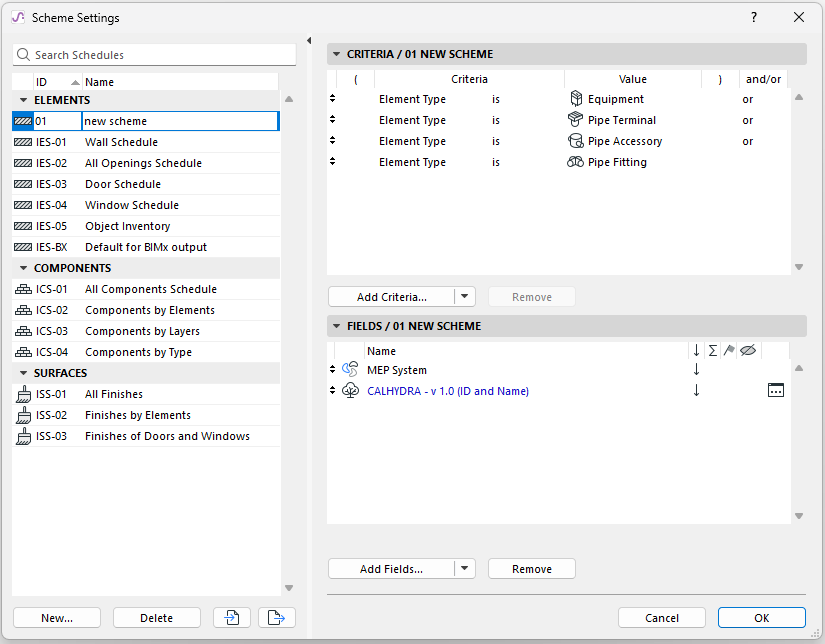
Use Interactive Schedule to find elements by classification
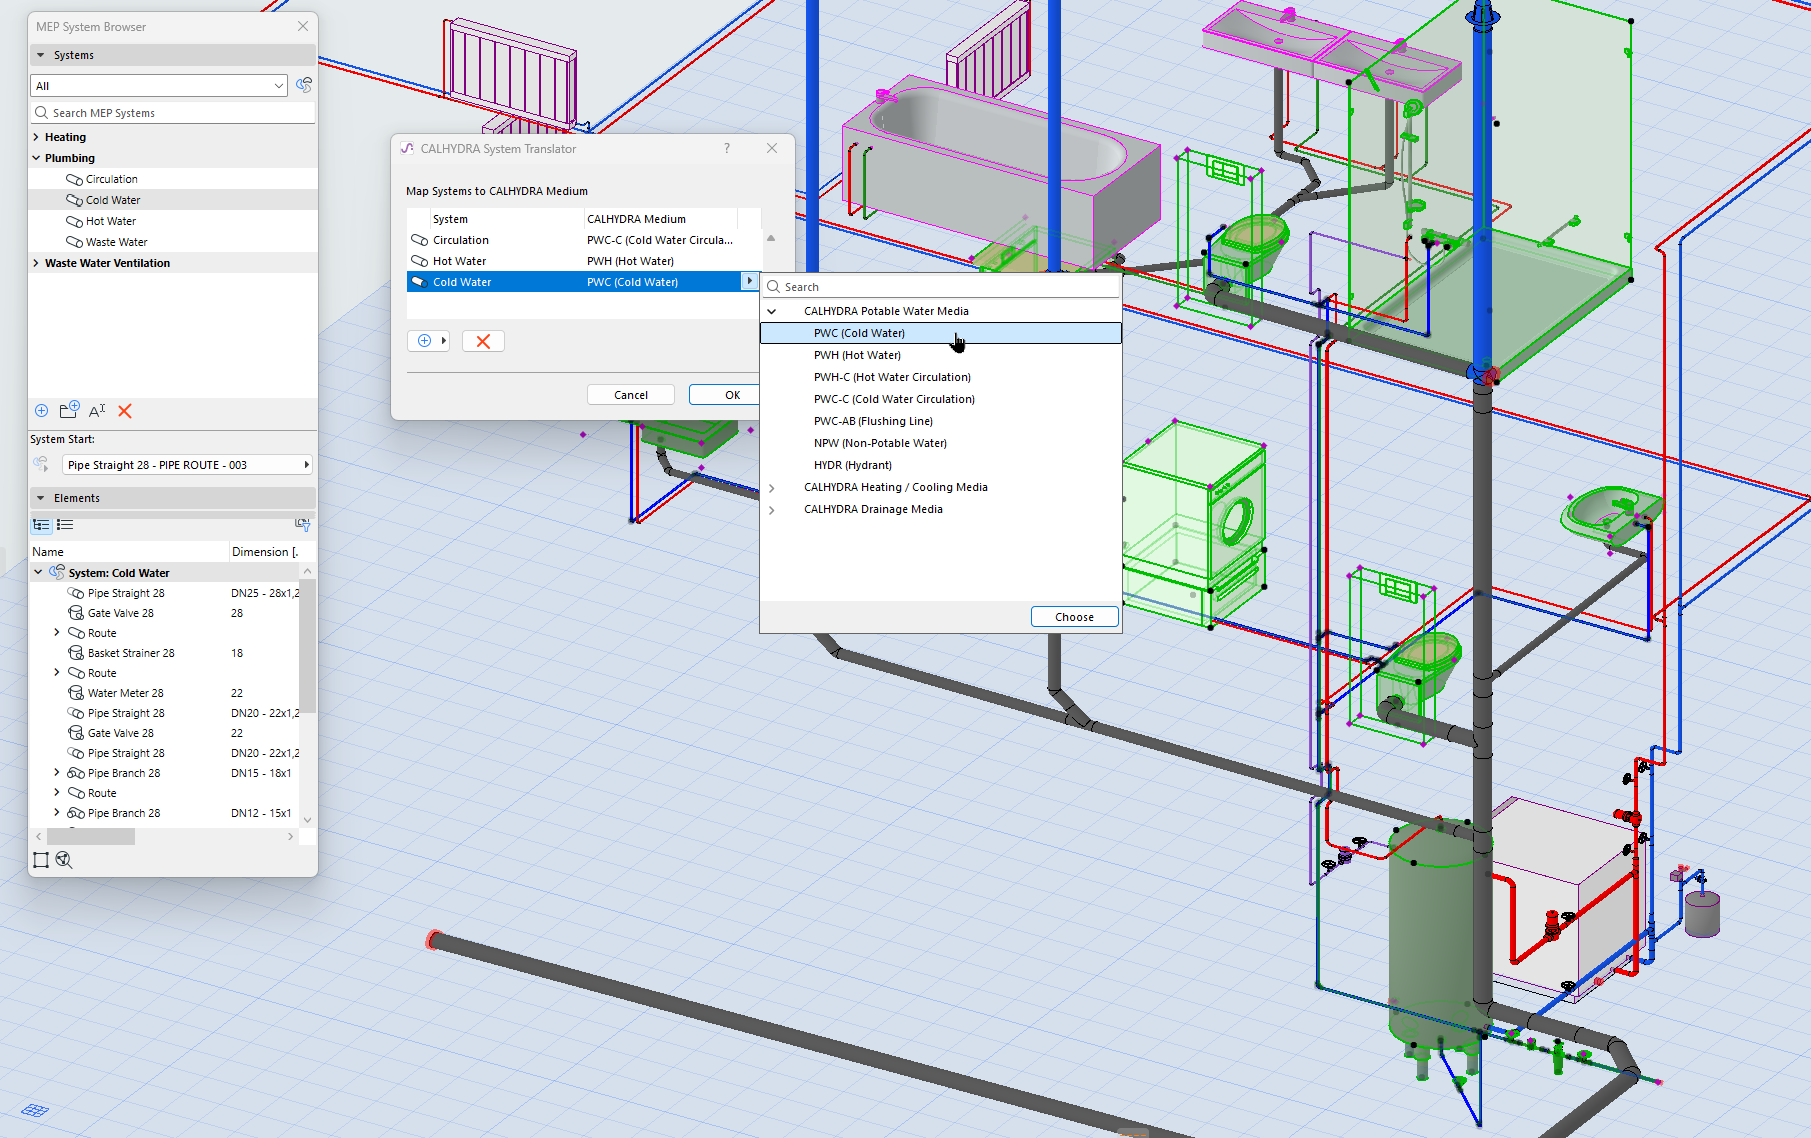
Step 2 – Configure the CALHYDRA System Translator
The Translator defines which MEP Designer systems are exported and how they are interpreted in CALHYDRA.
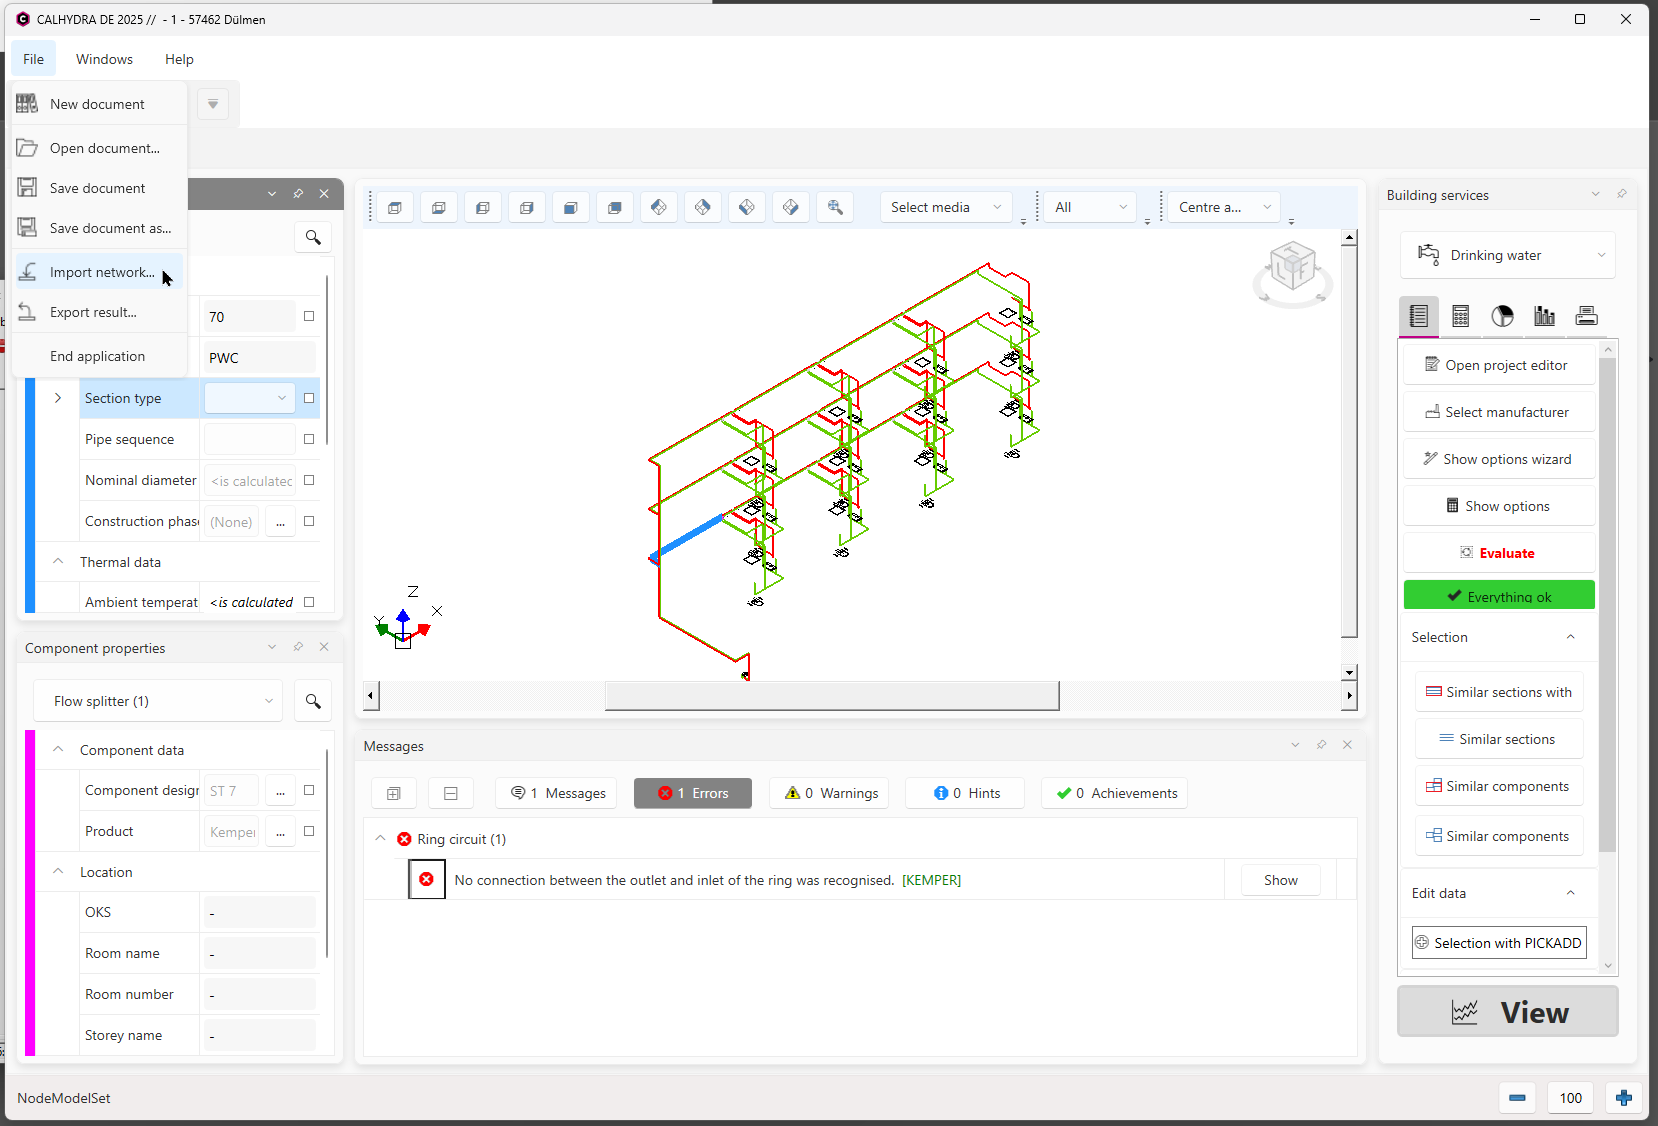
1.In MEP Designer, go to File > Interoperability > CALHYDRA Connection > CALHYDRA System Translator
2.In the CALHYDRA System Translator dialog, choose MEP Systems to export
•Click the Add button
•From the appearing list of systems in your project, select the ones to export
Limitation: For each export, choose systems from only one discipline at a time (for example, either Heating or Waste water). Don’t combine disciplines (e.g. Drinking water + Heating + Waste Water) in one export. If you do, CALHYDRA will show all disciplines together and refuse to continue the calculation.
3.In the CALHYDRA System Translator dialog, map the systems to CALHYDRA Medium
4.For each selected MEP System, assign the correct CALHYDRA Medium
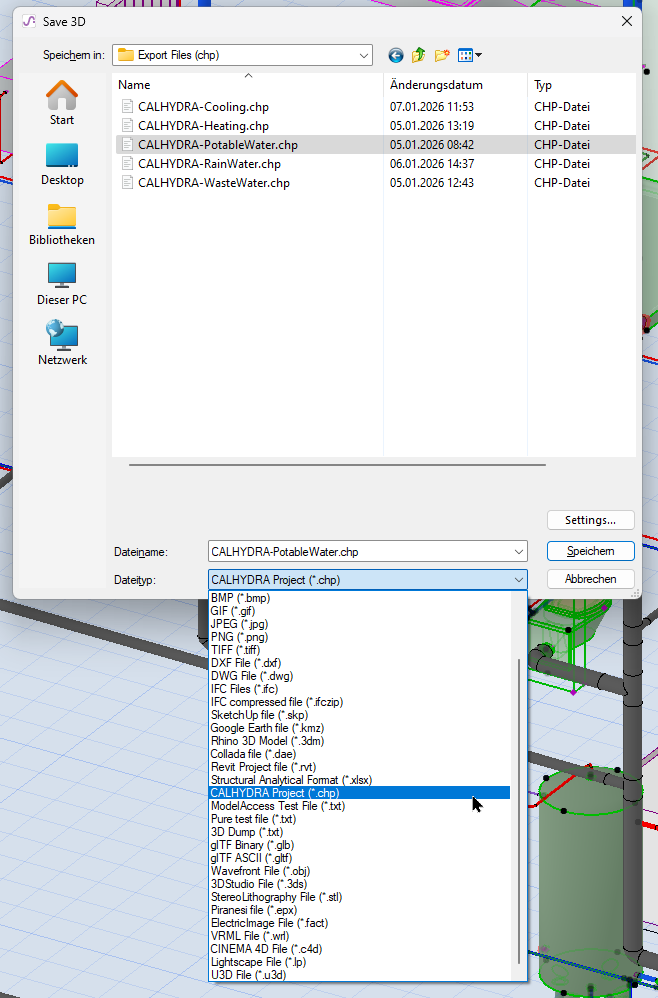
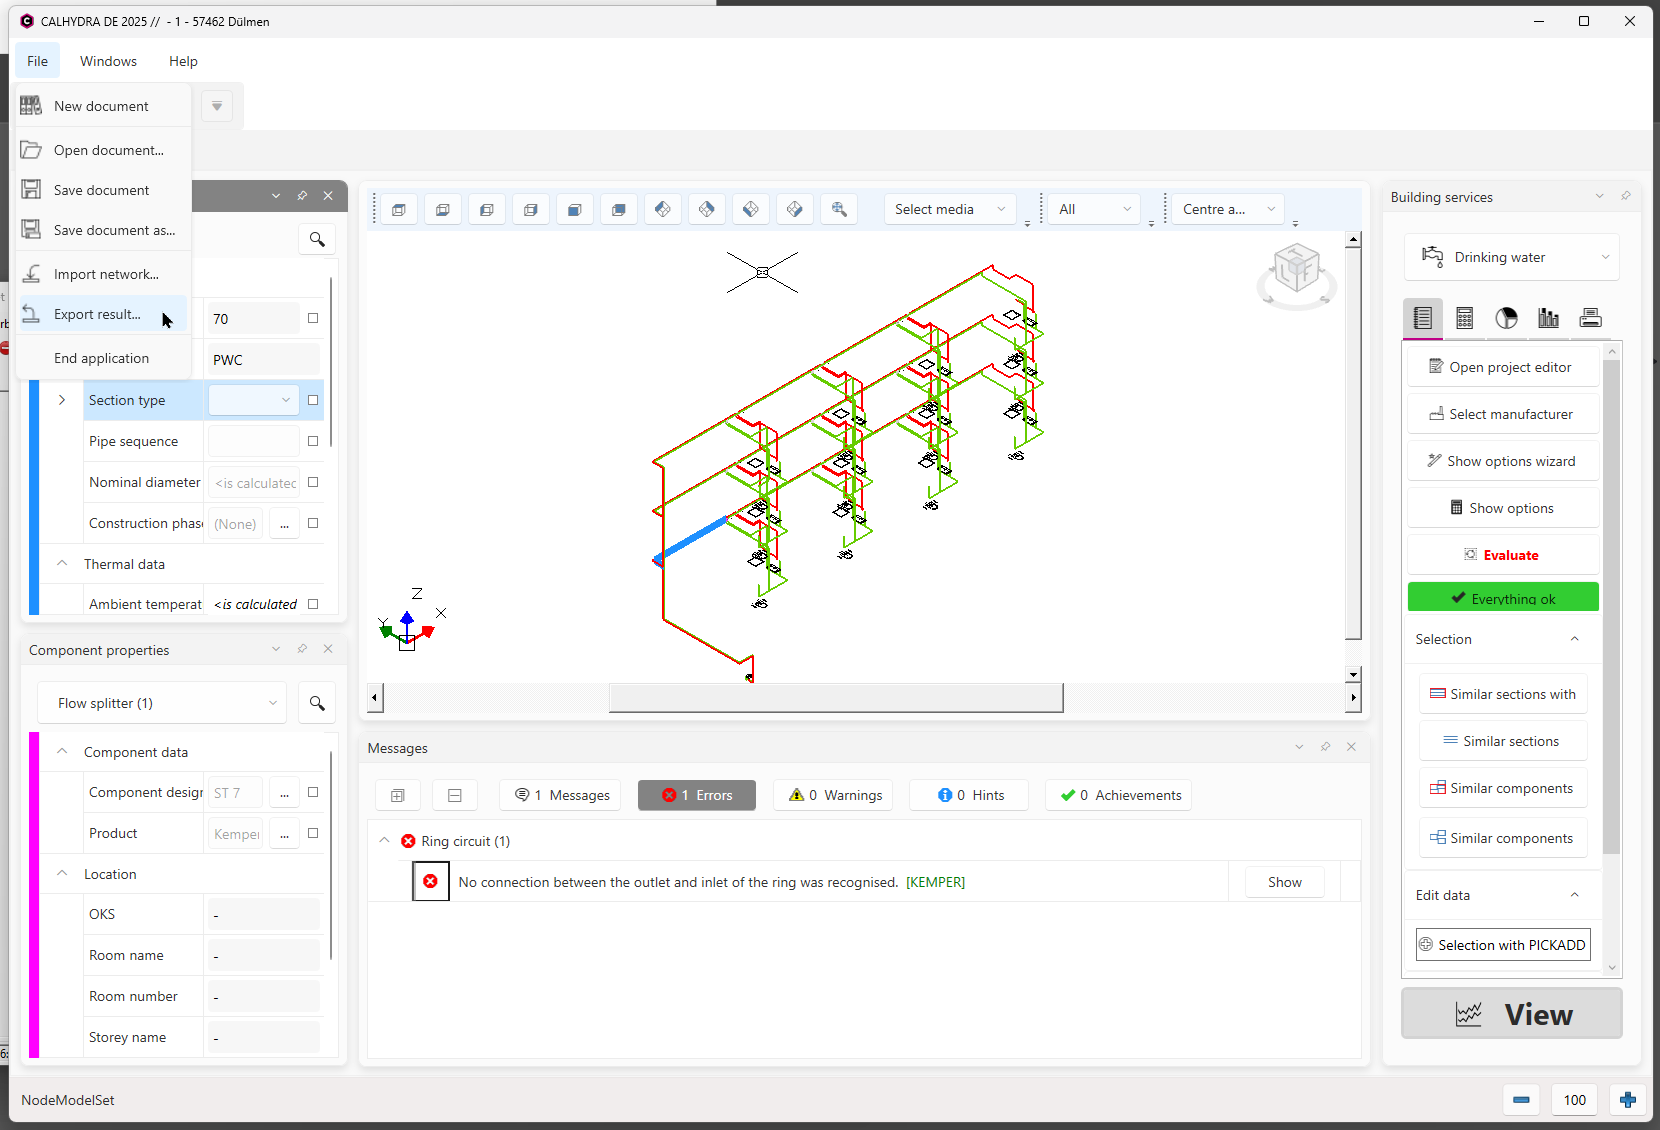
Step 3 – Save a CALHYDRA project file
1.In MEP Designer, go to File > Save As…
2.In the file type dropdown, choose CALHYDRA Project File (*.chp)
3.Specify a location and name, then click Save
All systems that you selected and mapped in the CALHYDRA Translator will be exported to this .chp file.
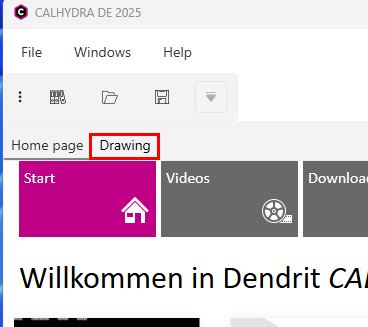
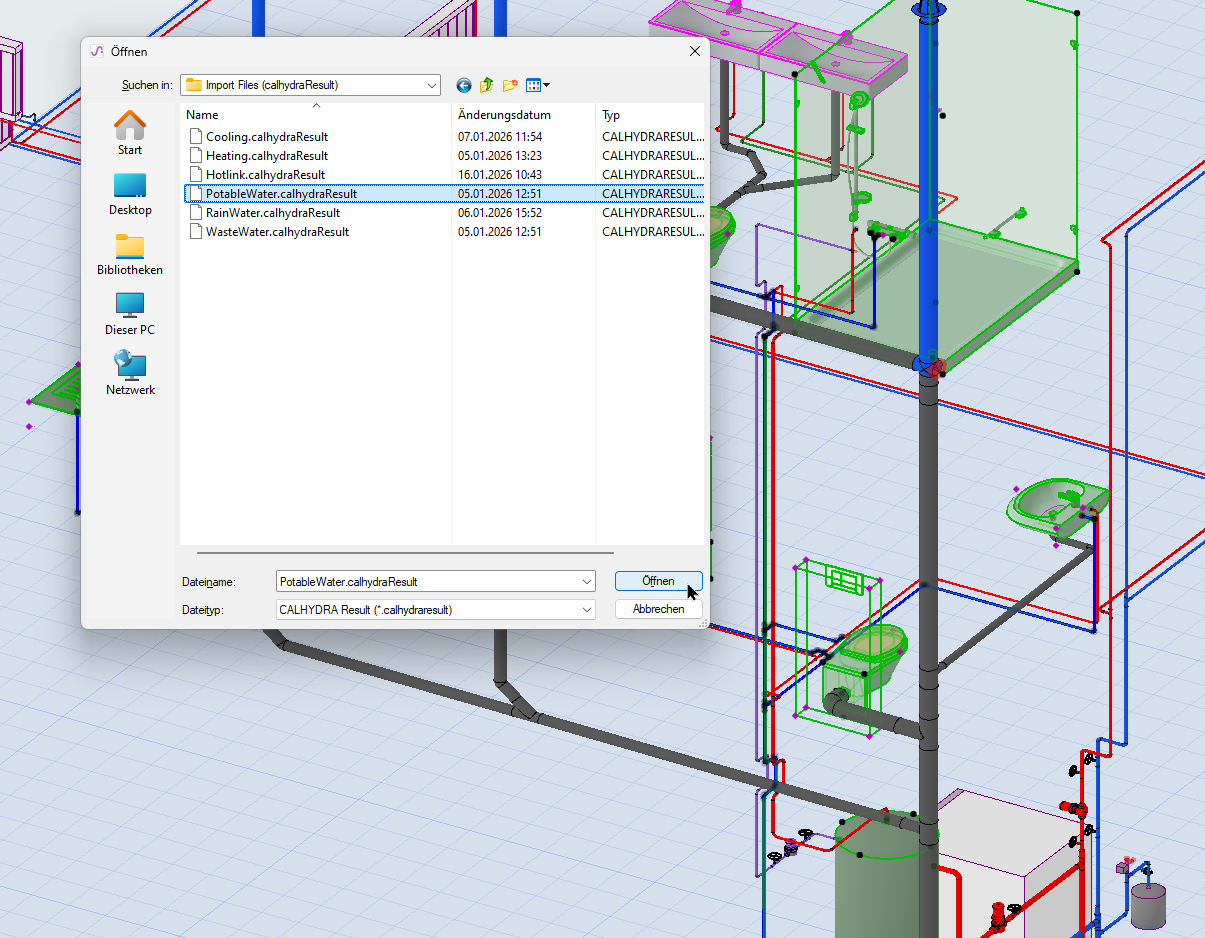
Step 4 – Import the project to CALHYDRA
1.Start CALHYDRA
2.Switch from Home page to the Drawing tab
3.Under Building Services, choose the appropriate service: Drinking water, Waste water, or Heating
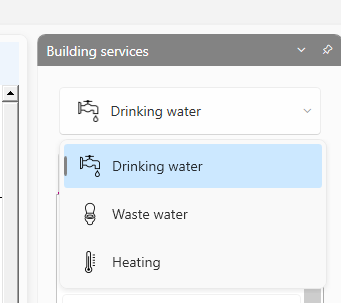
4.Use File > Import network to load the .chp file that you exported in Step 3
CALHYDRA will display the imported network in its isometric and tabular views.
Importing a network into CALHYDRA
If the network includes special objects (e.g. drinking water storage or heaters), CALHYDRA may prompt you to select an appropriate product from its database.
See also Useful settings for best results (by discipline)
Step 5 – Run the Calculation in CALHYDRA
The exact UI and steps are described at CALHYDRA Online Help
Step 6 – Export results from CALHYDRA
1.After a successful calculation, use File > Export result
This file will typically use a .calhydraResult format.
2.Save the result file in an accessible location
Export result from CALHYDRA
Step 7 – Import results and update pipe dimensions
1.In MEP Designer, open the corresponding MEP project
2.Go to File > Interoperability > CALHYDRA Connection > Import results from CALHYDRA
3.Browse for the .calhydraResult file that you exported in Step 6
4.Click Open
MEP Designer will use the CALHYDRA result to update the pipe dimensions of all matching routes.
Importing a result file back to MEP Designer
In Teamwork: Make sure to reserve the piping elements to be updated. Otherwise, no update will occur.
If certain pipes were not updated, check the following:
•Is the System/Medium mapping in the CALHYDRA System Translator dialog correct?
•Does the CALHYDRA-calculated diameter exist in the MEP Designer Route Specification? If not, the route will remain unchanged without error feedback.
Hint: Use the same Route Specification set in both MEP Designer and CALHYDRA
•Is it a Teamwork project? Make sure you have reserved the piping elements to be updated.
Use Model Compare between:
•A saved version before result import, and
•The model after import.
Model Compare will highlight exactly which pipes changed in diameter.
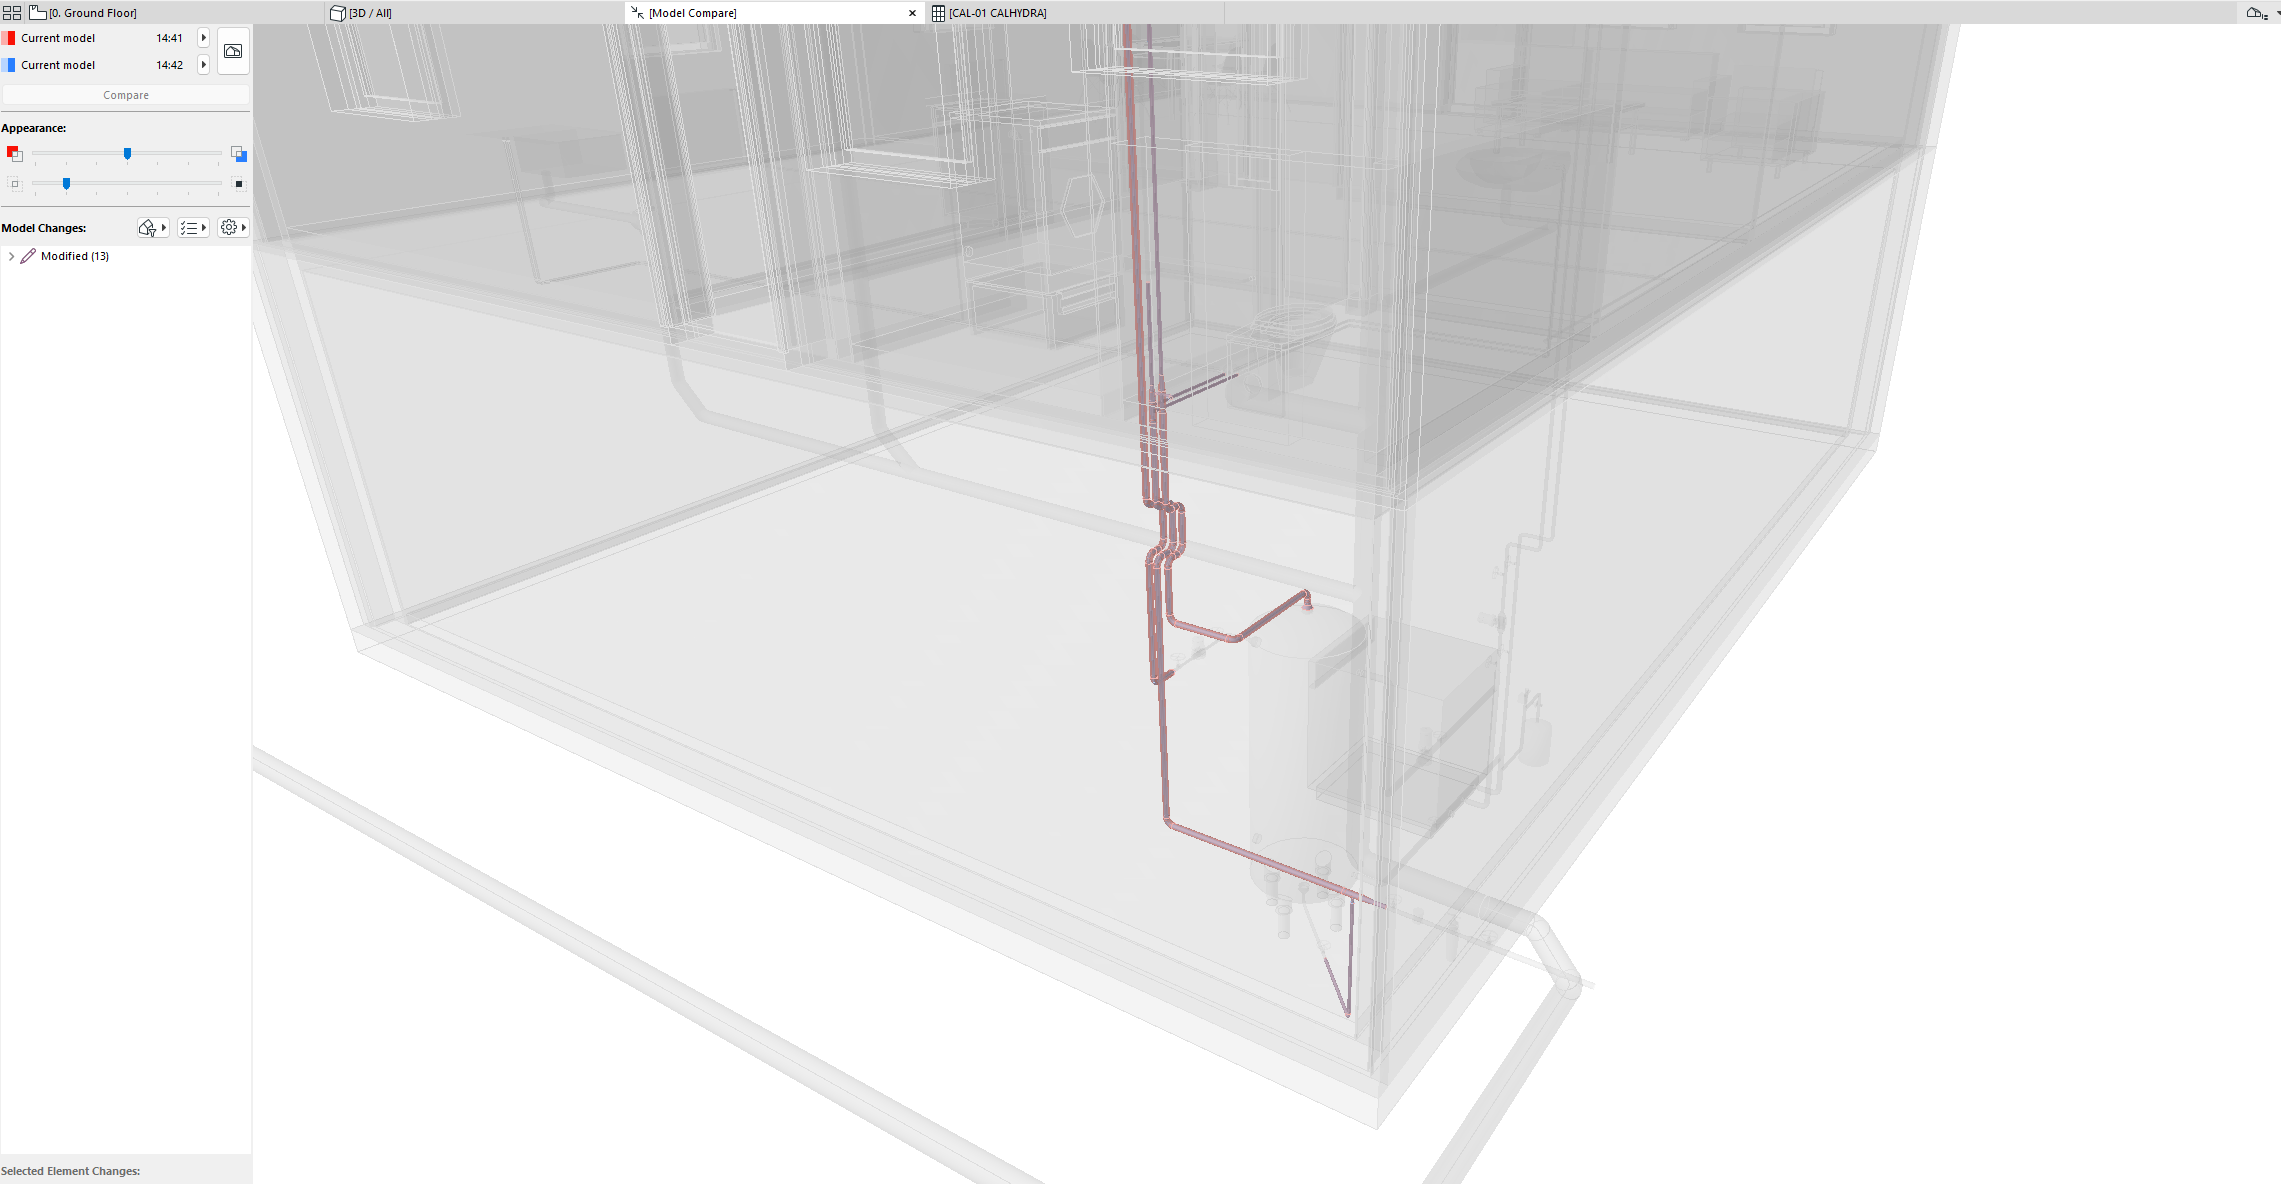
Use Model Compare to see what changed
Useful settings for best results (by discipline)
For correct results, use these tips to set up your MEP Systems.
Waste Water systems
In the MEP Designer model:
•Model and connect two separate MEP Systems: Ventilation pipes and Waste Water pipes
•In the CALHYDRA System Translator, map the Ventilation system as LT (Vent Line)
Potable water with circulation (PWH-C)
In the MEP Designer model:
•Model and connect two separate MEP Systems: The main Potable Water system and the Circulation line. The Circulation needs to be a separate System and set accordingly inside the CALHYDRA Translator
•Classify and map potable water and circulation systems separately
In CALHYDRA:
•Choose a suitable drinking water storage/heater object when prompted
Heating and Cooling systems
In CALHYDRA:
•Assign Power (W) values:
–Click on each radiator (consumer) and fill in the Power parameter.
–Missing power will give an error: “No power is entered in a consumer (name).”
•Assign Contents (l) values where required:
–To correctly calculate the expansion tank, set the Contents (l) parameter on radiators.
–If missing, CALHYDRA shows: “The Content is missing for x component(s).”
•Flow direction: If CALHYDRA informs you that an accessory is placed against the system’s flow, correct the accessory direction in the MEP Designer project using the “Flip direction” command, then re-export.

Rain Water Systems
In CALHYDRA:
•Set Target discharge (l/s) on roof drains
•Ensure roof drainage network is cleanly modeled and correctly classified
–If missing, CALHYDRA shows: “The process is not assigned to an area and does not have a defined target process.
•Mixed disciplines in a single export are not supported
–If a CALHYDRA project contains systems from several disciplines at once, CALHYDRA will not continue the calculation
–You must restrict each export/Translator setup to one discipline at a time
•Systems currently not supported
The following are explicitly excluded and cannot be reliably calculated:
–Cold Water Circulation
–Flow Splitters
–Complex hydraulic networks of heating and cooling systems
•Classification integrity required
–Do not delete or rename the CALHYDRA Classification System
–You can reorganize or delete individual entries, but the system name must remain unchanged for mapping to work
Standards supported by CALHYDRA
Drinking Water calculation
•DIN 1988-200:2012-05
•DIN 1988-300:2012-05
•DIN 1988-500:2011-02
•DIN 1988-600:2010-12
•DVGW Arbeitsblatt W 551:2004-04
•VDI/DVGW-Richtlinie 6023:04-2014
•VDI-Richtlinie 6003: Oktober 2004
•DVGW-Arbeitsblatt W 575
Drainage calculation
•DIN EN 12056
•DIN 1986-100