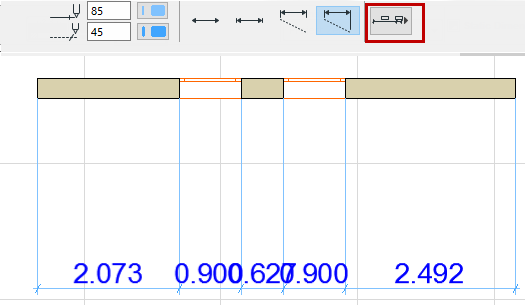
Dimension Details Panel
The Dimension Details panel contains options for the dimensioning of Windows and Doors and composite Walls.
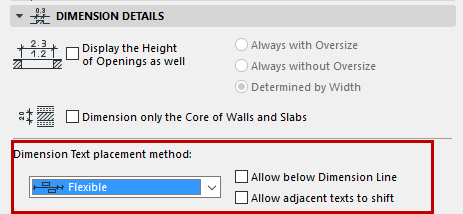
Display the Height of Openings as well
Check this box if you want the dimension marker to display the opening’s height value along with the width. If you check this box, choose one of the three radio buttons at right to define how to display the Height value:
- Always with Oversize: Include the opening’s vertical oversize, if any, in the Height value.
- Always without Oversize: Do not include any oversize when calculating the displayed Height value.
- Determined by Width: If the dimensioned Width includes an oversize, show Height with its Oversize. If the dimensioned Width does not include an oversize, do not include any oversize in the displayed Height value.
Dimension Components of Composite and Profile Elements
- With the Manual method, click the endpoints of each
skin in turn before placing the dimension.
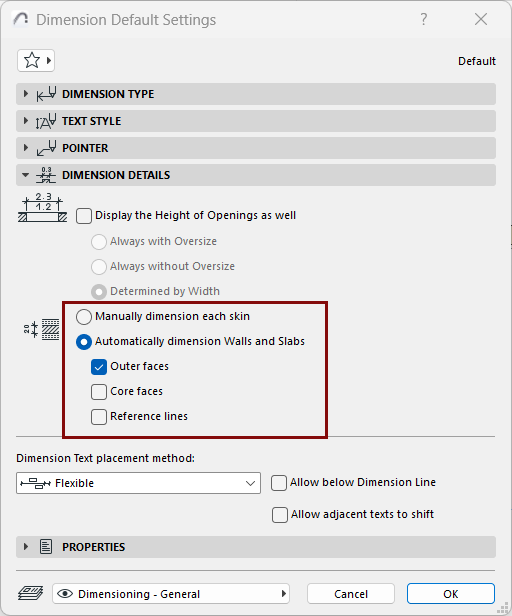
- With the Automatic method, dimension points are placed at the faces and/or reference lines depending on the options checked below (at least one category must be checked)
- Outer faces
- Core faces
- Reference lines
The Automatic method works on Walls on the Floor Plan, and on Walls and Slabs in Section.
See also Dimension Wall or Slab Thickness.
Notes:
- On the Floor Plan, the core(s) of a profile element will be dimensioned along its cut part.
- In Section, the core(s) of a profile element will be dimensioned along its bounding box.
- If you edit the composite or profile structure so that it no longer has a core, the core-only dimension will automatically change to dimension the full thickness of the Wall/Slab.
Dimension Text Placement Method
Use these options to control how Dimension Texts should be adjusted if they become too crowded.
Dimension Texts are placed horizontally and in the middle of the measured segment.
- If there is not enough room, Dimension Texts are shifted sideways so as to be readable. Adjacent Dimension texts also shift sideways.
- If there’s no space to move sideways, they are adjusted
vertically upwards, by rows.
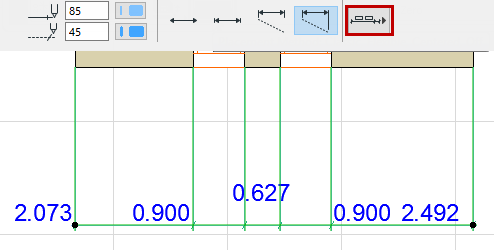
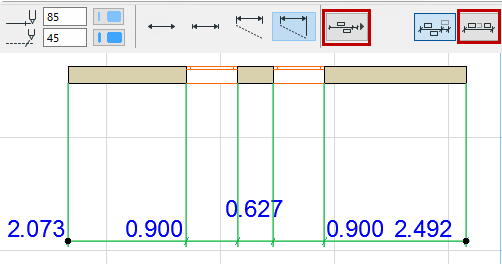
- Flexible (default): This method is more sophisticated than the Classic: It makes automatic adjustments even if a dimension text has been manually moved, or consists of multiple lines.
- Dimension Texts are placed horizontally and in the middle of the measured segment.
- If the space is too narrow, Dimension Texts will shift sideways. (Adjacent texts stay put.)
- If there is not enough space for a sideways shift, texts may
be adjusted vertically.
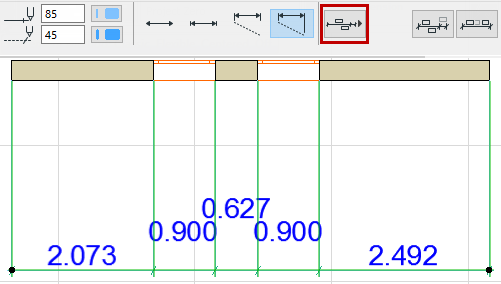
Two additional checkmarks options are available with this method:
- Allow below dimension line: As part of the
adjustment, texts may be displayed below the dimension line as well as
above.
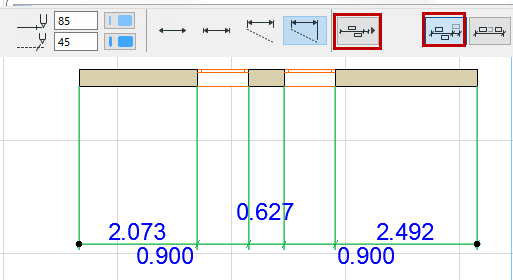
- Allow adjacent texts to shift: When a dimension text
is shifted sideways, its adjacent dimension texts may also shift sideways (to
the middle of the space remaining) as needed.
- Centered:
- All dimension texts are placed right in the middle of the measured segment. Nothing is adjusted sideways.
- If there is not enough room, they are adjusted
vertically.
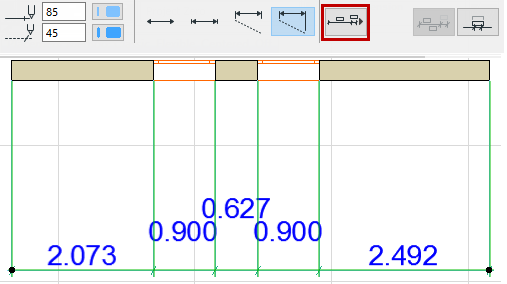

- Allow below dimension line: As part of the adjustment, texts may be displayed below the dimension line as well as above.
- Allow overlap with Markers: Texts may overlap with the dimension markers. (If this is off, then texts will be adjusted vertically to avoid overlap with Markers.)
- Off: No automatic adjustment takes place to enhance
readability.
All the texts are simply placed in a row, directly above the dimension line without regard to readability.