Publish BIMx Hyper-Model Using a Wizard
Use this method (File > Publish BIMx Hyper-model) to create a new Hyper-model Publisher Set from your Archicad model a few easy steps.
Compared to the Publisher method, the wizard is easier, but customization options are more limited:
- You can save only a single 3D view to the Hyper-model.
- You cannot pick and choose among individual layouts: You can include all Layouts, no Layouts, or a single Layout Subset.
- You have fewer options to limit model size or to fine-tune the exported element information.
To take full advantage of Archicad model data in BIMx, try saving the Publisher set using the Publisher-Organizer instead. See Publish BIMx Hyper-Model: Publisher method (detailed method) .
Steps to Publish BIMx Hyper-model Wizard
- In the 3D window, set up the desired view. This will be the basis of your Hyper-model.
If you want to include a gallery of camera positions in the BIMx model, place cameras on the Floor Plan and select one.
Note: You may need to optimize the Archicad model before saving it in BIMx format to ensure optimal performance. See BIMx: Notes on Model Data, 3D Model Settings, and Textures. - Go to File > Publish BIMx Hyper-model.
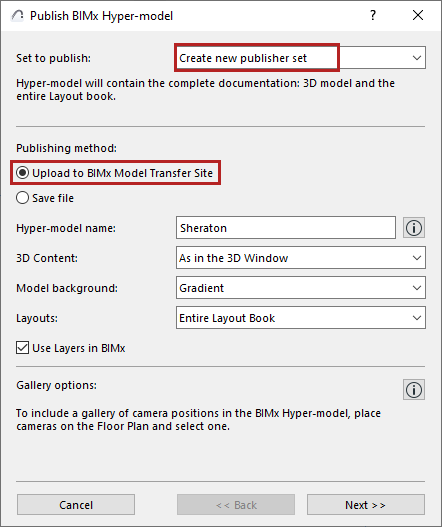
- In the appearing dialog box, choose Create new publishing set.
- Choose a publishing method: Upload to BIMx Model Transfer site or Save file.
- Upload to BIMx Model Transfer site will upload the file to bimx.graphisoft.com. (You must register before using this site.)
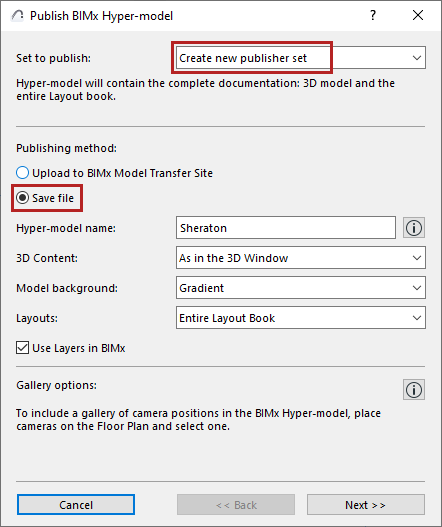
- Upload to BIMx Model Transfer site will upload the file to bimx.graphisoft.com. (You must register before using this site.)
- Hyper-model name: Optionally, use this field to rename the Hyper-model.
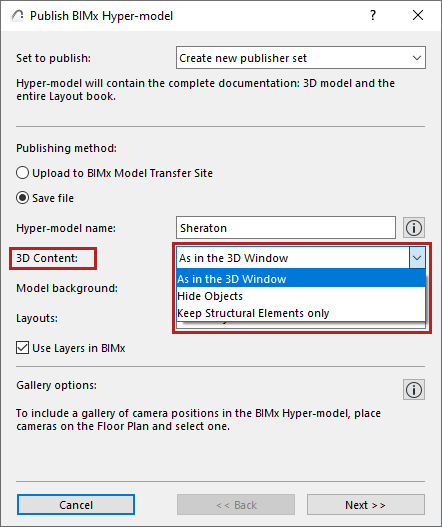
- 3D Content: Choose an option to filter the model’s 3D content:
- Model background: Choose a background to use while exploring the 3D model in BIMx.
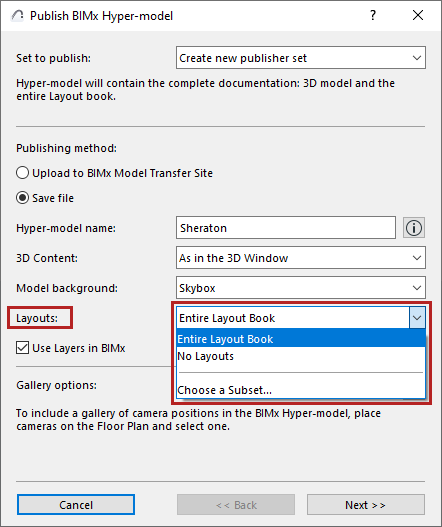
- Layouts: Choose the Layout content to include in the BIMx Hyper-model: Entire Layout Book; No Layouts; or a selected subset.
- Set Gallery options:
Gallery options for camera path
If the Publisher Set contains a camera path: Set Gallery options.
- Add cameras as separate gallery items: A separate gallery item (an image viewpoint) will be created out of each camera in the current Archicad camera path. (In BIMx, you can then combine these gallery items into a presentation.)
- Create a single movie for the gallery: A single movie-type gallery item will be created out of the current Archicad camera path
- Click Next.
- Set the options depending on the publishing method you choose (either Upload or Save).
If you are uploading the BIMx Hyper-model:
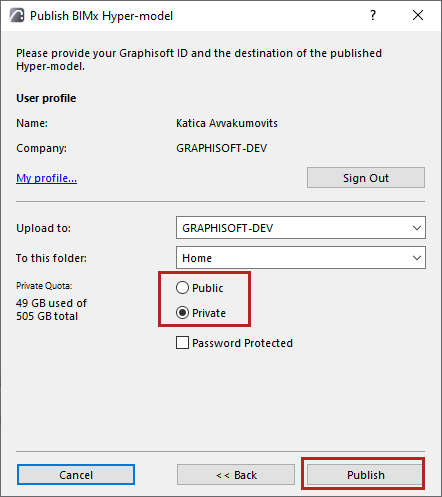
- Choose whether to upload to the Public Domain, or to a Private Folder. If you choose Private Folder, you can optionally password-protect the file.
If you are saving the BIMx Hyper-model:
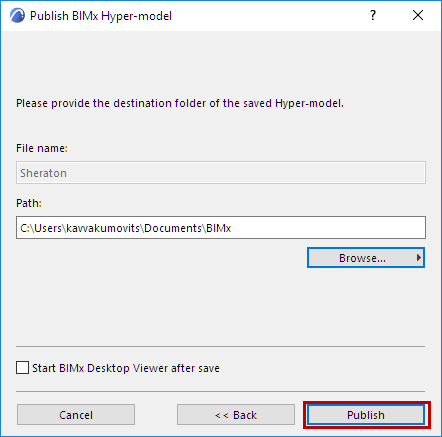
- Enter a destination file path.
- Optionally, check Start BIMx after save to open the BIMx model in BIMx Desktop.Note: The latest version of the BIMx Desktop application is available only in Microsoft Store and Apple App Store. Please use the store version to stay up-to-date.
Read more here.
- Click Publish.
For details, see Step 6: The Publish Process.