Set up Grid Pattern in Scheme Settings
Not available in Archicad Start Edition 2023
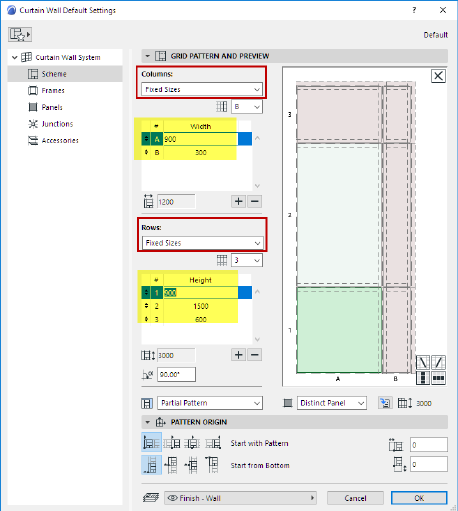
Use the Scheme page of Curtain Wall Settings to set up a Grid pattern in advance, before you place the Curtain Wall.
Note: Another approach is to place an empty Curtain Wall boundary and define the pattern graphically. See Create Grid Pattern Graphically.
There are three main Pattern Distribution options for both rows and columns:
•Fixed Size
•Best Division
•Number of Divisions
Each logic is described below.
Topics in this Section:
Define Infill for the “Leftover” (Fixed Size Row and/or Column)
“Best Division” Pattern Distribution
Pattern Origin (for Fixed Size patterns)
For the Scheme’s Rows and/or Columns: choose the Fixed Size option. (This Pattern Distribution logic is the same as in pre-22 versions of Archicad. Set each Column width and/or each Row height to an exact size.)

The resulting Curtain Wall in 3D, with fixed-size rows and columns:
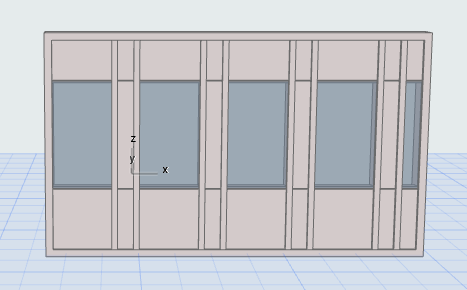
The fixed pattern is repeated to the extent of the Boundary and then cut off.
Define Infill for the “Leftover” (Fixed Size Row and/or Column)
If either Columns or Rows is set to Fixed Sizes, use the “Infill with” control to define what to do with the “leftover” inside the Boundary, if the end of the pattern does not coincide with Boundary.
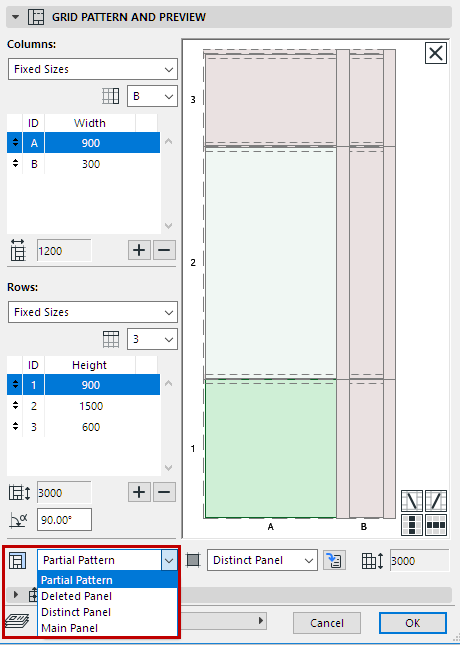
•Partial Pattern cuts off the pattern where it falls, at the end of the Curtain Wall Boundary.
•Or choose a Panel class: the leftover segments (in the horizontal and/or vertical directions) will be filled in with this panel type.
•The Pattern Origin setting affects the arrangement of the Infill (see examples below).
This Curtain Wall uses a Grid pattern with fixed-size columns and rows:
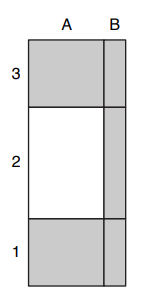
Curtain Wall Grid Pattern
See what happens with various Infill and Pattern Origin settings.
The blue line represents the Curtain Wall Boundary.
The red dashed line represents the repeated pattern.
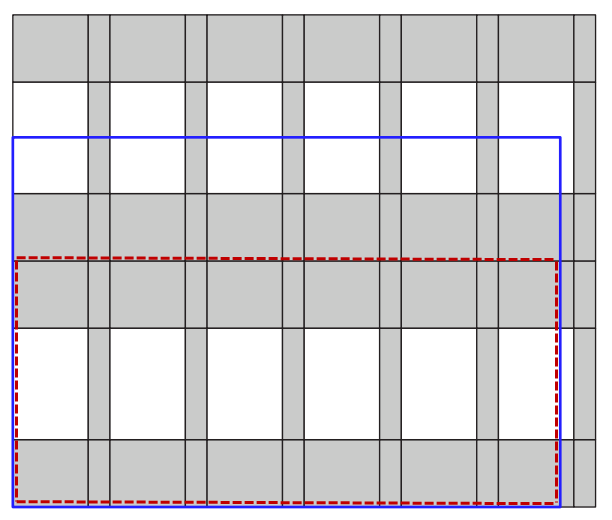
Infill with: Partial Pattern
Pattern Origin: Left Bottom

Infill with: Distinct Panel
Pattern Origin: Bottom Left

Infill with: Distinct Panel
Horizontal Pattern Origin: Align to Center
Vertical Pattern Origin: Bottom

Infill with: Distinct Panel
Pattern Origin: Align to Center (both directions)
“Best Division” Pattern Distribution
With this logic, the Curtain Wall pattern will exactly coincide with the end of the Curtain Wall segment, without any “leftover”.
For the Scheme’s Rows and/or Columns: choose the Best Division option.
•Set each Column width and/or each Row height to the desired size, then use the lock icons for each Row/Column to set whether its size should be fixed, or flexible.
•At least one Row or Column must be set to flexible. This means it might be stretched or shrunk relative to the size you entered.
•If you set a value to “flexible”, the resulting Row or Column will be sized as close as possible to this value. Several flexible values (e.g. two flexible column widths of 300 and 600) will maintain their relative sizes - that is, one flexible column will always be twice the width of the other.
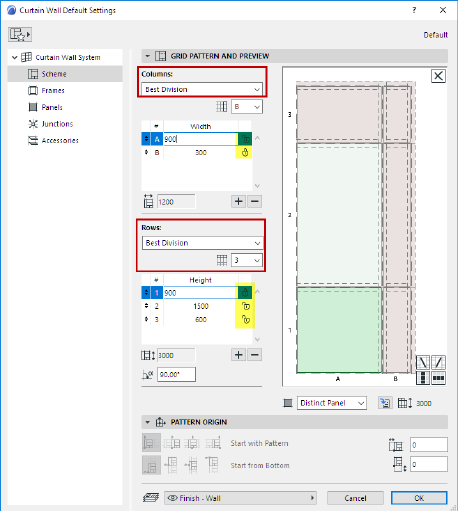
As you input a Best-Division Curtain Wall, the feedback shows you that the column and row patterns are automatically distributed evenly.

Use the “End With” control here, to use a different panel in the last column:

Best Division (End with Column B)

Best Division (End with Column A)
To get feedback on how the flexible row or column (e.g. Column A set to 900 mm, flexible) was actually sized in the resulting Curtain Wall:
go to Curtain Wall Selection Settings, and switch the pattern to “Fixed Sizes” to see the value (here, Column A is actually 945 mm).

Use this option to specify that the pattern be repeated a fixed number of times within the Curtain Wall segment.
You must set at least one row/column to have a flexible size, to allow it to stretch.

Here, all the rows and columns are flexible. No matter how high and how wide the Curtain Wall is drawn, the pattern (three rows by three columns) will be repeated exactly once.

For both Columns and Rows, choose one to end the pattern with.
For example: Your pattern contains two column types - A and B.
Set End Column to B.
When you place the Curtain Wall, the AB pattern will be repeated using their fixed sizes, but the segment’s last column will be the B column. (followed by the Infill, if applicable).
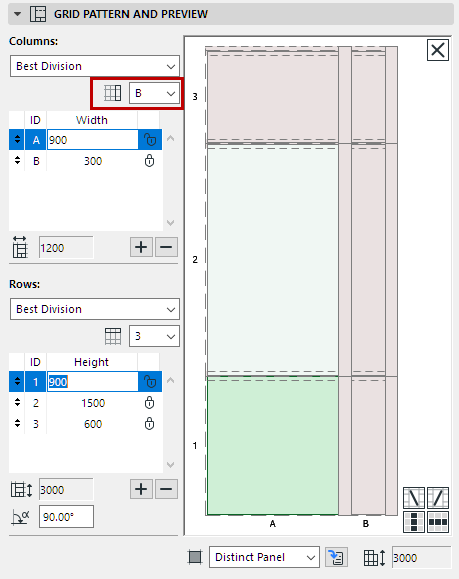

End Pattern with Column B
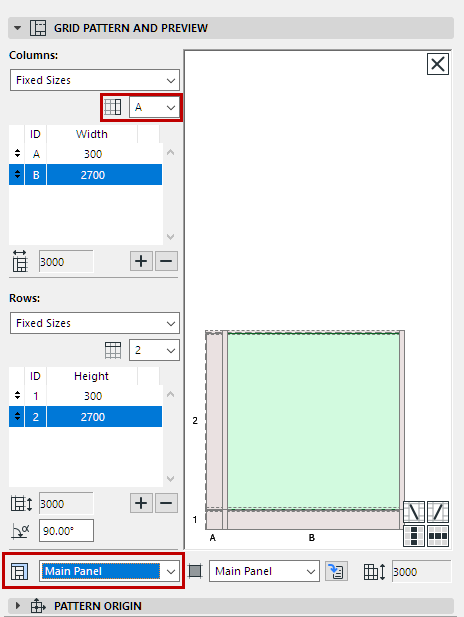

End Pattern with Column A - Then the Infill
Pattern Origin (for Fixed Size patterns)

The Pattern Origin definition locks the origin of the grid pattern (in both the horizontal and vertical directions) to a specific point on the Curtain Wall segment, plus or minus an optional offset.
Consult the tool tips and icons to pick the one you need.
Note: Pattern Origin controls not available if the row/column logic is set to “Best Division” or “Number of Divisions”.
Horizontal Pattern Origin
•Origin at the start of the segment
•Origin at the middle of the segment. The horizontal pattern will begin at the center of the segment, and will be distributed outward in both directions. (The center of the Curtain Wall will always have a vertical gridline running through it.)
•Pattern midpoint is at the segment midpoint
•Origin at the end of the segment
Vertical Pattern Origin
•Origin at the bottom of the segment
•Origin at the middle of the segment
•Pattern midpoint at the segment midpoint
•Origin at the top of the segment
See Examples of Infill Settings for illustrations.