Walls, Slabs, Roofs and Shells can be defined as composite structures.
Assign a Composite Structure to a Wall, Slab, Roof or Shell
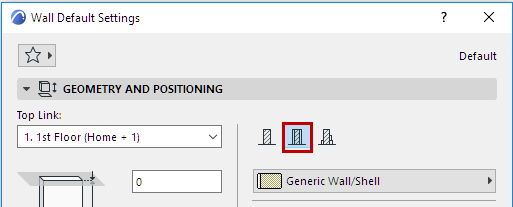
1.Open the Element Settings dialog box for the element type.
2.In the Geometry and Positioning Panel, define the element’s structure as a composite by clicking on the “Composite” icon.
3.Use the pop-up below to choose a composite structure. Notice the icon that indicates whether the selected composite contains a Core or not. (In this image, the icon indicates “No Core”.)
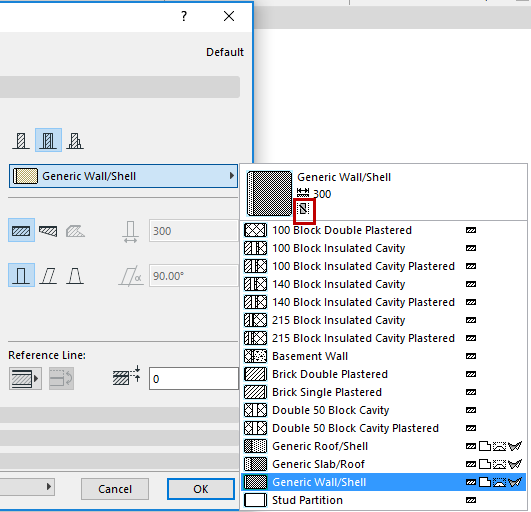
Note: Composite Structures are defined for specific element types: Wall, Slab, Roof, and/or Shell, by the “Use With” control, in the Options > Element Attributes > Composites. The composite structure pop-up in element Settings shows only those Composite Structures whose “Use With” control includes the element type you are defining. Composites are defined at Options > Element Attributes > Composites
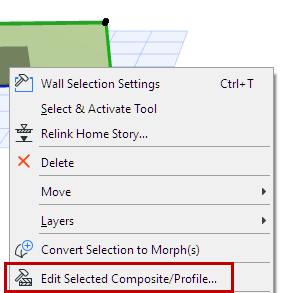
•You can also edit a selected composite by accessing its settings from its context menu:
4.The chosen composite structure is applied to the currently selected or created element.
Note: The view’s model’s Partial Structure Display settings will affect the display of composite elements.
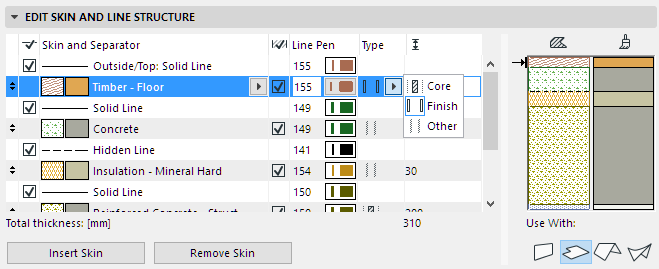
Components of Composite Structures
The layers of the composite element are called “skins”; a composite structure can have up to 48 skins.
The skins are separated by “separator lines”; and the outline of the composite is the “contour line.”
Composite elements can include one or more structural skin called a Core, although defining a Core skin is not required.
The skins you define as “Core” or “Finish” will also affect views in Partial Structure Display.
Assign these definitions in the Options > Element Attributes > Composites.
Composite Structures Dialog Box