For a 3D display of only the items selected explicitly or by Marquee:
•Right-click to access the Show Selection/Marquee in 3D command; or
•Use View > Elements in 3D View > Show Selection/Marquee in 3D
(Or use the 3D Visualization toolbar control for this command.)
If your plan includes both explicitly selected elements and a marquee selection, this command will disregard the marquee and show only the explicitly selected elements.
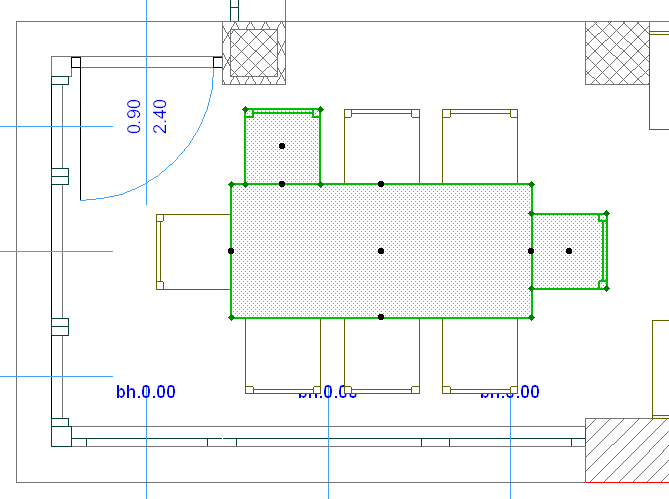
Marquee Area in 3D
If the selection is a Marquee area, the caption of the 3D Window will include the “Marquee” mention.
For more information on defining a marquee area, see Marquee Area.
By default, elements inside the Marquee are displayed in 3D.
To change this, use the Marquee Effect controls in View > Elements in 3D View > Filter and Cut Elements in 3D.
See Filter and Cut Elements in 3D Dialog Box.
Elements in a Marqueed 3D Window
If you create an element in the 3D Window which is delimited by a marquee, the new element will only appear in the 3D Window if you draw it inside the marquee area.
If you place a new element outside the boundaries of a Marquee-based 3D view, or drag an existing element outside the Marquee boundaries, that element will disappear immediately from the 3D Window.
When you go to the Floor Plan, however, you will see the elements. Change your marquee area (or remove it) and return to the 3D Window to check it.
If you select one or more elements in a trimmed 3D view, resulting from either a Marquee area or a 3D Cutaway, some elements will be only partially visible, but selection dots of the whole element will be displayed and all the nodes and edges can be found with the cursor.
