
The Main Header field is generated automatically at the top of the Schedule: its content is the name given to the Schedule in Scheme Settings.
Column Headers are also generated automatically, at the top (or the left) of the columns (or rows) of data. Their content comes from the respective field names.
To change a header text, just click into the field and type.

To format header text, make sure that “Header” is selected from the Apply To pop-up, then choose text formatting options.
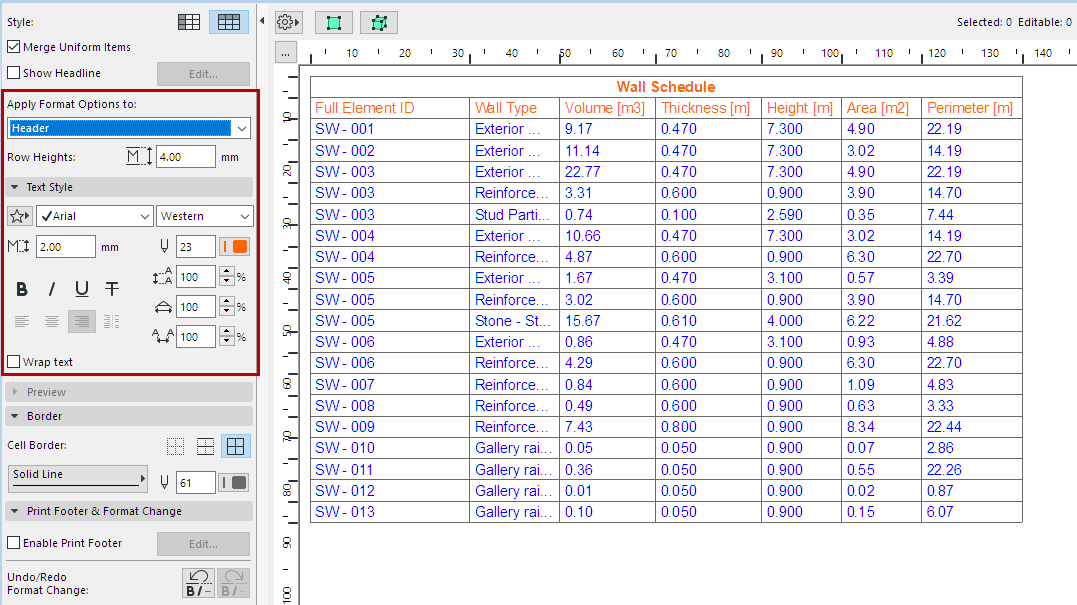
To select multiple cells, use Shift-click.
From the Settings pop-up, click Show/Hide Main Header or Show/Hide Column Header.

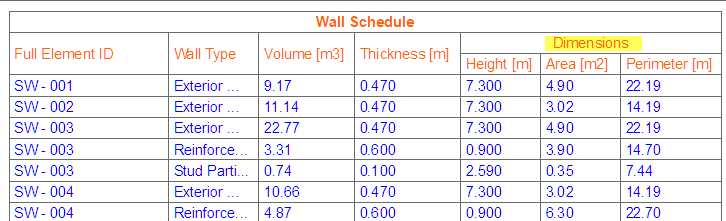
Use this command to create a new header cell above any set of selected column headers. For example, select three column headers that refer to Wall dimensions, and create a new header cell above these three columns, entitled “Dimensions”.
1.Select two or more column headers (use Shift-click to select multiple cells).
2.Choose Insert Merged Header Cell Above from Header Options.
Note: Not available unless you have selected at least two adjoining header cells!
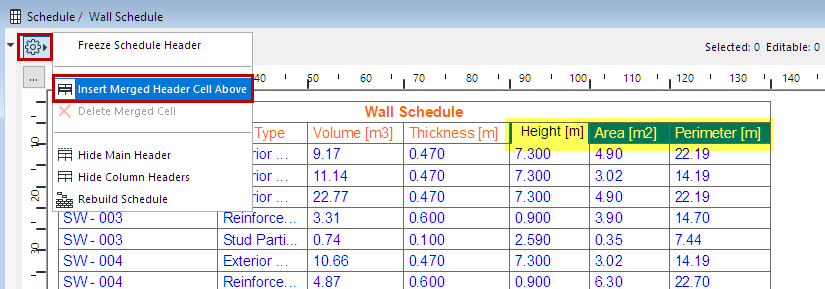
3.A new cell (named “merged” by default) appears above the selected headers.
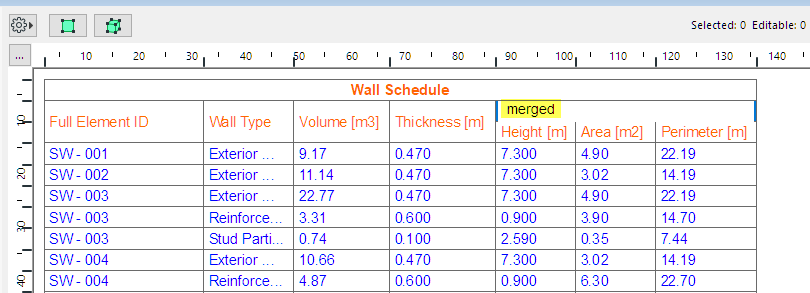
4.Type in any header text and format as usual. Any number of header cells can be created in a hierarchical order.
•Delete Merged Cell: This is only active if you have manually created a new merged header cell, and have selected that cell for deletion. Not available in any other cell.
This command ensures that the main header and/or row/column headers rows remain visible on top when you scroll down the schedule.