Archicad 27 Help
Click here to see this page in full context

Fix Modeling Errors: Check and Solidify Morphs
What is a Non-Solid Morph?
A Morph is non-solid if it includes any edge segment that is not adjoined by exactly two faces. A Morph with a free-standing edge, or faces that do not connect precisely, will be non-solid.
Often, you cannot see the non-solid error if you are looking at a complex model.
This may cause problems:
•if you calculate Morph volume in lists, a non-solid Morph will have a volume of zero;
•only solid Morphs can have a cut fill; a non-solid Morph in Section is shown without a fill.
How To Fix a Non-Solid Morph: Use Solidify Command
To find and fix such modeling problems, do the following:
•Check the Info Box or Settings of any selected Morphs to see if they are solid.


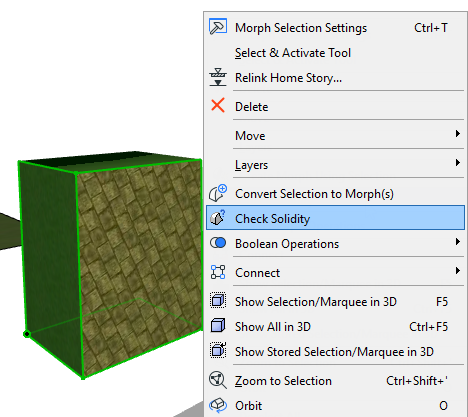
•Select any or all Morphs, then use the Check Solidity command from the context menu (or the same command from Design > Modify Morph).

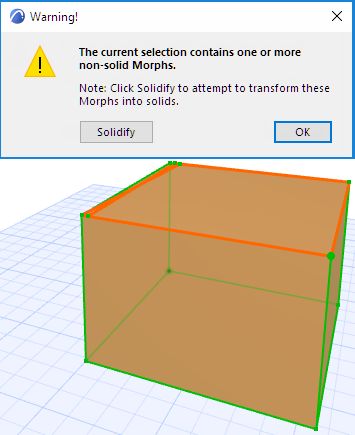
•If any of the selected Morphs is not solid, you get a warning, and the problematic Morphs and edges are highlighted in the model, as shown in the image below.
•To try to fix the error, click Solidify.

If the Solidify Command Cannot Fix The Error
If the Solidify command could not fix the non-solid Morph automatically, you get a warning.

The problematic Morphs and edges are highlighted in the model.
Try to fix the problem with graphical editing, adding Morph edges to fill in the gaps:
•Use the Add to Morph command (pencil icon) from the pet palette to add one or more new Edges where the gap is. Each time you add a new Edge, Archicad will automatically try to create adjoining solid faces within the Morph.
•In some cases, it is useful to draw another Edge on top of an existing Edge where the gap is, to generate automatic faces.
•When you are done adding edges, select the Morph and use Check Solidify again to see if the edits worked.