Archicad 27 Help
Click here to see this page in full context

Create Change from Change Manager Palette - With Elements Selected
Create Change from Change Manager Palette - With No Elements Selected
Create New Change Using Change Tool
Place New Change Marker Linked to Existing Change
Create New Change on a Layout Revision
Create Change from Change Manager Palette - With Elements Selected
1.In any model window, select element(s) involved in the Change that you wish to document.
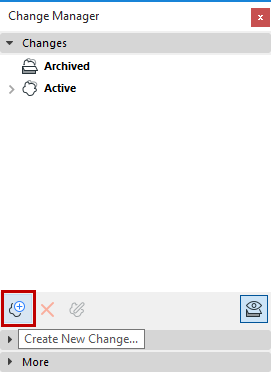
2.In Change Manager, click Create New Change.

3.The New Change dialog box appears. Enter a Change ID (required), name, and any custom data as needed.
See Edit Change Scheme to Define Custom Data.

4.Click OK to create the Change.
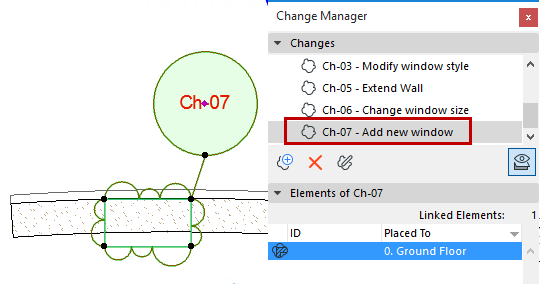
The new Change is listed in the Change Manager. The selected elements are linked with the Change and listed in the panel below.

Create Change from Change Manager Palette - With No Elements Selected
1.On the Change Manager, click Create New Change.
2.The New Change dialog box appears. Enter an ID, name, and other information as needed.

3.Click OK to create the Change.
The new Change is listed in the Change Manager. Note that it is not linked to any elements in the project; no Linked Elements are listed at the bottom of the Change Manager. Consequently, this Change will not show up automatically on any Layout Revision.

If you want Archicad to detect Changes automatically on every affected Layout, then you must link these Changes to one or more elements.
Create New Change Using Change Tool
Use the Change tool to place a Change Marker (cloud and/or marker) in any of the following windows: Floor Plan; Section; Elevation; Interior Elevation; 3D Document; Worksheet; Detail; or Layout window.
•The Change element (cloud and/or marker) can either be linked to a new or existing Change, or is an unlinked graphical element. If it is linked, then the Change Marker is listed in Change Manager, and is added automatically to every affected Layout Revision.
•Visibility of Change Markers is defined globally for each Transmittal Set, in the Transmittal Set Details dialog box.
See Show or Hide Change Markers in This Transmittal Set
1.Activate the Change Tool
–from Document > Documenting Tools, or
–from the Archicad toolbox

2.In Change Tool Settings, enter the Change ID and Change name.

Marker type: By default, the Change Tool is set to create a new Change (The other options - also available in the Info Box - are to place a linked or unlinked marker).

3.From Change Tool Settings or the Info Box, choose the component(s) you want to place: a Cloud plus a Marker Head, or just one or the other.

4.From the Info Box, choose a geometry method for the Cloud part of the Marker (if you are using a Cloud):

–Polygonal
–Rectangular
–Rotated Rectangular
–Circular
5.Place the Change Marker in the project.
6.A new Change appears immediately in the Change Manager. The Change Marker is linked to the Change you just placed.

Note: The cloud component includes an on-screen only polygon. If needed, you can hide this polygon with View > On-Screen View Options > Marker Range.
The new Change is listed in the Change Manager.
Place New Change Marker Linked to Existing Change
1.Activate the Change Tool and adjust its settings as described above.
2.From the Info Box, choose Place linked marker.

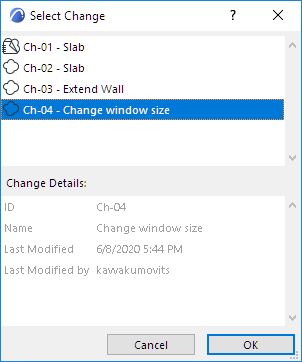
3.In the Info Box pop-up, choose the Change that you wish to link the new Change marker to; or click Select Change.
4.In the appearing Select Change dialog box, choose the Change and click OK.

5.Place the Change Marker into the project. It is linked to the Change you selected.
Create New Change on a Layout Revision
You may wish to note a Change on a Layout Revision manually. For example, if a new Drawing was added to the Layout; or the Drawing order on the Layout has been changed; or if the Master Layout has changed.
1.In the Revision History panel of Layout Settings, click New Change.

2.In the New Change dialog box, enter data for the change as needed. (See New Change Details.)
3.Click OK to create the Change and add it to the Layout Revision.
The new Change is listed in the Change Manager. Note that it is not linked to any elements in the project; no Linked Elements are listed at the bottom of the Change Palette.
Another way to do the same thing:
1.Open the Layout.
2.Use the Change Tool to create a new Change, with a marker, directly on the Layout. Again, it is listed in the Change Manager and added to the open Layout Revision.