For a description of generic settings common to all tools in the Toolbox, see Working in Tool Settings Dialog Boxes.
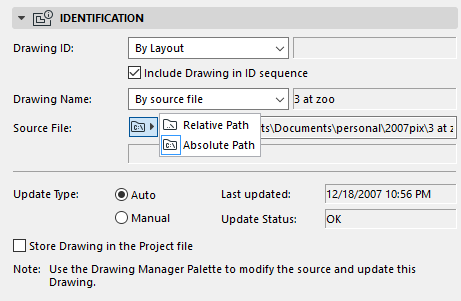
Assign an ID to the placed drawing.
Note: For a Drawing placed in a model view, this field is empty.
•By Layout: Drawing ID depends on the Layout Settings of the Layout on which the Drawing is placed. In Layout Settings, consult the “IDs of Drawings on this Layout” tab page.
•By View ID: The Drawing ID will be equivalent to the ID of its source View, if any.
•Custom: Enter a custom Drawing ID in the text field to the right.
Include Drawing in ID sequence: Check this box to include your drawing in the ID sequence, even if it is a custom ID.
If the Drawing source is an Archicad view:
•By View: Name only
•By View: ID + Name
•Custom
If the Drawing source is an external file:
•Custom
•By source file. Read-only field. Click the folder icon to display the file path as absolute or relative.

•Archicad view: Displays the view’s path if the Drawing source is an Archicad view.
•Page No.: Appears if the Drawing source is a multi-page document (e.g. a PDF file).
•Auto: Drawing will be updated automatically when the layout is activated. If a drawing comes from a different source than the currently opened project file, then Archicad will check whether it requires updating or not.
•Manual: The Drawing is frozen in the state its source view or file was in when placed on the layout. This can be useful if you wish to keep the drawings untouched until they are approved or you are ready to move on to the next stage in your work.
•Store Drawing in the Project File: Checked automatically for Manual-update Drawings.
If it is not checked, then an external Drawing’s source files must be available if you open the project in a different location.
Drawing Size and Appearance Panel
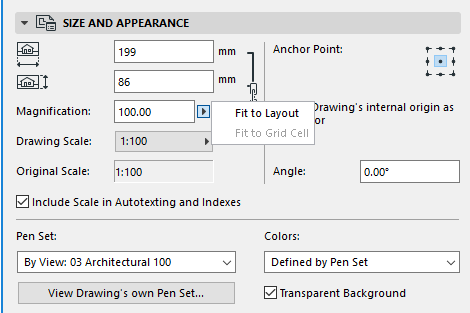
The first four fields - Width, Height, Magnification, and Drawing Scale - are interrelated (as indicated by the lock icon). A change in any of the fields will result in corresponding changes in the other three fields, so that the drawing’s proportions remain fixed. Use these fields to set the size of the placed Drawing in either measurement units or as a percent of its original size (the Magnification).
Fit to Layout
Use this option from the Magnification pop-up.
Fit to Grid Cell
Available if the Layout contains a Grid.
To rescale the Drawing on the Layout (instead of using the original scale of the source view), choose a predefined scale factor from the Drawing Scale pop-up, or enter any other custom scale. (The Width/Height/Magnification values will change to reflect the new Drawing scale.)
Note: If your source drawing size, as defined in Master Layout Settings, is larger than the paper size you choose here, Archicad will automatically resize the drawing’s output size to make it fit on the page.
Note: For Drawings placed on Model Views, and for placed Images and PDF documents, no scale is shown. Instead, the drawing’s Resolution (in dpi) is indicated.
Customizing the Drawing scale has no effect on the scale of objects within the drawing; it is equivalent to a graphical resizing of the Drawing, like the effect of magnifying a document with a copy machine.
Your customized Drawing Scale is distinct from its Original Scale. Separate Autotext entries and Title parameters are available for Drawing Scale and Original Scale: if you place an Autotext for “Drawing Scale” on a Layout or Master Layout, the Drawing Scales of every Drawing on that Layout are displayed.
See Autotext.
Original Scale: Scale of the drawing’s source view.
Include Scale in Autotexting and Indexes: Drawing scale can be included on your output via Autotext (e.g. in an Index or on a Layout). However, for some Drawings, the resulting scale value may be misleading - for example, if the Drawing is placed as part of a PDF file. Since Archicad cannot interpret the content of the PDF, there is no point in displaying a Drawing scale in this case. Uncheck this box for such Drawings.
Anchor Point: The point by which the drawing is placed onto the layout. Serves as the drawing’s fixed point in case its elements are modified in its source view.
Define the Drawing’s anchor point:
•Use Drawing’s internal origin as anchor: Check this box to use the Drawing’s origin as an anchor point after placing it.
•Anchor Point: Click one of the nine points to use as an anchor point.

Angle: Enter a rotation angle in degrees for the Drawing position, if desired.
For Drawings placed on the Floor Plan, Detail, Worksheet, or in a 3D Document, the Angle field includes an additional pop-up:

•Relative to Orientation (the angle will be measured relative to the Oriented View)
•Absolute to Coordinate System (the angle will be measured from the (0,0) point of the project coordinates).
For more information, see Set Orientation.
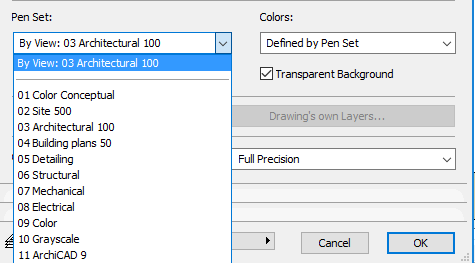
•By View: Use the pen set assigned to the Drawing’s source view.
•By Source File: This is the default if the drawing source is an external vectorial file.
Use the Pen Set drop-down to choose a different pen set.
Click to view and edit the Drawing’s Pen Set.
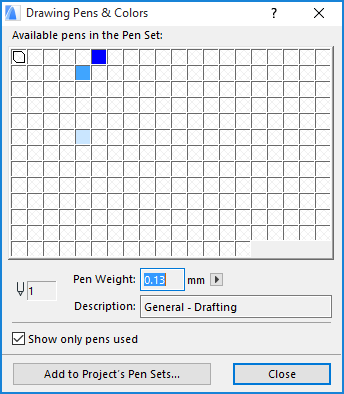
Then Add to Project’s Pen Sets. In the appearing dialog:
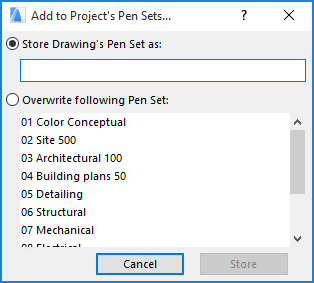
•Store Drawing’s Pen Set: Enter a name and store it among the project’s pen sets.
•Overwrite following Pen Set: Choose a Pen Set to overwrite and replace it.
Colors
By default, the Drawing will display the colors as defined in the pen set you have chosen.
Optionally: use Grayscale or Black & White instead, for this drawing only.
Note: When printing a layout, you have the option to choose black and white output regardless of the color setting in Drawing Settings: activate Black and White checkbox in Print Layout Settings.
See Print Layout.
Transparent Background: Check this box to ensure that the Drawing is displayed with a transparent background.
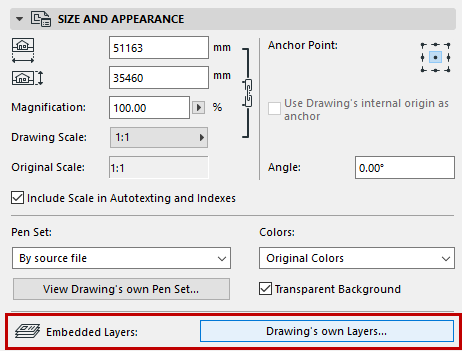
This control is active if the source of the selected Drawing is a DWG, DXF, DWF or PDF file.
Click Drawing’s own Layers to bring up a list of the Drawing’s own (embedded) layers. For any layer you wish to hide, click the “eye” icon to close it.
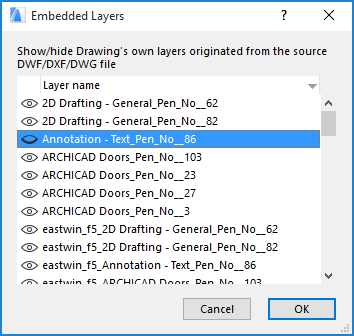
You can sort this list by either Layer name or by show/hide status.
Once you click OK to close Drawing Settings, any change you made in the Embedded Layers’ show/hide status will be carried out in Archicad; no drawing update is necessary.
If you do modify the Drawing source and then update the Drawing in Archicad:
•any new layers created in the source file will be displayed in the Archicad Drawing
•any layers deleted or hidden from the source file will be deleted from the Archicad Drawing
Should you explode this Drawing, then only the elements on currently visible layers of the Drawing will be placed into the Archicad project.
Hide Drawing’s Embedded Layer from Layout
A quick way to hide the embedded layer of a Drawing component is from its context menu on the Layout itself.
First, ascertain the name of the embedded layer: zoom in to the Drawing, use the cursor to identify a point or line in the Drawing, and view the Info Tag to see the name of the embedded layer for that part of the Drawing:

Now, with the cursor at the selected drawing item (e.g. the contour of the wall element), bring up the context menu: in the Layers sub-menu, the Hide Embedded Layer command appears. Click this command to hide the embedded layer.

Note: If there are multiple elements at the cursor location, the embedded layer of the topmost item will be hidden.
Choose a format for the on-screen display of this Drawing on the Layout.
With large Layout Books, your choice here can affect navigation speed significantly:
•Full Precision (drawing shown with full details, always rebuilt)
•Quick Preview (faster navigation; Drawing rebuilt only upon explicit Rebuild of the Layout, or when a Drawing update occurs)
•No Preview (fastest navigation)
If you choose Quick Preview, the text “Quick Preview” will be displayed. The drawing content is an accurate vectorial preview, but you may lose certain details: certain dashed lines and fills will be shown as solid.
If you choose No Preview, the Drawing frame will be shown with the text “No Preview” in place of the Drawing content. (You may prefer this option to reduce redraw time if you are working on a Layout with multiple drawings, and you do not need to see this Drawing’s content as you work.).
This preview display option is an on-screen effect only and does not affect output.
Select any edge of the drawing and use the usual pet palette editing commands to modify the frame into any shape. In this case, the Manually resized frame button is activated.
To reset the frame to fit the drawing, click Fit Frame to Drawing.
By default, Crop Drawing to Frame is also checked: as you resize the Frame, the Drawing content is cropped accordingly. (Cropping takes place after you deselect the edited Drawing.) Cropping the Drawing content reduces file size and can speed up Drawing update.
For further information on Frame and cropping, see Drawing Frame.
Split Drawing among Multiple Layouts: This checkbox is active and applicable only if the selected Drawing is created from a Schedule or Index view. If this box is checked, such Drawings will be split into multiple Layouts, if the contents cannot be fit onto a single Layout page.
See Split Schedule into Multiple Layouts.
Add Printable Border: Check this box to add a printable border for your drawing. Use the controls below to choose a line type and pen color for this border.
Border Offset: Enter an offset value for the printable border.
See also Drawing Titles.
Note: Drawing Titles can be applied only to Drawings which are placed on Layouts. Drawings in Model Views do not have Drawing Titles.
Choose a predefined drawing title type from the pop-up list.
Note: You can also create a custom Title Type.
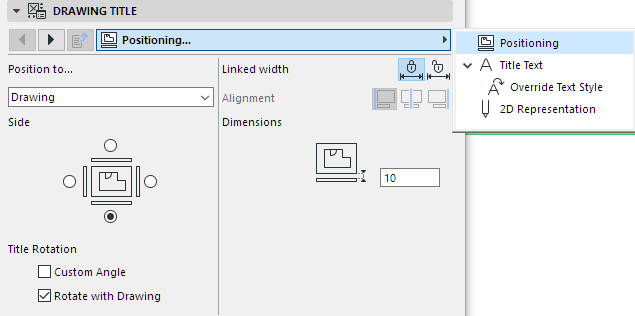
Define Title size and pencolor.
Uniform Title Pen: Check this box to use this pencolor for all parts of the Drawing Title, regardless of any custom colors set elsewhere for this Title.
Flip Title: Check this box to flip (mirror) the title graphically.
Title’s Preview Area: The window at right shows a symbolic preview of the Title in one of two formats. Click one of the two buttons to display a preview:
•Show Preview of the Title’s position to the Drawing: Click the upper button (Layout icon) to display a preview of the Title’s position relative to the Drawing.
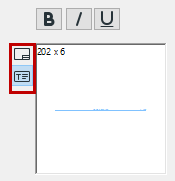
•Show Preview of the Title: Click the lower icon (with a T) to display a preview of the Title only.
Back Reference: Click this button to access the Back Reference dialog box. If the current drawing is based on a source marker, then this dialog box will list any Layout whose Drawing displays the source marker of the current drawing.
See Back Reference to Layout Containing Source Marker.
Title Text Style Panel
See Text Style.
Drawing Title Panel (Custom Settings)
Use these controls to fine-tune the GDL parameters of the selected Drawing Title, as applicable.
