Cutting plane in 3D model (shortcut: C)
Display the inside of the building by using temporary cutting planes in 3D
To create a cutting plane:
- Open the 3D model:
- Click the Cut model command from the bottom right corner
of the screen or press C

- The model is cut horizontally at the current camera height by default. (This cut height is then stored and used as long as the 3D model remains open.)
- Cut the model horizontally or diagonally by changing the cut plane. Note: Customizable cut plane is a BIMx Pro feature. Don't see it? Learn how to access Pro features at BIMx Pro LicensingNote: To know more about Customizable cut plane, see Graphisoft Community Cut plane
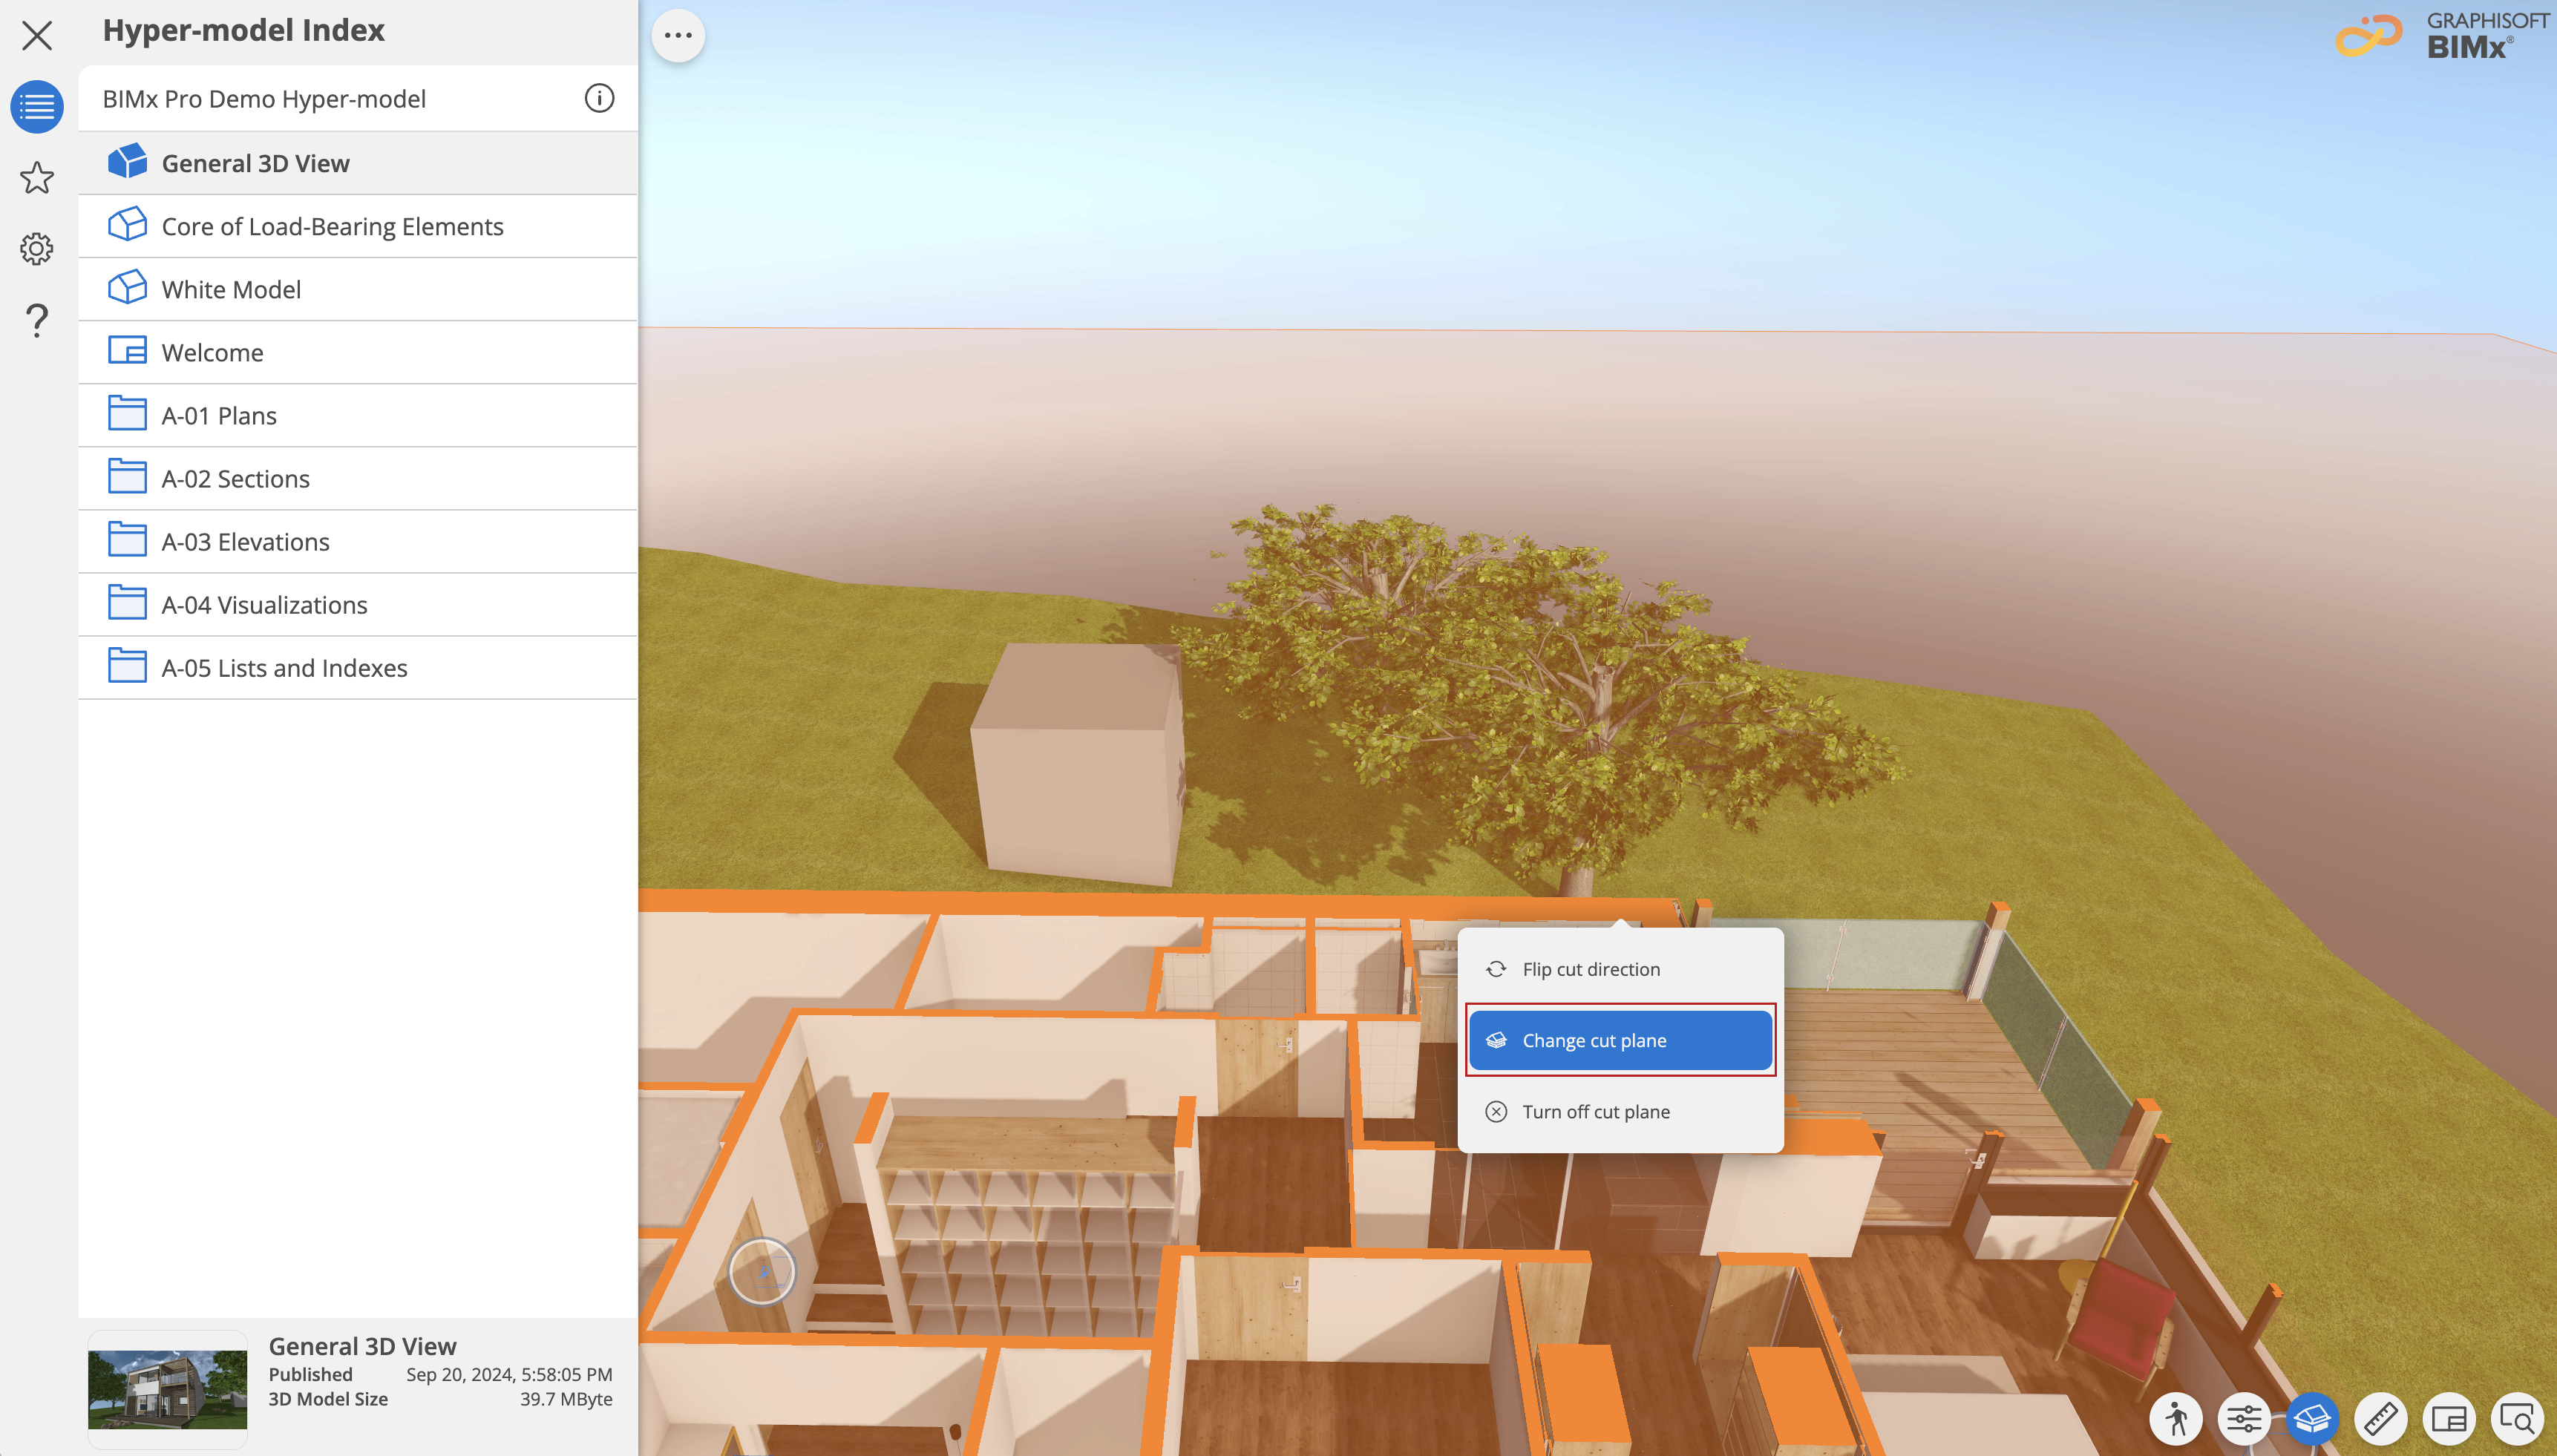
- Right click the cut surface, after cutting the model
- Select Change cut plane
- Move the cursor to the surface you want to cut parallel to.

- Hover over the frame to display the cutting plane. You can change
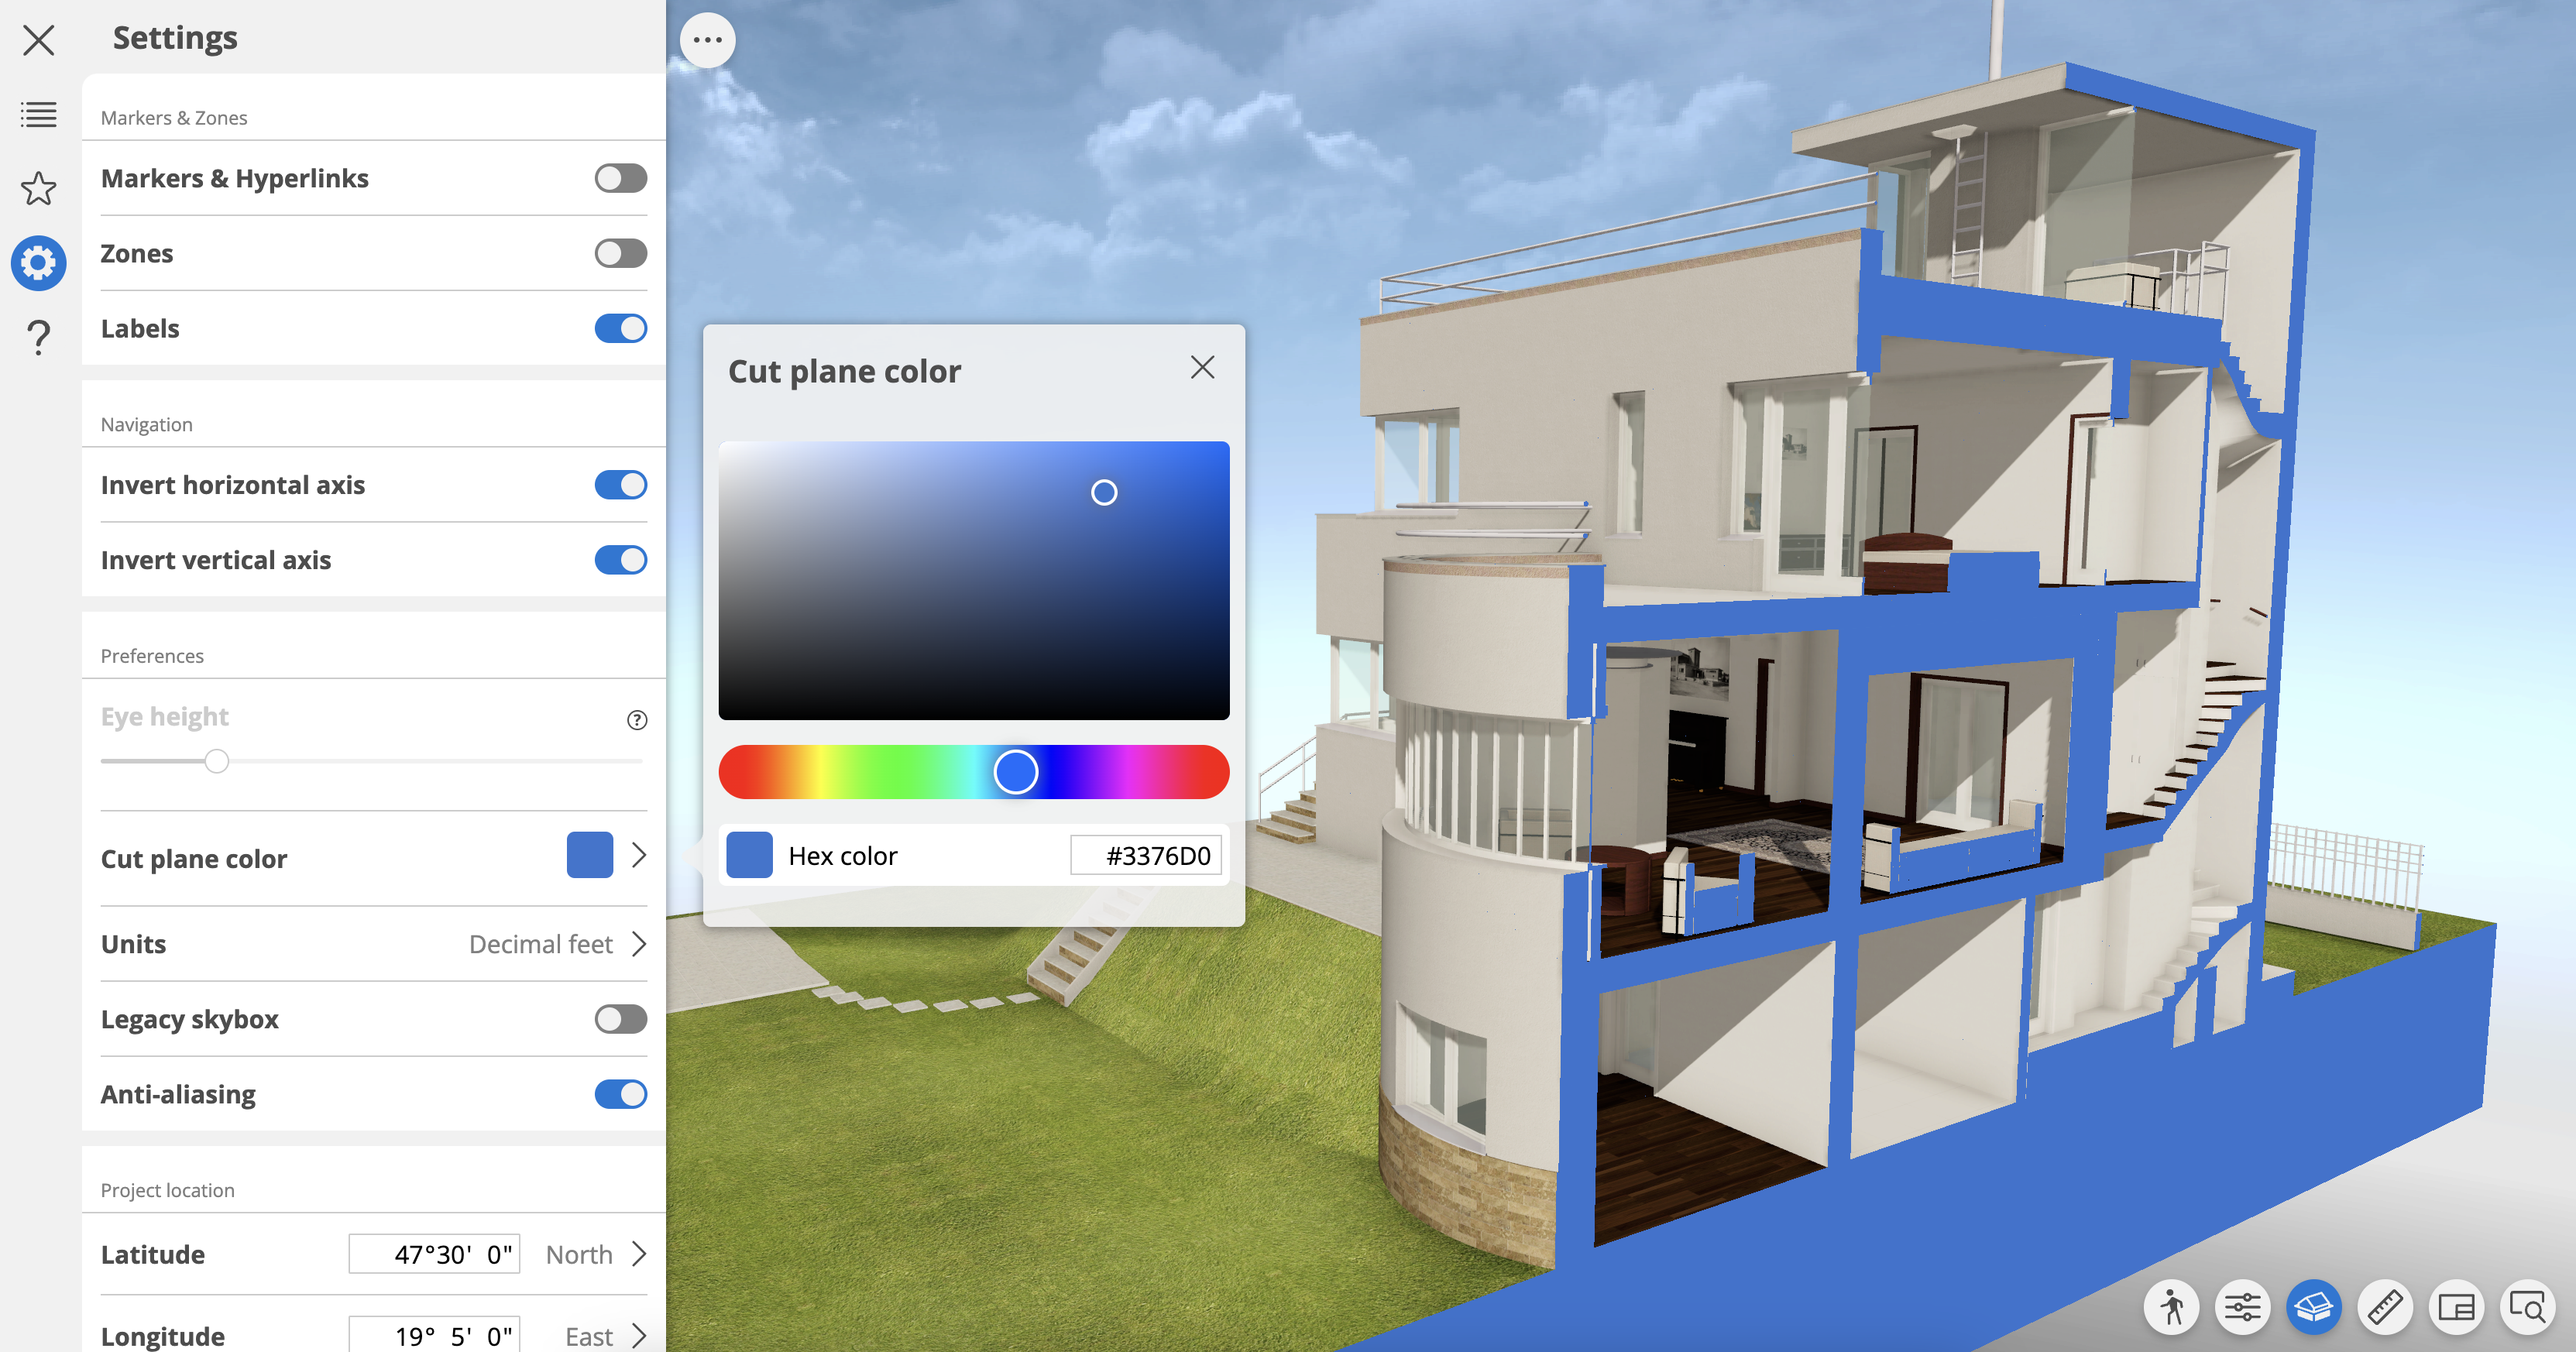
the cutting plane’s color using the Cut Plane Color Picker in BIMx
Settings. See Cut Plane Color Picker
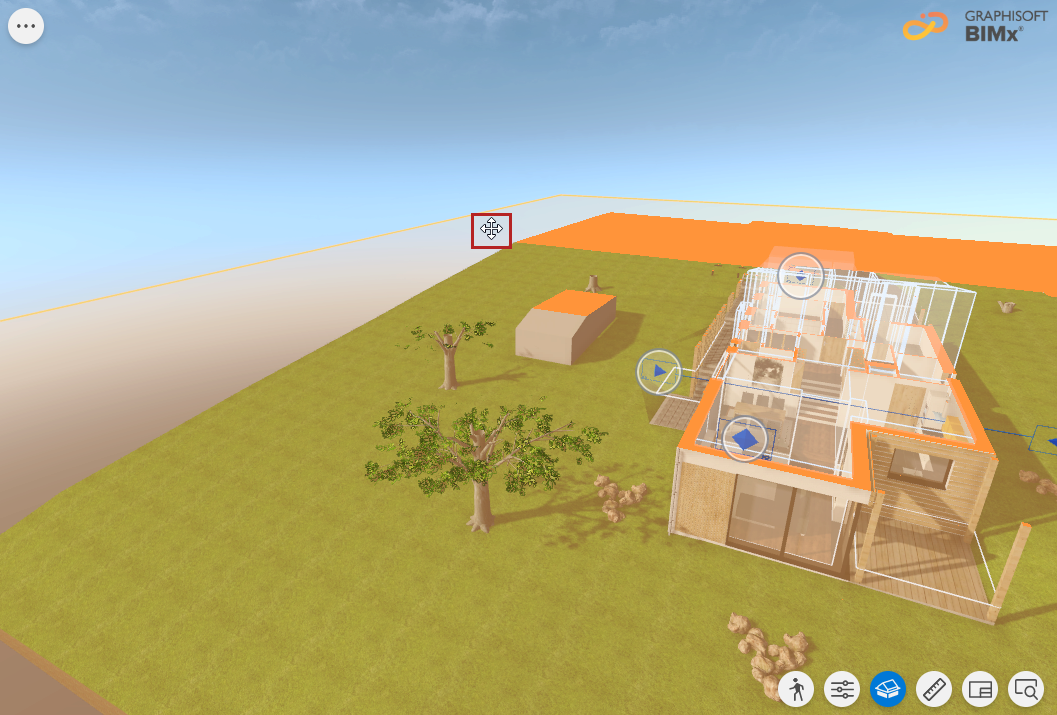
- Click and drag the cutting plane to see the part of the model you need.
Note: If a ghosted Layout is also shown in the 3D model, moving
the cutting plane will move the Layout along with it.
Right-click anywhere on the cutting plane to see the context menu.

- Flip cut direction to reverse the direction of the cut
- Turn off cut plane to turn the cutting plane off and show the full model
- Change cut plane to change the orientation of the cut plane.
Or toggle off the Cut model command at the bottom right corner of the screen (or press C).
Cut Plane Color Picker
Customize the 3D model’s representation by changing the color of cut surfaces.
Use a neutral color to keep the focus on the plan, or embrace your corporate identity with your own color palette. You need to pick your custom color only once. It is saved in BIMx Preferences and is applied to all your models.