Project Mark-Up: Basic Workflow
1.Switch on the Mark-Up Tools Palette (Document > Mark-Up Tools).
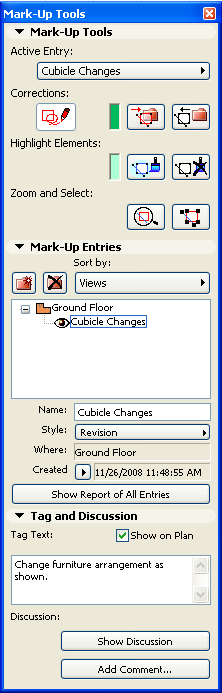
Note that it has three panels (plus a fourth, Teamwork panel, if you are in a Teamwork project)
See Teamwork and Project Mark-Up.
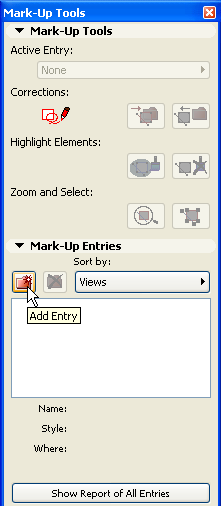
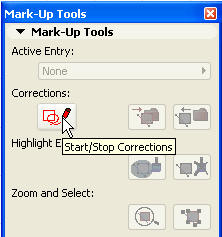
2.Start a new Mark-Up entry by clicking the Add Entry icon in the Mark-Up Entries Panel. Alternatively, click the Start Corrections icon in the Mark-Up Tools panel.
3.The New Mark-Up Entry dialog box appears. Enter a Name for this entry and choose a Mark-Up Style (e.g. Revision.)

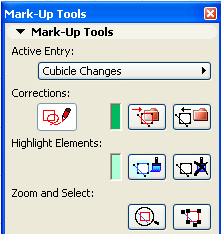
4.Now add your input, using the controls of the Mark-Up Tools Palette.
For example:
Add new elements as corrections: Enable the Start Corrections button, then use any tool to add elements to the current view. (The colors used are determined by the Entry’s Mark-Up Style.)
Convert elements to corrections: After selecting an element, click the Turn into Corrections button. (Remove the Correction marking from any selected element by clicking the Remove Corrections button.)
Highlight elements: Select one or more elements, then click the Highlight Elements button. (Remove a highlight from a selected element by clicking the Remove Highlight button.)
Add a tag text: Type the desired text into the field in the Tag and Discussion panel. Then click Place On Plan, and move the cursor to the desired position in the view. Click to place.
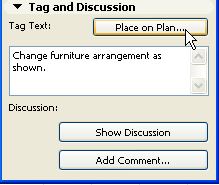
Add a Discussion Comment: Click Add Comment to open a text window, then type your comment. Colleagues who then open your marked-up view can view your comment by clicking on Show Discussion, and add their own comment.
For any Entry listed in the Mark-Up Entries Panel, click the eye button open or closed to show or hide it.
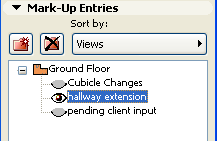
If an Entry is hidden, the corrections/highlights will disappear as long as the Entry remains hidden.
Show/Hide All Mark-Up Entries in Project
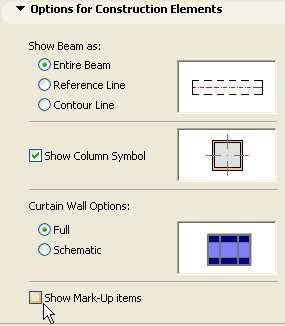
A project’s Mark-Up Entries are displayed by default. To hide them, uncheck the corresponding control in the Document > Set Model View > Model View Options dialog box.