When you modify your design, automatically created zones do not automatically adjust themselves to the changes, so they may require you to use the Update Zones command.
To adjust Zones to your updated design and recalculate the Zone area, use the Design > Update Zones command. The Update Zones dialog box also alerts you to any problematic Zones that might have been created.
Note: You cannot update manually created zones.
The Update Zones dialog box contains the following columns:
•Status: This is where ArchiCAD tells you if the Zone could be updated, and if not, what the nature of the problem is. The icons appearing in this field represent the following:

All is well, ArchiCAD has successfully updated your Zone.

The Zone was created manually and cannot be automatically updated.

The layer on which the Zone resides is locked. Unlock the layer in the Layer Settings dialog box and repeat the update process.

The Zone is self-intersecting. Just as in the case of polygons, you may have to adjust the Zone to have valid geometry, or split it into two Zones. You can examine the Zone by selecting it in the list, and clicking the Zoom to Selected Zones button. Fix the problem and repeat the update process.

The reference point of the Zone is outside of its boundary. Each automatic Zone has a reference point that must lie inside the Zone. If you get this error message, move the reference point inside the Zone and repeat the update process.
For more information, see Zone Reference Point.

The Zone you are trying to update cannot be properly adjusted, because it has difficulty in finding all of its edges. Click the Zoom to Selected Zones button to find the Zone. Fix the problem and repeat the update process.
No.: This column contains the number that has been assigned to the particular Zone.
Name: This column contains the name of the Zone.
Added m2: This column contains information on how the Zone has changed. (You can change the area unit in the pop-up menu in the upper right portion of the dialog box.)
To keep the original position of zone stamps when updating zones, check the Keep Zone Stamp position checkbox.
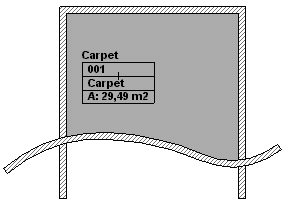
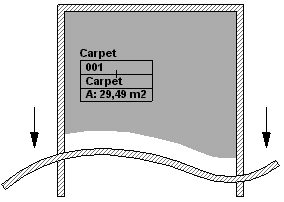
To remove the 3D zone space crop, check the Remove Crop from Top if updated and/or Remove Crop from Bottom if updated checkboxes.
Note: If you leave these checkboxes unchecked, conflicts may arise in certain geometric configurations.
For more information, see Crop Zone to Another Element.