Creating Custom Components for Doors, Windows, Curtain Walls
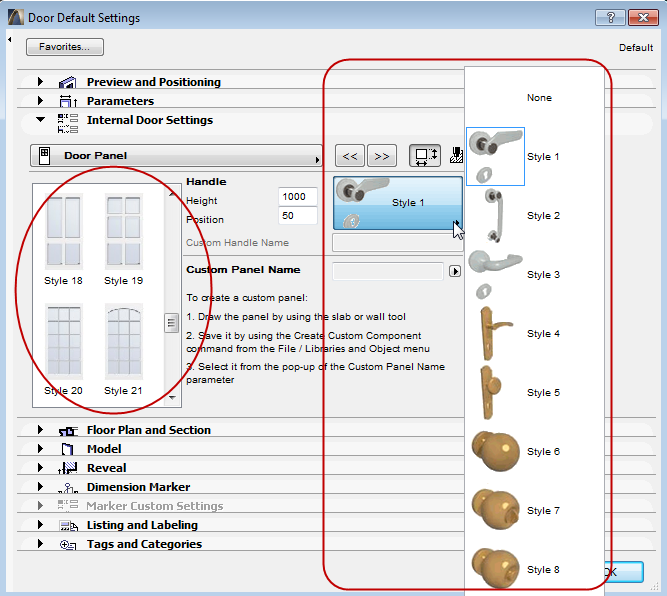
Doors, Windows and the frames and panels of Curtain Wall are GDL objects with many parameter choices. For example, doors in the ArchiCAD library offer you a variety of choices for door panels and doorknobs:

However, your design may need a different kind of door component - one which is not available in your library. In this case, you can draw a model element and save it as a library part, defining it as a custom component (e.g. door handle) that can then be used with your placed doors.
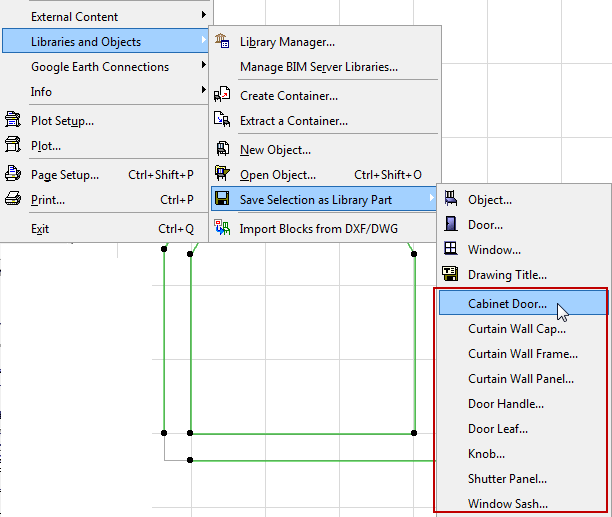
The possible custom components are listed under File > Libraries and Objects > Save Selection as:

For example, you can save a slab as a custom door leaf. The resulting GDL object is saved as a Door Leaf in the project’s Embedded Library. All Doors that use Door Leafs will be able to use this newly created custom Door Leafs.
•When applying the custom component, ArchiCAD will automatically resize it, if necessary. For example, you may create a Door Panel-type Custom Component that is 1000 by 2000 mm in size. If you have a Door that is 800 by 2000 mm in size, with its Trim Width 50 mm on all sides, the Door Panel will be resized to 700 by 1950 mm. The program will stretch/shrink all parts of the Door Panel Custom Component proportionately to fit this size.
Example: Create Custom Door Leaf
Suppose you wish to create a custom leaf for a door. Follow these steps:

1.Using ArchiCAD Construction Elements (such as Slabs), draw the desired door leaf on the Floor Plan or in the 3D window.
2.In case of Door/Window custom panels, what you draw in the X-Y plane of the Floor Plan Window will be ‘stood upright’ in the Window/Door library part (rotated 90 degrees around the X axis – as described in the GDL Reference Guide). For other custom component types, this condition does not apply.
The centerpoint of the resulting object is the center of the drawn elements’ bounding box.

Note: You should set the attributes (Pen, Surface etc.) values of the drawn elements to the desired values prior to saving it. These values will be applied to the custom component when it is actually used later in the Project.
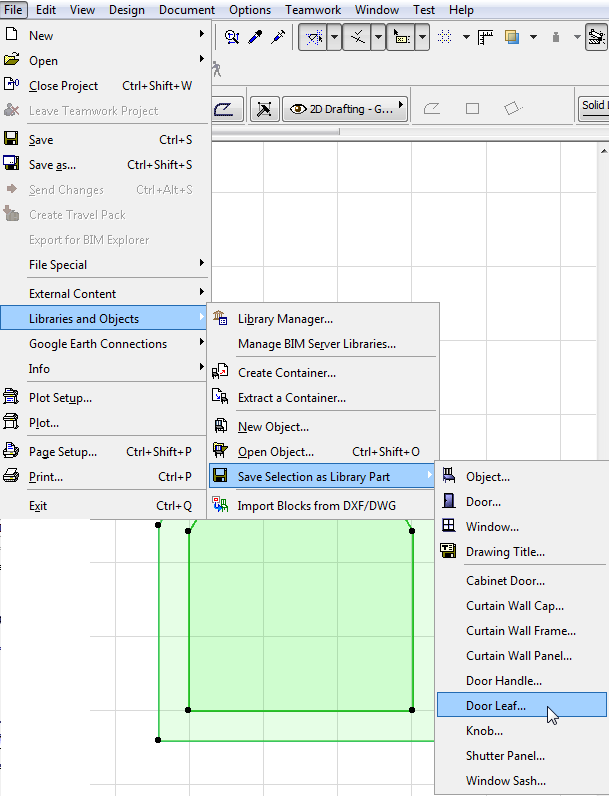
3.Select the drawn element(s) and choose the File > Libraries and Objects > Save Selection as > Door Leaf.

(If you have no elements selected, the command is grey.)
4.The Save Door Leaf Dialog comes up.

5.Specify a name for the new library part, which is automatically saved in your project’s Embedded Library and available as a Custom Panel Type for Doors.
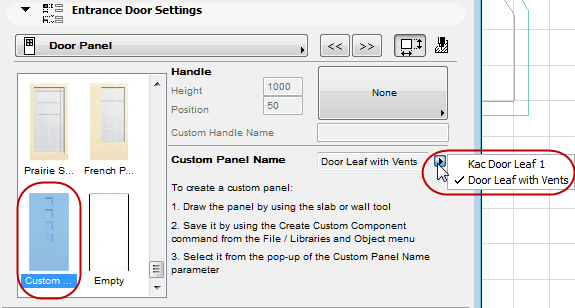
6.In the Door Settings Dialog, set the Door Panel style to Custom Panel.
7.From the Custom Panel Name pop-up, choose the custom panel you wish to use (if there is only one custom component defined, the parameter will be automatically set to that value). Then press OK to accept changes.

The newly created Door Panel is applied to your Door.

For information on editing the resulting GDL library part, see Editing Custom Library Parts and Components.
Example: Create Custom Frame or Cap Profile for Curtain Walls
Suppose you wish to customize the profile of your Curtain Wall Frame, or to add a custom Cap. Follow these steps:
1.Using ArchiCAD construction elements, draw the custom Curtain Wall frame on the Floor Plan or in the 3D window.
2.Select the drawn element(s) and choose the File > Libraries and Objects > Save Selection as > Curtain Wall Frame.

3.The Save Curtain Wall Frame dialog box comes up.

4.Specify a name for the new library part, which is automatically saved in your project’s Embedded Library and available as a Custom Frame for Curtain Walls.
5.Select the Curtain Wall whose Frame you wish to customize.
6.In Curtain Wall Selection Settings (either “Mullion” or “Transom”), choose Modular Frame.

7.In the Curtain Wall Frame Settings panel, select “Custom Frame” and/or “Custom Cap” from the Type pop-ups.

Your saved custom library parts are listed in the pop-ups below.
Click OK to replace the selected Frames with the custom component(s).