How to Place a Construction Element in ArchiCAD
Use the Toolbox
The typical steps in element creation using the Toolbox are:
1.Select the element’s tool in the Toolbox and open its settings dialog box.
2.Adjust the settings offered by default to suit your particular situation or purpose. You can choose a Favorite - a predefined element configuration - using the button on top of the Tool Settings dialog box.
See Favorites.
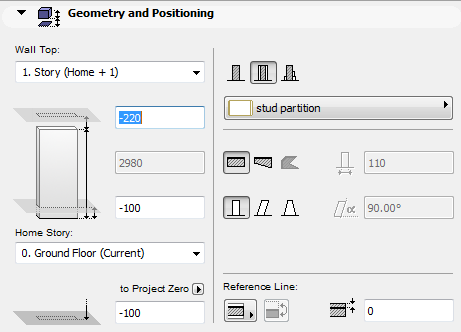
3.Use the panels of the Settings dialog boxes to assign parameters to the element.
For more information, see the descriptions of individual panels for each Tool Settings dialog box in Tool Settings Dialog Boxes.
4.Where applicable, choose a Geometry Method from the Info Box allowing you to create plain, curved, chained, rotated or polygonal variations of the elements.
5.Draw or place the element in the Floor Plan or 3D window.
Other Ways to Create an Element
Other methods of element creation include:
•Use the Favorites Palette: double-click on stored Favorite settings for the relevant tool, then click to place an element with those settings.
•Use the Magic Wand to create new elements that automatically match the shape of an existing element (e.g. create a Roof that fits exactly over your exterior Walls).
See Magic Wand.
•Create duplicates of existing elements.
•RoofMaker and TrussMaker from the Design > Roof Extras or Design > Design Extras menu.
See Element Extras: TrussMaker, Solid Element Operations.
Positioning Construction Elements in a 2D Window
A new element placed in a 2D model window is at the level of its Home Story (plus or minus any optionally defined offset).
See Home Story.
Gravitate Elements onto a Slab, Roof, Shell or Mesh
To make placement more accurate, you can use the Gravity function to place Wall, Column, Beam and Object type elements directly onto a Slab, Roof, Shell or Mesh.
See Gravity.
Positioning Construction Elements in a 3D Window
When you open the 3D window, an editing plane automatically appears: new elements will be placed onto this editing plane.
If you begin element input by snapping to an existing element hotspot or surface, the editing plane will automatically move to that position.
You can reposition the editing plane manually at any time.