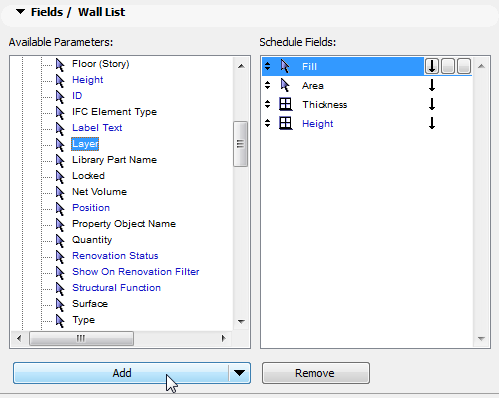
In the Fields Panel of Schedule Scheme Settings, you will choose which fields should be displayed in your schedule.
From the list of Available Parameters on the left, choose the desired items, and click “Add” at the bottom of the dialog box to add them to the Schedule Fields on the right.
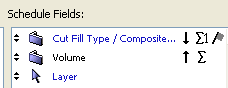
For example, in the Wall List scheme pictured here, we want the Wall Layer to be included in the schedule. Choose “Layer” from the Available Parameter, then click “Add” to add it to the Schedule Fields on the right.
An illustrated list of the parameters, divided by element type, is available here:
See Element Listing Parameters in the Interactive Schedule.
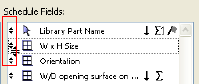
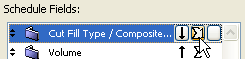
To change the order in which fields are listed in the schedule, use the up/down arrows at the left edge of each row to move the field up or down.
See also Schemes Fields Panel.
You can further set the order in which items are listed within each field, by using the three buttons at the right:
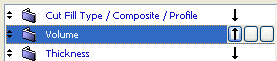
•Click the first button to sort walls in this field in ascending/descending order. (You can also leave this field blank, for “None”. “None” means that this field will not be taken into consideration when sorting.)
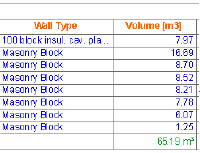
•In the example below, walls will be listed by Wall Type (the name of the schedule column that lists walls by Building Material, the first schedule field); inasmuch as several walls are of the same type - such as Masonry Block- the walls will be listed in order of their volume.

Click the second button to add a schedule cell which displays the sum of the items in the selected field. Here, we will have the schedule add a sum to the schedule’s Volume column.
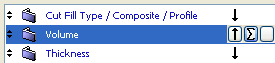
The second button contains an icon for a second option: to list a quantity for this field.

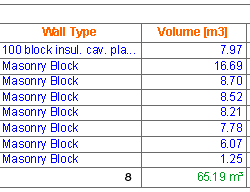
Here, we will have the schedule add a Quantity to the schedule’s Wall Type column.
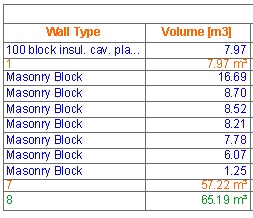
The result: Wall Type shows a Quantity at the bottom of the column (a total of 8 walls), and the Volume column shows a total sum of all the volumes at the bottom (65.19 m3).
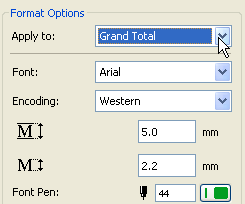
Note: You can apply unique formatting options to this row of sums/quantities, which is called Grand Total. If you choose “Grand Total” from the Apply to pop-up list, the formatting options will apply to this row/column of the schedule only.
The third button lets you add a flag to one of the fields in the list. (You cannot flag more than one field at a time.) The flagged field will display a separate sum or quantity for each group of identical elements in that field. For example, the Wall Type field already has a “Quantity” row, showing the total number of walls; to show a Quantity for each type of wall in that field, we have added a flag to the Building Material field.
The result: Wall Types show a separate quantity for each separate wall type. Moreover, the Volume column also lists the corresponding volume sub-totals.
Note: You can apply unique formatting options to this row of sum/quantity subtotals, which is called Total.