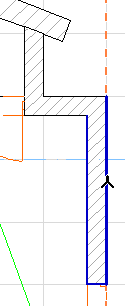

In the Floor Plan or Section windows, you can dimension wall thickness in a single click by clicking its contour.
In this example, with the Linear Dimension tool active, move the cursor to the wall’s contour line.
Click once. Two dimension points appear.
Double-click to complete the dimension chain and place it with the Hammer cursor.
If you place a series of wall-thickness dimension markers along a chained wall, only the dimension points located on walls perpendicular to the dimension chain will be displayed.
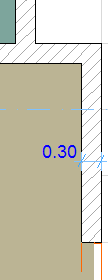
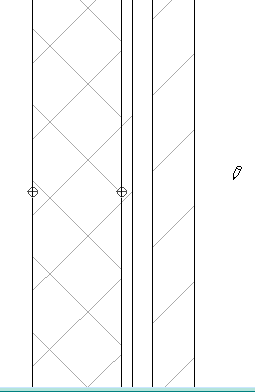
You can dimension the individual skins of a composite element:
Note, however, that only the two sides of the Wall (the Wall’s full thickness) and the core are dimensioned associatively.
Dimension Core Only of Walls and Slabs
Check this box on the Dimension Details panel of Dimension Settings. This way, when you dimension Wall thickness (Floor Plan or Section) or Slab thickness (in Section), the single-click method will produce dimension points only on the core structure of a composite or profile element.
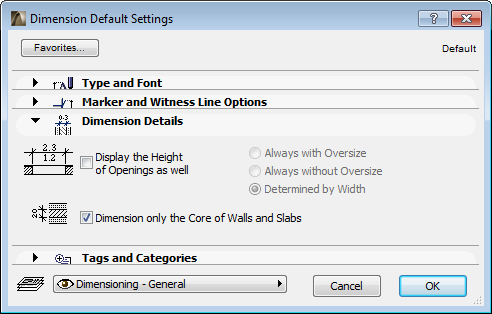
•On the Floor Plan, the core(s) of a profile element will be dimensioned along its cut part.
•In Section, the core(s) of a profile element will be dimensioned along its bounding box.
If you edit the composite or profile structure so that it no longer has a core, the core-only dimension will automatically change to dimension the full thickness of the Wall/Slab.
Note: The state of this checkbox will also affect how Walls will be dimensioned in Automatic Exterior Dimensioning. Similarly, this checkbox is tied to the “Dimension Core Only” option in Automatic Interior Dimensioning. (See Automatic Interior Dimensioning and Automatic Exterior Dimensioning.)