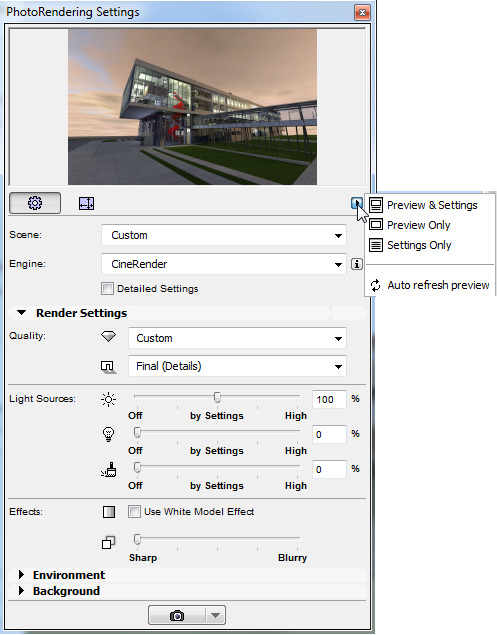
PhotoRendering Settings Palette
The PhotoRendering Settings palette is accessible from Window > Palettes > PhotoRendering Settings.
By default, the Preview window is at the top, and the settings of the selected Rendering engine are below. Click the pop-up below the Preview window to show:
•both Preview and Settings
•Preview only; or Settings only.

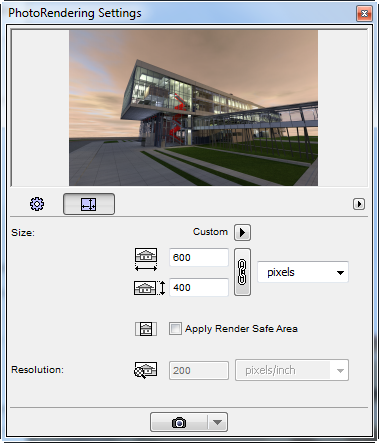
In the top part of the Palette, there are two main views: click the left button for Settings; click the right button for Size.
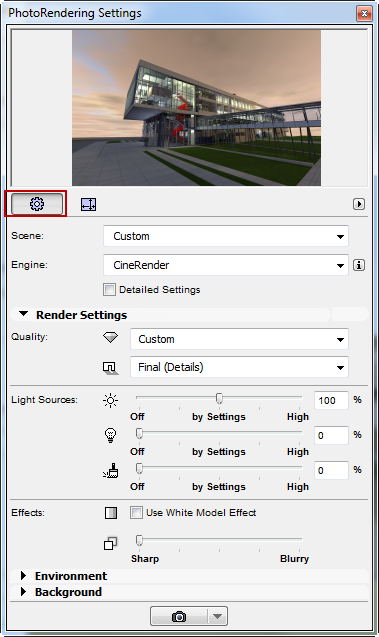
•Use the Settings view to adjust the parameters of your PhotoRendering Scene; parameters vary depending on the Engine you choose. You can save and manage your scenes in folders, so you can re-use them easily in subsequent renderings and export/import them among different projects.
For CineRender’s Basic settings: see Create a Rendering with CineRender’s Basic Settings, below.
For details on other engine-specific settings: see PhotoRendering Settings.
•The Size parameters will not be saved as part of the Rendering Scene. Thus, you will be able to use the scene in a variety of contexts, regardless of size.
Select and Manage Rendering Scenes
A Rendering Scene is a set of predefined Rendering Settings that can be stored and reapplied using the Select and Manage Scenes dialog box.
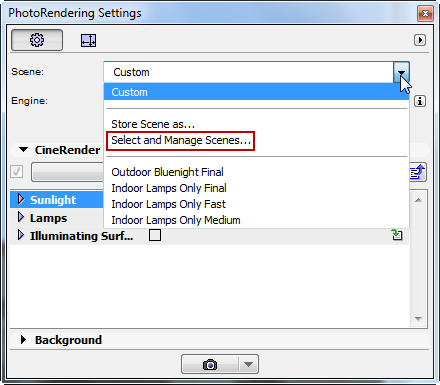
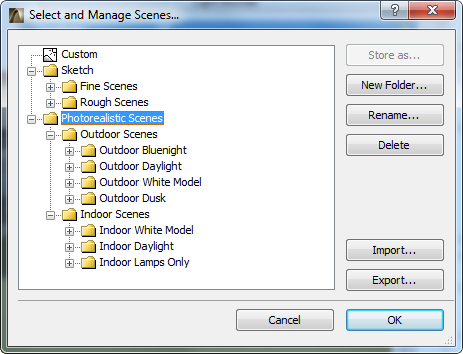
For each Rendering engine, ArchiCAD’s factory template provides one or more predefined Scenes. These are listed in a tree structure in the Select and Manage Scenes dialog box.
If you have loaded a Scene into the PhotoRendering Settings Palette, and then you change any parameter, the name of the Scene changes to “Custom” until you store it under a new name.
To store the settings of a Rendering Scene, open the Select and Manage Scenes dialog box and click Store as.
A stored Scene includes all the parameters on the Settings view of the PhotoRendering Settings Palette. Note that this includes the Rendering engine (e.g. CineRender or Sketch). However, a Rendering’s output Size is not stored as part of the Scene.
Before closing a project, make sure you store any customized Scene settings under a new name if you wish to reapply its settings later. Also, when saving a 3D view, you can save any named Scene as part of its View Settings (in the 3D Only panel of View Settings).
Using the Select and Manage dialog box to organize organized into folders, and to export/import Scene files among different ArchiCADs. (Scene files have the extension “renderingscene”.)
Note: You cannot use a PhotoRendering Scene in any version of ArchiCAD earlier than ArchiCAD 18.
ArchiCAD 18 comes with the following built-in rendering engines.
•CineRender Engine: This renderer is based on Maxon Cinema 4D version 14 and incorporates most of the parameters of the Cinema4D renderer.
Note: Copyright 2014 MAXON Computer GmbH. All rights reserved. http://www.maxon.net
•This engine enables you to create very high-quality, highly realistic images, with more exact texture and light reproduction than the other engines.
See Create a Rendering with CineRender’s Basic Settings.
See also Detailed CineRender Settings.
•Internal Rendering Engine: The Internal Engine (whose settings are analogous to the OpenGL engine) is suitable for producing draft-quality or simple renderings offering textured image surfaces, simple shadows and transparencies.
See Internal Rendering Engine.
•Sketch: This produces non-photorealistic renderings that replicate sketched lines - best suited for draft views in the early project stages.
For more information, see Sketch Rendering Engine.
The Size parameters you set up here will not be saved as part of the Rendering Scene. Thus, you will be able to use the scene in a variety of contexts, regardless of size.
Click the pop-up menu to access convenient predefined Size presets (corresponding to screen size in pixels, paper size, or the current 3D window size).
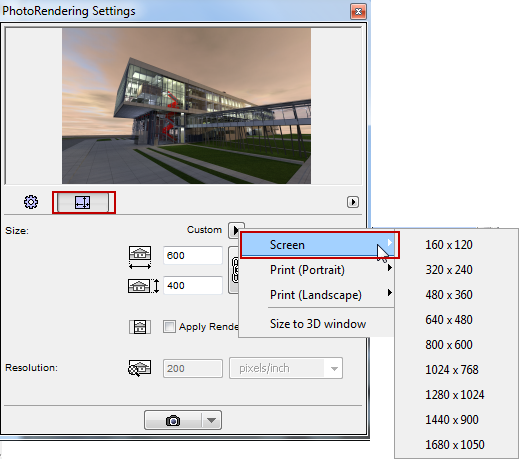
Size Presets available (e.g. Screen, in pixels, or Print, to match paper size.
Click the chain icon to keep these values proportionally constant: if you change one of the values manually, the other value will be updated accordingly.
If you choose a Paper size preset, you must also enter a Resolution value in dpi. The Size tab also displays the final image resolution.
Generation of the Preview picture is optimized for speed. Consequently, it has certain limitations: for example, the 3D grass feature is not shown in the preview (the Grass channel in Surface Settings has no effect on the preview.)
The Preview can be refreshed manually or automatically.
•Automatic refresh: To turn on automatic Preview refresh, choose this option from the pop-up
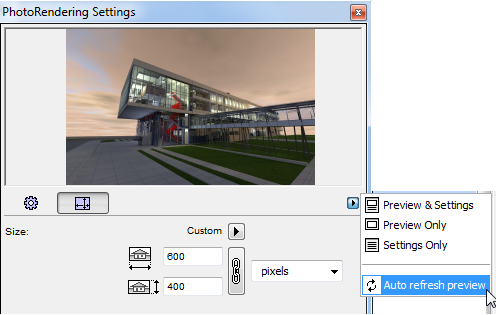
•Manual refresh: just click the picture. A Preview that requires refreshing is shown with an update icon, and the Preview is greyed out.
![]()
Notes on the PhotoRendering Preview:
•The 3D window must be active in order for automatic refresh to occur.
•While the PhotoRendering Palette can be displayed over any ArchiCAD window, the 3D window is always regenerated and brought to the fore every time its Preview is refreshed.
•While rendering with the Sketch Render engine, the preview will not use the actual 3D model. Instead, to speed up the preview feedback, a “dummy” basic model is shown, in which your current rendering settings are reflected.
•To refresh the Preview, ArchiCAD will regenerate only the changes resulting from modifications to the model, surface settings and rendering settings. However, if you close the PhotoRendering Settings Palette, ArchiCAD will have to re-render the entire model the next time you open it. Thus, to save time, you should keep the PhotoRendering Palette open while you work.