Fill Edit Vectorial Pattern Panel
This panel appears in the Fill Types Dialog Box (Options > Element Attributes > Fill Types) if you are creating or editing a vectorial fill.
To change the vectorial pattern of a Fill Type, select the fill you want to modify in the pop-up list at the top of the dialog box.
Edit its properties in the Edit Vectorial Pattern panel using the controls described below:
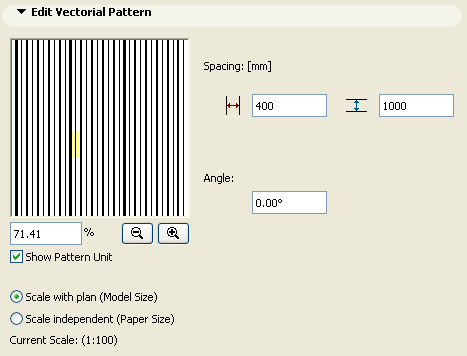
Show Pattern Unit: Check this box to place a highlight over the symbol unit in the preview window.
Scale window: Enter view scale in percent in this box to control the view in the vectorial hatching area.
To determine the relationship between fills and project scale, use the two radio buttons:
•Scale with plan (Model size): Use this option to ensure that the current Fill type will be displayed at the same scale as the model on every output.
Note: Avoid editing a scaled fill type if the project scale is different than that of the fill type, as it will be distorted.
•Scale-independent (Paper size): Use this option to display, plot and print the current Fill type definition at a fixed size, regardless of output scale.
Zoom Out: Click this button to Zoom Out the view in the vectorial hatching area
Zoom In: Click this button to Zoom In the view in the vectorial hatching area.
Spacing: Enter values in this section for spacing the vectorial hatching pattern horizontally and vertically.
Angle: Enter a value here to rotate the vectorial hatch shown in the Sample Window.
Click OK when you are finished. All elements using this fill pattern will now display the modified one.