
The Physical Sky is an entire constellation that includes multiple objects having properties (sun, weather, clouds, fog, rainbow, atmosphere). A Physical Sky provides both a background image and lighting effects. It is “smart” and the parameters are interconnected.
Choose Physical Sky from the Sky Setup parameter.

The following effects are on by default, and their respective parameters are defined in the weather presets. However, you can turn any of them off, or leave just one of them on, to achieve certain effects and/or optimize rendering time.
•Sky Visibility: If you turn this off, the Physical Sky parameters still affect the rendering, but you cannot see the sky itself.
•Sky Luminance: You can turn on Sky Luminance with the other effects off: this will give you the light effect of the Physical Sky without anything else.
•Sky Reflection: If only Sky Reflection is on, then you can, for example, see the environment reflected on a glass building, without rendering the environment itself.
•Sky Refraction: Turn on/off the Physical Sky’s refraction effect.
Do one of the following:
•Use ARCHICAD Sun Position: Checking this box will reset the Time & Location according to the sun location. Use this to fine-tune the weather preset you have chosen to match the conditions at the project location.
See also Note on Sun Settings in ARCHICAD.
•Manually enter the Date/Time and Location (in geographic coordinates) that will affect your rendering scene.
The sun is an Area light source. The following parameters can be used to define the characteristics of the sun light source. These have no influence on the look of the sky, on the ARCHICAD project sun, or any Sun Object.
Use Warm Colors: This setting increases the “warm” colors in the sun.
Intensity: Defines the intensity of the sun. If, for example, your scene is over exposed due to strong surface reflections, adjusting this value can help.
Saturation Correction: Defines the sun’s color saturation. If you want white sunlight, enter a value of 0% here.
Hue Correction: Depending on the value used, any color in the spectrum can be generated. Great for creating that extraterrestrial look.
Gamma Correction: Defines the sun’s gamma value. This value can be used to prevent over exposing a scene even if the Intensity value is too high. Animating the Gamma Correction parameter for day to night animations can help reduce the brightness of the noon sun.
Size Ratio: Defines the size of the visible sun.
Note that this also has an effect on the Area shadows. If you want a hard sun shadow, enter a value of 0% here.
In the first picture below, a higher Sun Size Ratio causes the shadows to be softer, which corresponds more closely to diffuse lighting situations in real life.
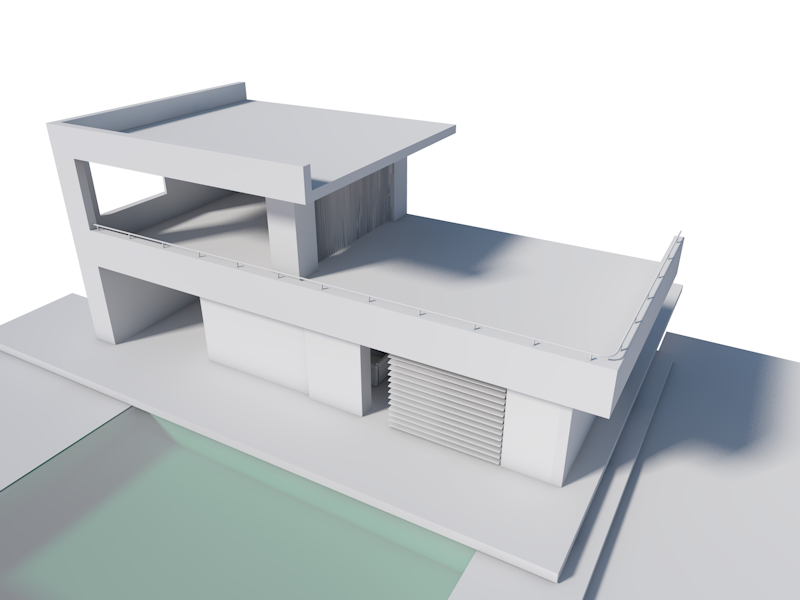

As Seen Intensity: Defines the visibility of the sun. Does not otherwise affect emitted light, etc. This parameter is dependent on the Intensity parameter. If Intensity is set to 0%, setting the As Seen Intensity to, for example, 1000% will not make the sun visible.
Use Custom Colors: Enable this option if you want to create a custom color using the color field below.
•The sun color will have no effect on 2D Clouds.
Lens flare: Enables or disables all lens effects.
•Glow Intensity: Lens glow and lens reflection. Defines the intensity of the lens glow. Set this value to 0% if you do not want any glow to be seen.
•Flare Intensity: Set this parameter’s value to 0% to disable the flare alltogether. Otherwise you can enter a different value to define its intensity.
•Distance Scale: If you encounter problems with the light sources integrated into the sun or moon (e.g. if lens flare or lens glow are displayed incorrectly), simply reduce their distance using this setting.
Density: Set Shadow density using the slider. A value of 50% will make the shadow semi-transparent. Values in excess of 100% can also be entered.
Shadow Color: Defines the color of the shadow cast by the sun.
Transparency: Check this box to have transparent objects cast a shadow.
The following three parameters are relevant only if you are using the Standard renderer. They have no effect in Physical rendering mode!
•Minimum Samples
•Maximum Samples
•Shadow Accuracy
These parameters function just like the Light parameters (with Area shadow) of the same name and pertain exclusively to sun Area shadows. (See Shadow Casting.)
The Sky shader is an accurate simulation of the sun’s and sky’s natural color and brightness with regard to their current location and the time of day.
•Sky Horizon: Choose either Physical Properties, Custom Gradient, or None. If you choose Physical Properties, the following additional parameters are available:
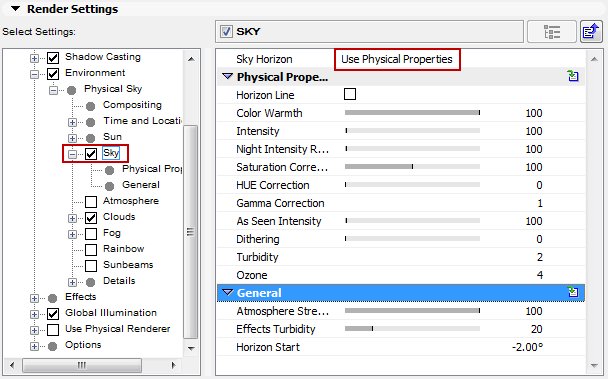
•Horizon Line: If enabled, the sky will be clipped at the bottom at the horizon line, where it will be colored black. Otherwise the southern hemisphere will be given the color (and brightness) of the horizon.
•Color Warmth: Physical Sky works internally with spectral colors that have to be converted to RGB colors for rendering. This setting increases the “warm” colors in the sky (i.e., less turquoise in a blue sky and more brown in a morning or evening sky).
•Intensity [0..10000%]: Defines the intensity of the sky’s brightness. This affects the light used by the sky for GI calculation and the direct (most often blue) illumination of objects. The Intensity only regulates the visible intensity (without the influence of GI).
•Night Intensity Ratio [0..10000%]: Defines the brightness with which the night sky is rendered as well as the brightness of the light it emits. This parameter is dependent on the Intensity parameter. If Intensity is increased, the Night Intensity Ratio will increase accordingly, without the value itself being increased.
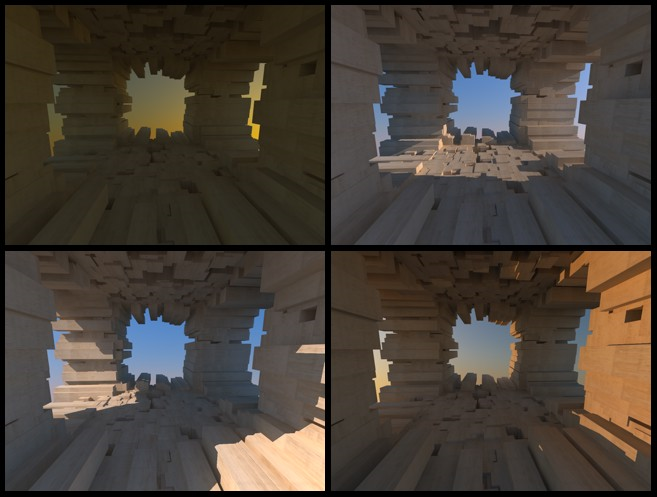
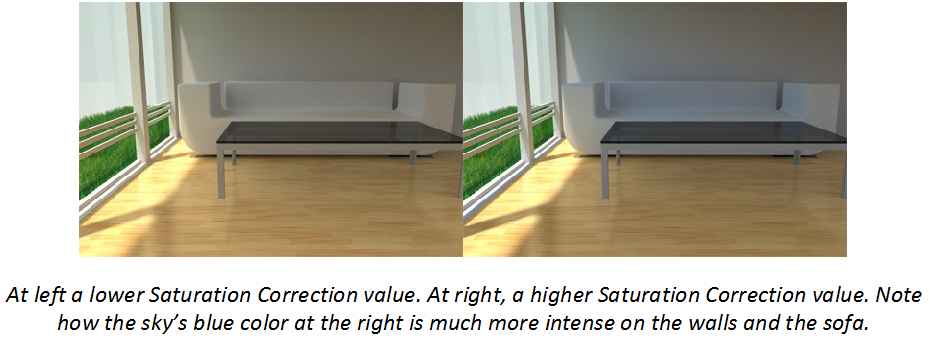
•Saturation Correction [0..200%]: Defines the sky’s saturation. If, for example, the sky is too blue, simply lower the Saturation Correction value. A value of 0 will result in a grayscale sky.
•Hue Correction [0..100%]: This parameter can be used to create extraterrestrial sky colors. The entire color spectrum is available for you to use.
•Gamma Correction [0.1..10]: The internal brightness range for the sky is much larger than can be displayed on your monitor. Use the Gamma Correction value to define the brightness range from brightest to darkest values.

•As Seen Intensity [0..10000%]: Defines the brightness of the rendered, visible sky only (also dependent on the Intensity parameter). The GI calculation will not be affected!
•Dithering [0..100%]: If color banding (sudden color transition) appears when the sky is rendered, increase this value to add a slight noise to the sky’s gradient, which will hide such banding.
•Turbidity: Many natural color phenomena in the sky are caused by various combinations of light and water or other particles in the atmosphere. In CineRender, this is called “turbidity”.
The smaller the value, the clearer the atmosphere will be. Higher values will result in correspondingly in more foggy or smoky, as well as more colorful, effects.
•Tip: In case the sky is too bright or too dark, the Turbidity and Atmosphere Strength (see below) parameters will have the greatest influence in rectifying this.
•Ozone: In the real world, ozone filters ultra violet sunlight. In visual terms, it filters yellow and red sunlight (i.e., the Sun option must also be enabled). Therefore, the higher the Ozone value the more bluish the sunlight will appear (in the real world, this takes place at dusk and dawn). The color of the sky itself remains unaffected.
General
•Atmosphere Strength [0..100%]: The atmospheric strength affects the brightness of the atmosphere (the same effect as the Turbidity parameter, described above). Lower values will cause the atmosphere to fade to black; larger values will fade to white (if the Turbidity value is high enough).
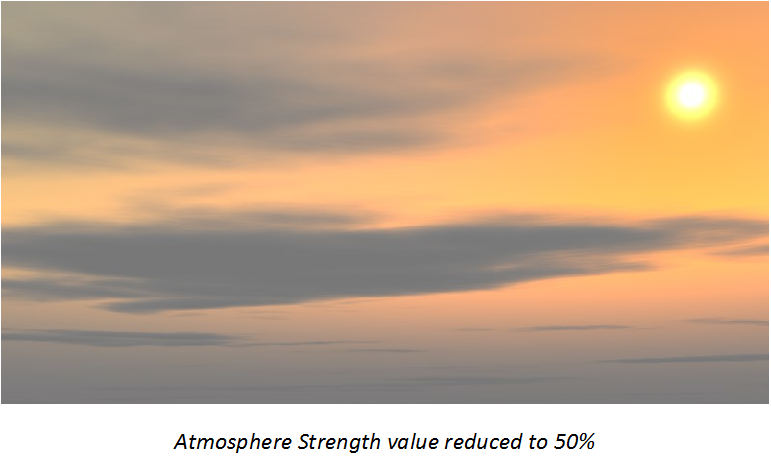
•Horizon Start [-89..89°]: Varies the height of the horizon. If, for example, you have a scene in which you do not have an endlessly large Floor element, you may find that you can see under the horizon. If this happens, enter a negative Horizon Start value and the sky color will be stretched or compressed accordingly.
Note: The default values here are generally adequate and you will rarely have to adjust them.
This effect can be described as follows: you look at a mountain panorama and notice how mountains in the distance seem to be increasingly covered by a bluish haze.
This atmospheric effect (also called “atmospheric perspective”) is caused by two main factors:
•Absorption of light
•Dispersion of sunlight and skylight
Intensity: Defines the brightness of the atmospheric haze. Larger values quickly result in an unrealistic, overexposed effect.
Horizon Fade: This parameter helps you mix the color of the atmosphere with that of the sky, creating an atmospheric perspective effect. A value of 100% will result in only the horizon color being used.
Saturation Correction: Adjusts the atmosphere’s saturation. Smaller values result in a grayish, colorless haze.
Hue Correction: The atmospheric haze can contain any color, depending on the value entered here.
Gamma Correction: This setting can be used to increase the atmospheric effect depending on the lighting situation. It can, in certain instances, help improve the overall look of the effect.
World Scale Ratio: This algorithm assumes that 1000 meters in the real world are equal to 1000 units in CineRender. This ratio can be modified using this setting. Values greater than 100% will increase the atmospheric effect, e.g. 500 CineRender units are equal to 1000 meters in the real world.
Dithering: If color banding (sudden color transition) appears when the atmosphere is rendered, this value can be increased to add a slight noise to the sky’s gradient, which will hide such banding.
Use the Clouds controls to edit the look of your 2D clouds.
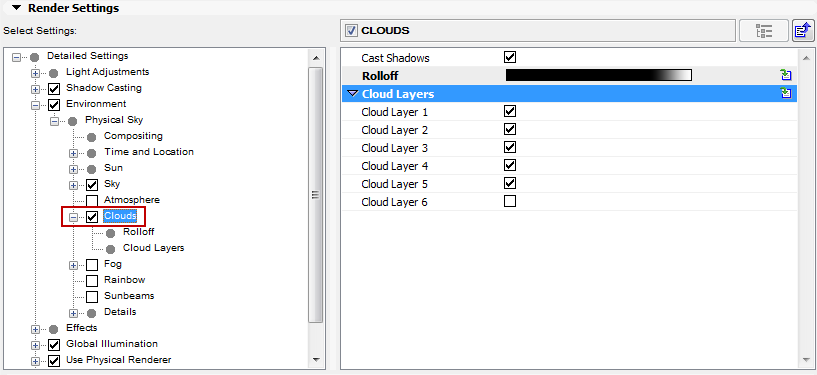
A special method is used to project 2D clouds onto the celestial sphere to give a realistic impression of cloud cover that stretches across the entire firmament.
Cast Shadows: Defines whether or not 2D Clouds should cast shadows.
Rolloff: This grayscale gradient causes the sky to fade to the cloud color near the horizon, thus giving the cloud cover a realistic look as it approaches the horizon.
See also Adjusting Gradient Parameters.
Cloud Layers: The levels can be turned on or off via the Levels 1-6 options.
2D Clouds can be made up of up to six cloud layers, each of which can be turned on or off separately. Each layer offers the same settings.
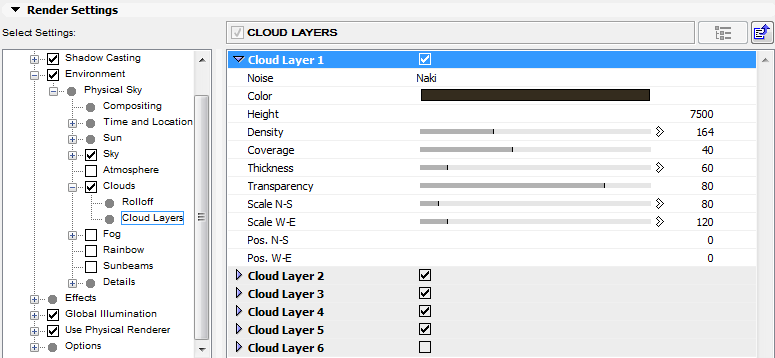
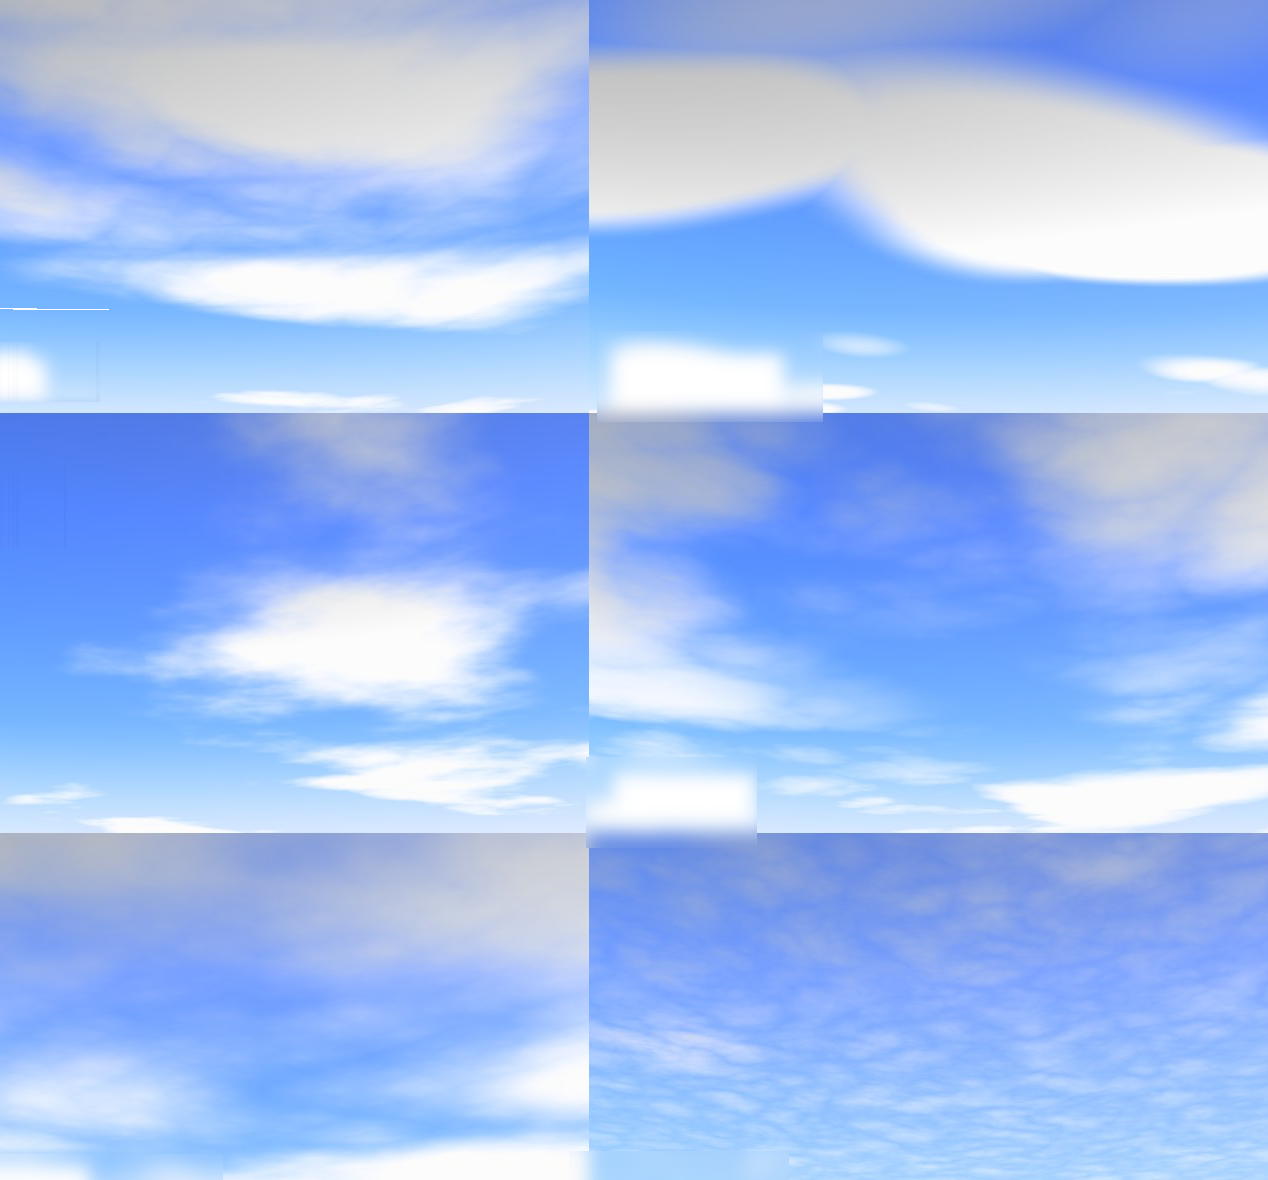
•Noise: Noise turns an otherwise smooth surface into a more or less randomly uneven surface Here you can select the type of noise with which your 2D clouds should be created.
•Color: Define the color of your cloud here; its color will be independent of the sun’s color or that of other sources of light. Only the cloud’s brightness will be adjusted to match the sun.
•Height: Set the height of each cloud layer. If you take a look out of the window you will notice that clouds often consist of several layers.
Cirrus clouds can, for example, be placed on a layer that is higher (since they reach greater heights in reality as well), and clouds that are darker, rain-filled, and more foreboding can be placed on a lower layer.
•Density: Density defines the contrast of the clouds. If a low value is used, the clouds will be very transparent, especially towards the edges. The higher the value, the more homogeneous the clouds will be.
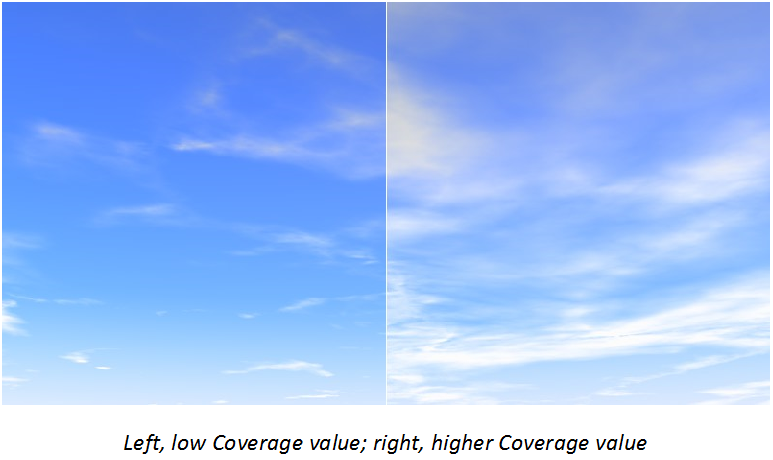
•Coverage: This is the most important cloud setting. With it you define the degree of cloud coverage. Very low values result in no cloud coverage; very high values result in a completely overcast sky.
•Thickness: Thickness is the measure of the degree to which the sunlight will be dispersed or absorbed. Lower values result in the clouds being brightened more by the sunlight, higher values result in darker clouds.
•Transparency: Transparency regulates the degree to which 2D clouds cast shadows onto other objects in the scene. Enter a value of 100% if no shadows should be cast.
If, in addition to the sun, you add light sources that cast shadows, make sure they are placed at a height greater than 10,000 m
•Scale N-S; Scale W-E: These settings let you scale the noise pattern in the North-South (N-S) or West-East (W-E) directions.You can easily create long, thin, stretched cloud formations by scaling them in one direction only.
•Position N-S; Position W-E: Use these settings to move your clouds in the North-South (N-S) or West-East (W-E) directions.
A fog system has been integrated into Physical Sky - a real volumetric fog, based on diverse types of Noise shaders that render less homogeneously and therefore more realistically.
Note: Using fog can increase render times: the denser the fog, the more time it will consume.
The fog stretches infinitely in a vertically adjustable fog bank.
If you already have Sunbeams activated, any added fog will add much more calculation time.
•Color: This is the color the fog should assume. This color will not be affected by other colored light sources, although the sun’s color can be multiplied with the fog’s color (if the Illumination Intensity setting described below is set to greater than 0).
•Start Height/End Height: These settings determine where the fog should begin and end (starting from the ground, Y=0).
The fog bank, which extends infinitely on the X- and Z-axes, must at least be limited in its vertical extension. Otherwise you would not be able to see anything in the resulting soupy fog.
You can determine how quickly density is lost between the Start Height and End Height settings by adjusting the Density Distribution (see below).
•Max. Distance: Use this setting to optimize render times. Roughly speaking, this distance is calculated from the camera’s point of origin, looking into the scene. Only the fog that lies within this range will be calculated.
•Density: Density is the measure of the fog’s density, i.e. the higher the value, the more opaque the fog.
•Density Distribution: Regulates the density between the Start and End settings.
A rainbow is created by light refracting through raindrops. A rainbow’s position is dependent upon the position of the sun. To that end, remember the following rules:
•A rainbow’s apex always lies exactly opposite the sun.
•The lower the sun’s position, the higher a rainbow’s apex will lie.
As in reality, there always exists (even if not always visible) a second, less visible mirrored (in color) rainbow with a larger radius.
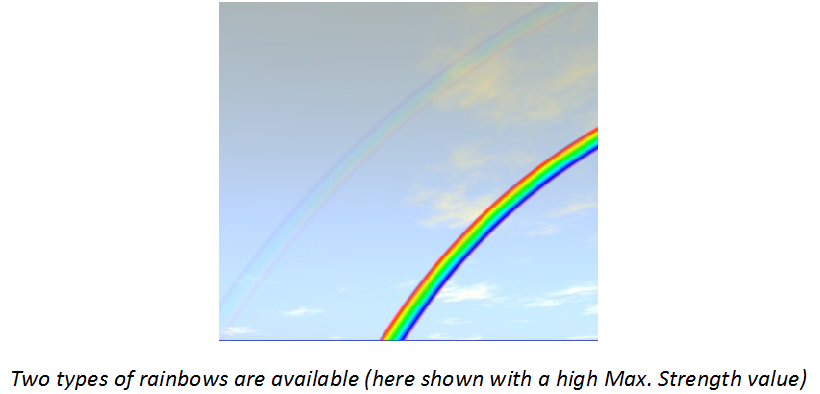
Spatially, a rainbow will always be arranged in front of all Sky objects (even clouds).
Max. Strength: Use this control to adjust the rainbow’s transparency. The second rainbow will be created according to the properties of the first. The lower the value, the more transparent the rainbows will be.
We suggest you use unobtrusive, transparent rainbows - less is more.
Turbidity Dependent: In reality, if there’s no rain (or moisture in the air), there’s no rainbow. Physical Sky regulates the density of the moisture in the air via the Turbidity setting (see above, at Environment > Physical Sky > Sky > Physical Properties). So, if you want to link your rainbow to this setting, activate this option. If Turbidity is set to 0, for example, no rainbow will be created.
If you activate Turbidity, the following options will be made available:
Min. Turbidity Threshold/Max. Turbidity Threshold
Use these controls to adjust the rainbow’s turbidity.
Example: You set the first control to 9 and the second to 50. This means no rainbow will be visible as long as Turbidity is less than 10. If Turbidity is greater than 50, the rainbow will be rendered to full strength. Between 9 and 50, the rainbow will be rendered in correlation with the strength of Turbidity.
First Rainbow Inner and Outer Angle/Second Rainbow Inner and Outer Angle
The precise definition of rainbow angles is not needed here. Simply view the difference of both angles as the measure for each rainbow’s width.
If you think rainbows are too narrow, try entering inner and outer values of 30° and 50°, respectively, for the first rainbow.
Start Clipping/End Clipping
Imagine an animated airplane approaching from the distance out of the rainbow. In the distance, the airplane is behind the rainbow; as it approaches it will eventually cover the rainbow. Such effects are possible using these settings.
Objects lie in front of the rainbow up to the Start Clip point; starting at the End Clip point, the objects lie behind the rainbow.
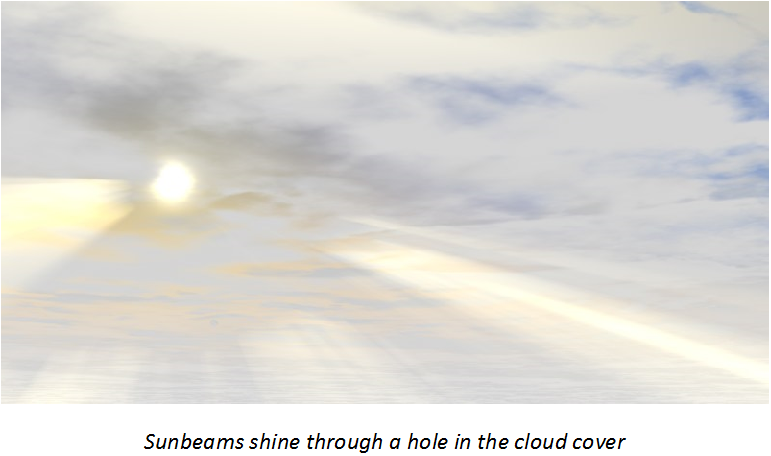
Sunbeams shining through the clouds can be a beautiful and useful effect.
To make the sunbeams visible, make sure of the following:
•From the point of view of the camera, the sun should be mostly hidden behind the clouds.
•The cloud cover must be structured so that sunbeams can pass through them, i.e. with intermittent holes or clearing.
Using fog (see Fog) in addition to sunbeams can increase render times.
Turbidity Dependent: If, as in reality, you want to let atmospheric particles affect your sunbeams, simply activate this option. This links the visible sunbeams to the Turbidity setting (Environment > Physical Sky > Sky > Physical Properties). The more hazy the air (atmosphere), the better the sunbeams can be seen. If Turbidity is set to 0, no sunbeams will be visible.
Intensity: Here you can adjust the brightness of the sunbeams
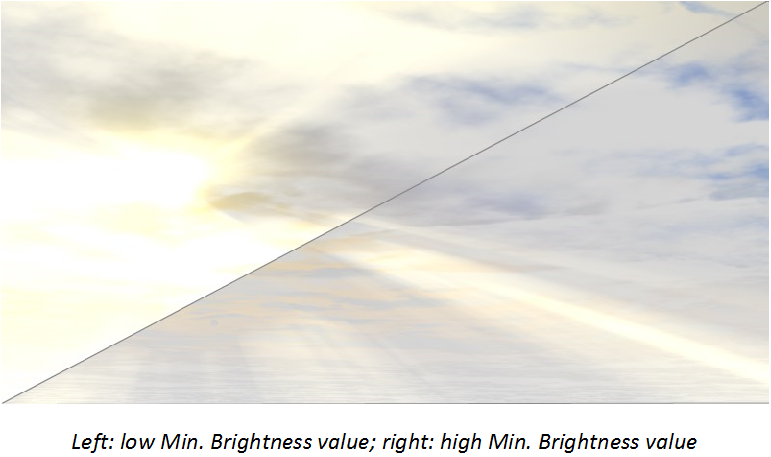
Min. Brightness: Use this control to determine at what minimum brightness value (internal) the sunbeam will become visible. Select a high value if you want to make only the brightest sunbeams visible, a low value if you also want to make weak sunbeams visible. The brightness of the rendered sunbeams is defined by Intensity.
Start Distance/End Distance
These settings, calculated from the camera’s point of origin, let you define an area within which sunbeams will be depicted. T
Sample Distance: Everywhere that physical effects are simulated (e.g. a ray of light loses intensity over a particular distance), points of measure (samples) are defined that calculate the level of intensity at a given location. The more samples you define, the more precise the result will be. Longer render times will also result.
The same applies to Sample Distance: The lower the value, the more precise the sunbeams will be rendered (and the render times will increase as well).
Use these controls to add additional details to your Physical Sky.
Show Moon: Defines whether or not the moon should be shown.
•Scale: Here you can vary the size of the moon.
•Bright Intensity/Dark Intensity: Use these settings to define the bright side of the moon (side lit by the sun) and the dark side of the moon (side not lit by the sun). If you want a full moon, set both settings to 100%.
•Distance Scale: If you encounter problems with the light source integrated into the moon, simply reduce its distance using this setting.
Show Stars: Check this box to display stars.
•Star Min. Magnitude: The Magnitude value represents the apparent brightness of stars on a firmament. Use this control to determine the stars’ minimum magnitude at which they should be visible. The following rules apply:
•Low value: Only the brightest stars will be projected
•Maximum value: All stars in the internal database will be projected.
•Resize Stars with Magnitude: Depending on the magnitude (brightness) of the stars, individual stars will be scaled, thus adding even more realism. If this option is not active, all stars will have the same size.
•Brighten Stars: Use this control to adjust the brightness of the projected stars: The higher the value, the brighter the stars.
•Star Radius: Use this control to adjust star size
•Show Constellations: Check this box to display constellations.
•Constellation Color: Constellations can be displayed in any color. If you set anti-aliasing mode to Best in Render Settings (see Antialiasing), the constellations (as well as the Grid - see below) will be smoothed when rendered.
•Grid Width: The celestial sphere is similar to the earth being divided along longitudinal and latitudinal lines, though here they are referred to as azimuth and height. The grid can be made visible by setting Grid Width to 10°, for example. Azimuth and height will then be represented by a line every 10°.
•Grid Color: Defines the color of the grid.
The grid will be smoothed if you set anti-aliasing mode to Best in Render Settings (see Antialiasing).
Show Planets: Enable or disable the display of our solar system’s planets (Mercury, Mars, etc.).
Sky Dome Light: In addition to the sun (which itself is a “normal” internal light source) an area light source that is (almost always) blue exists that simulates the bluish light emitted by the atmosphere. This light can now be disabled (this bluish light is sometimes not desirable for scenes rendered without GI).
Generate GI
See Illumination for information about Global Illumination.
Note: The GI emitted pertains only to the sky, not any other elements, i.e. Fog, Rainbow, etc.
•GI Strength: Defines the strength of the generated GI.
•GI Saturation: Defines the amount of saturation of the light emitted by the sky, i.e. how blue (or orange for early evening scenes) the scene should be rendered.
•GI Cloud Influence: Defines the degree to which the 2D Cloud color should affect the GI. A value of 0% means that the cloud color will be ignored entirely and only the sky itself will be used.