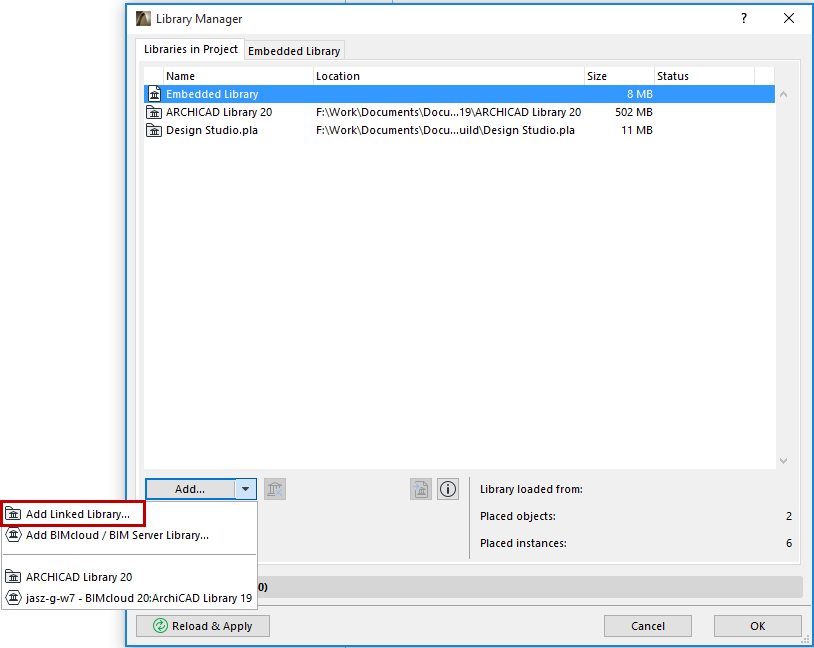
Linked Libraries include the standard ARCHICAD library loaded by default, as well as any other libraries you add. In contrast to the objects of the Embedded Library, these libraries are linked folders, or .lcf or .pla files.
Note for Teamwork Users: In Teamwork mode, there are no linked libraries - only the Embedded Library, and BIMcloud/BIM Server Libraries.
To add a linked library to your solo ARCHICAD project:
1.Open Library Manager.
2.From the Libraries in Project tab page, click Add, or click Add Linked Library from the Add button’s pop-up list.

3.Browse for the desired folder, select it, then click Choose.
Note: If you add a folder containing a .pla file to your Linked Libraries folder, be aware that the library parts in the .pla file at the top of the hierarchy will be mounted. However, if the folder contains additional. pla files at a deeper level of the hierarchy, those .pla files will not be mounted. The solution is to add these .pla files to your project as separate files, rather than adding the folder that contains them.
•Use Drag and Drop. From any location on your computer, drag and drop a library file or folder into the Linked Libraries folder of Library Manager.
The chosen folder is now listed in the Library Manager.
When you are finished, click OK to reload project libraries and close the Library Manager.
Alternatively, you can reload libraries without closing Library manager: click Reload and apply.

Feedback at the bottom of the Library Manager provides
•the selected item’s Path
•the number of placed objects from this library
•the number of placed instances.
If the selected linked library is unavailable, the number of the project’s missing objects and instances which originate from this unavailable library are also listed.