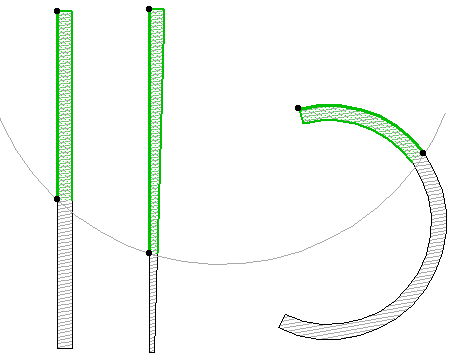
You can split many selected elements (Walls, Beams, Lines, Slabs, Roofs, Meshes, Fill and Zone Polygons, Lines, Arcs, Polylines and Splines) along a line segment, arc or element edge.
The Split command is available in the Floor Plan and 3D Window, and - for drawing elements only - in Section/Elevation/IE and 3D Document windows, and Details and Worksheets.
Note: You cannot split a polygon - such as a Roof element - with an arc.
Note: You can split a Curtain Wall with another Curtain Wall, but you must use the Split Curtain Wall command.
See Split Intersecting Curtain Walls.
The splitting plane is always perpendicular to the Floor Plan.
Exception: If you are splitting a Morph, you have more freedom: the splitting plane can be set perpendicular to the current editing plane.
1.Select the elements you wish to split.
2.Choose the Edit > Reshape > Split command, or the hatchet icon from the Info Box.

3.Draw a temporary splitting line, or click on an existing Line, Arc, Wall or polygon edge.
In the 3D window, a red splitting plane is shown as feedback.

4.Click on either side of the splitting line/arc/edge with the Eyeball cursor.
Note: When splitting walls, the split takes place at the point where the splitting line intersects with the reference line(s) of the selected elements.
5.Elements on the clicked side will remain selected, while elements on the other side will be deselected. The selected group of elements can be edited in the usual ways.
If the selected element is intersected by an element in several locations, the Split command will split the selected element at every intersection point.
Splitting is also available in the 3D Window. You can split the selected element with a vertical plane into two segments. This feature works the same way as on the Floor Plan. The splitting line is drawn in the plane of the User Origin.
Note: When no elements are selected, the Split command will let you split a wall at the clicked location along any of its sides or reference line.