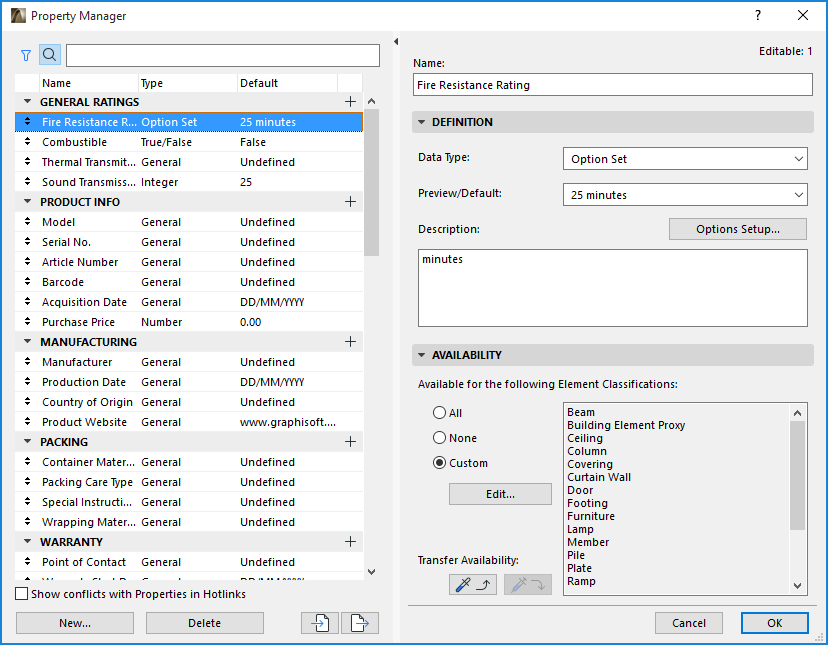
Use the Property Manager (Options > Property Manager) to create and manage the set of properties for this project and customize their availability for the various element classifications.
Note: For information on assigning property values to individual elements, see Assign and Edit Property Values in Element Settings.
Search and Filter Property List
By default, the left side of the Property Manager lists all the properties available in the project.
To narrow the list of properties shown, use the Search and Filter icons at the top of the list:

Search for a property by name:
Click the Search icon, then start typing text into the search field. All property and group names containing the search term are shown.

To view the full list of properties again, delete the text from the Search field.
Filter by Element Classification:
Click the Filter icon, then choose an Element Classification from the pop-up.
This way, only the properties of the selected Classification are listed.

To view the full list of properties again, choose All Element Classifications from the filter list.
For more information, see Element Classification.
1.Open the Property Manager dialog box at Options > Property Manager.
2.Do one of the following:
•Click the New button at the bottom of the dialog box
•Click the Plus sign to the right of any Group name
3.In the Add Property/Group dialog box: Choose a radio button for either a new Property or Group, then enter its name.

4.Add to group: For a new property, choose the group into which it should be placed.
Optionally, check “Duplicate of” to duplicate the values of an existing property or group (from the drop-down list) under a new name.
5.Click OK to create the new item.
Each property has a data type. The data type determines the format of the value(s) that can be assigned to this property (in Element Settings/Info Box).
To set a property’s data type:
1.Select a property from the left side of the Property Manager.
2.Choose a Data Type from the right side of Property Manager:

•General: Can be any text or number (e.g. for the “Manufacturer” property)
•Integer: A whole number (e.g. for the “Sound Transmission Class” property)
•Number: Any number expressed in decimals (e.g. for the “Purchase Price” property). The number of decimals displayed is set at Options > Preferences > Working Units.)
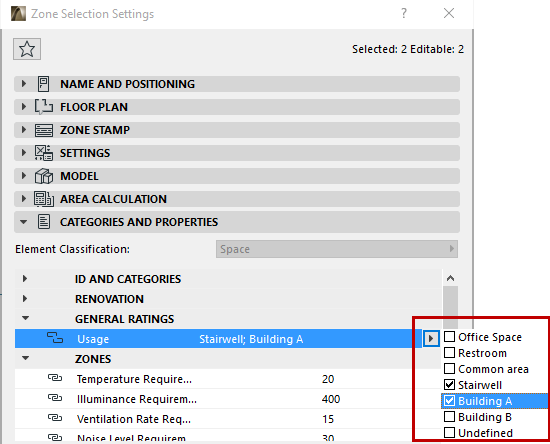
•Tags List: Can be a tag or series of tags (e.g. Building A, Floor 2, Common Use, Kitchenette)
•Option Set: Provides a fixed set of options (e.g. for the “Fire Resistance Rating” property)
For details, see Options Setup below.
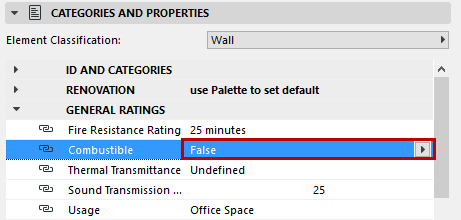
•True/False (e.g. for the “Combustible” property)
If desired, enter a default value or edit it for this property.
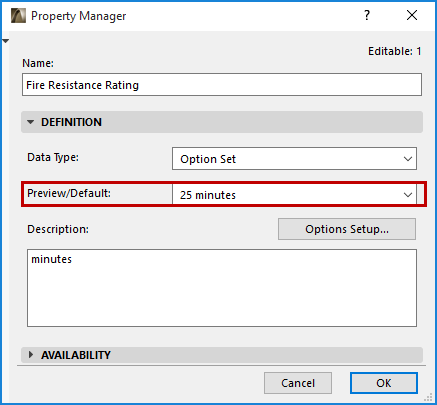
If you edit a property’s default value in Property Manager, all linked property values are updated accordingly at the element level.
See Link Property to Default Value.
This button is active only if the Data Type is “Option Set”. Click to open the Options Setup dialog box.
Use Options Setup to list a set of specific values that the user can choose from when defining this property for a particular element.
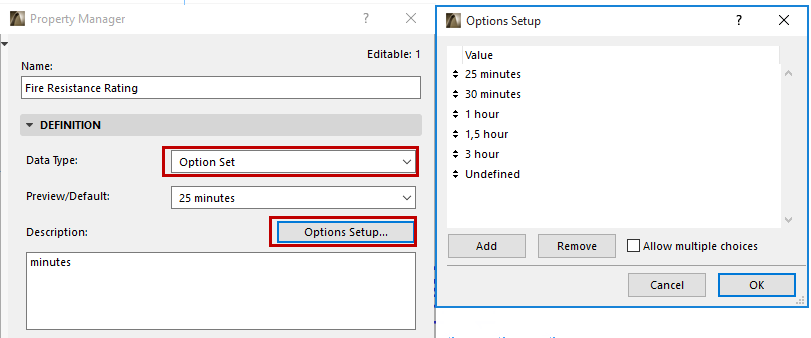
•Click Add to add a new option (type a value into the New Option line).
•To delete an option, select it and click Remove.
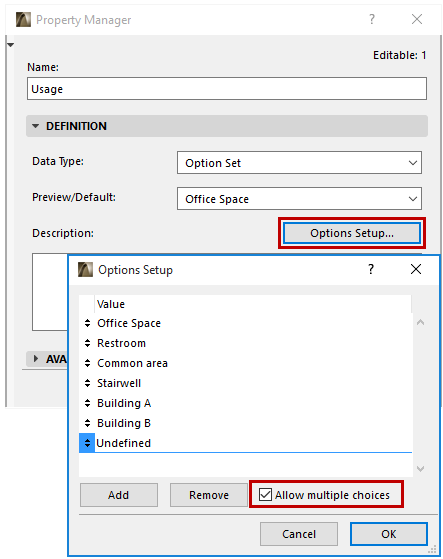
•Check Allow multiple choices to enable the user to choose more than one value for this property in Element Settings (or the Info Box).
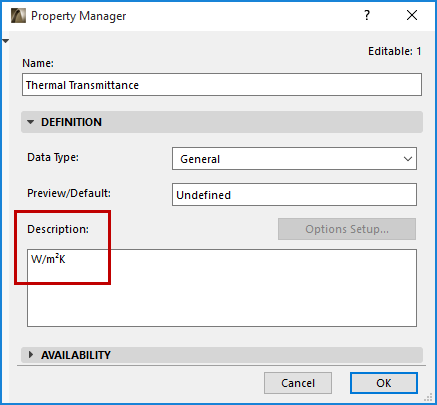
Optionally, enter any further information here to guide the user in assigning a value (in Element Settings) to this element property. For example, the purpose of the property; recommendation for its format or measurement unit: “minutes” for the Fire Resistance Rating Property, or “W/m2K” for Thermal Transmittance.
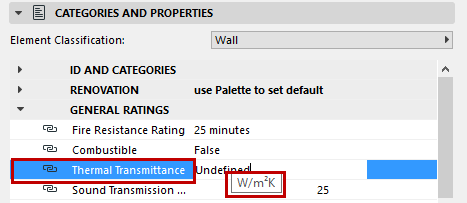
In Element Settings, this description is visible by hovering over the property name:
Properties available in the element’s Settings dialog box depend on the Element Classification.
See Element Classification for details.
Use the Availability controls in Property Manager to define which properties go with which Element Classification. For any Properties or Groups selected on the left, select Element Classifications on the right.
•When setting Availability, you can multi-select any set of properties from the list on the left.
•If you select a group, the Availability definition is applied to all properties in that group.
Availability Settings:
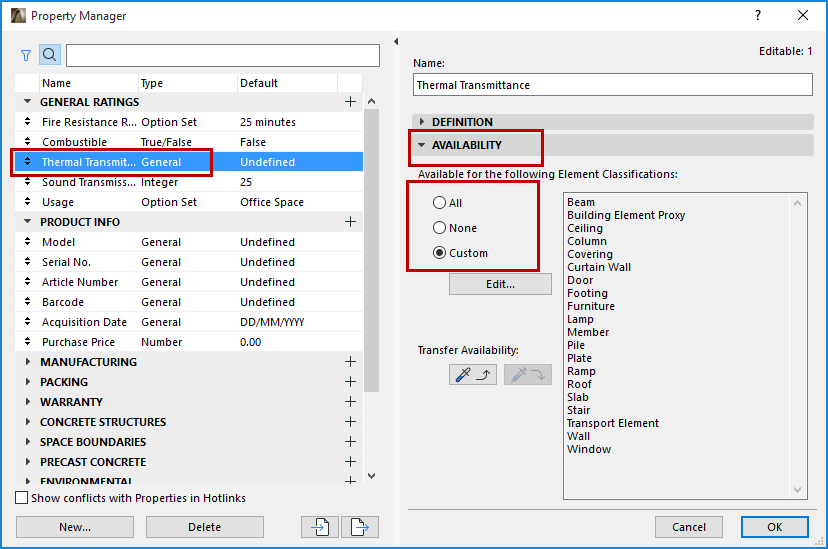
•All: The groups or properties selected on the left will be available in the Settings dialog boxes of all 3D elements (regardless of their Element Classification)
•None: The groups or properties selected on the left will not be available for any elements in the project. (You might set certain properties to None if the current project does not use them, yet you still want to use them in other phases of the same project, or other projects, e.g. in a template).
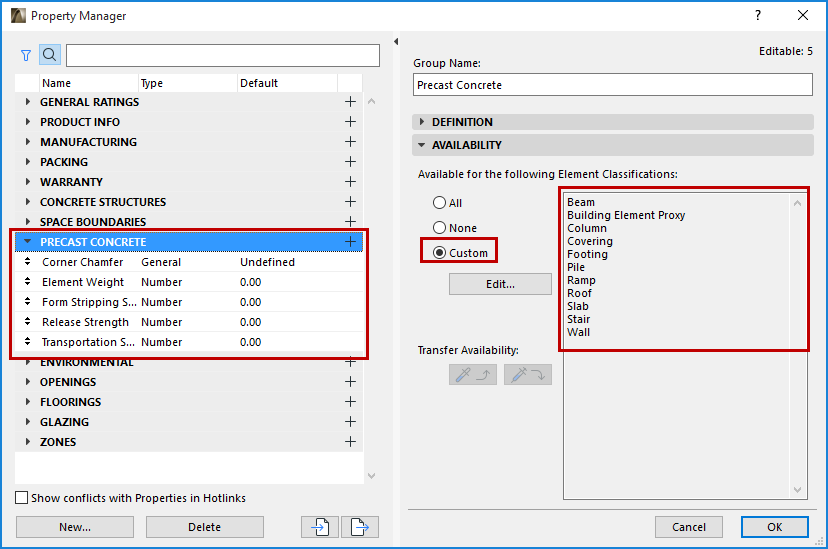
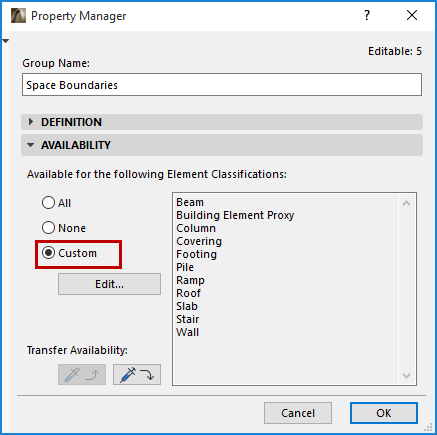
•Custom: Click this option, then click Edit to select the Element Classifications that should use this property or group.
The groups or properties selected on the left will now be available in the Settings dialog boxes only for the elements having one of the Element Classifications you have checked here.
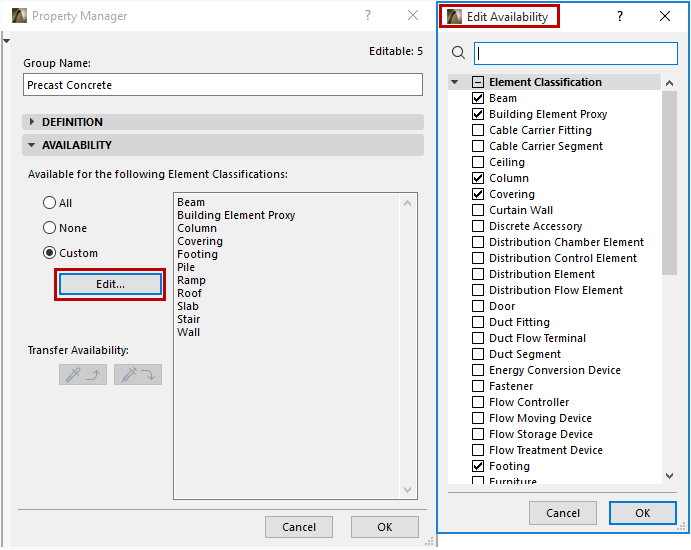
For example, the properties of the Precast Concrete group (selected at left) are available to elements that have one of the Element Classifications custom-selected at right (Beam, Column, etc.) - logically, those which might be of precast concrete:
You can use Find and Select to locate elements for which a specific property is available (or not available).
Transfer Availability:
To transfer a property’s Availability definition to another property or group, use the Transfer Availability buttons in Property Manager:
1.From the Property list at left, select the property whose Availability definition you want to transfer.
2.Click the “Pick up” icon.

3.Select a property or group to which to transfer the availability data.
4.Click the “Apply Availability” icon.
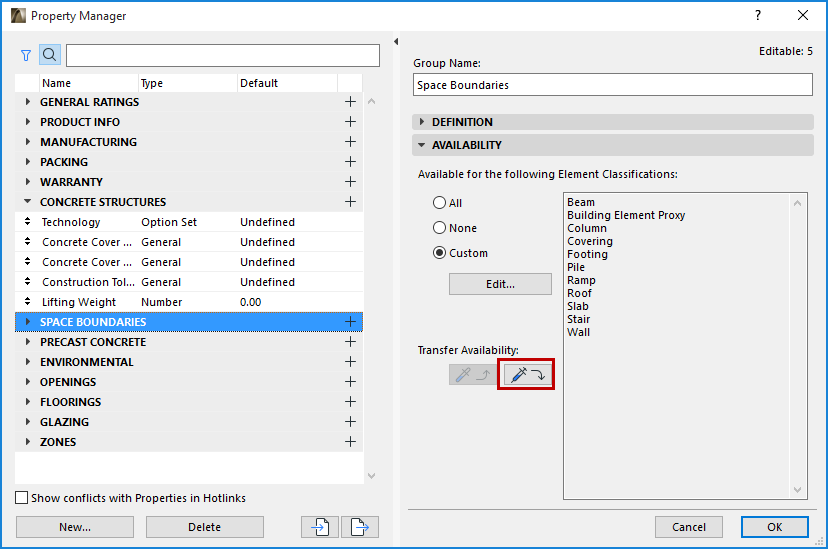
The availability data of the selected group (or property) is customized accordingly.
Changes in Property Manager
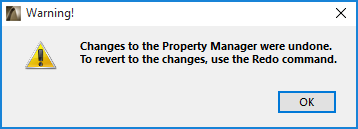
•After making edits in Property Manager, click OK to accept the changes and close the dialog box. At this point, you can use Undo/Redo to undo/redo the Property Manager edits.
•If you edit a property’s Data Type in Property Manager, all the project elements that use this property will retain their assigned values as far as possible. For example, if you change the Combustible property’s True/False data type to the General data type, an element’s Combustible property value that was set to False will stay that way, except it now becomes editable, as a General data type.
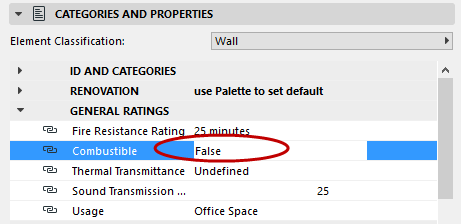
Data Type Changed from True/False to “General”