Color (CineRender Surface Channel)
The settings on this page define the basic color of the surface.
Defining Color and Brightness Values
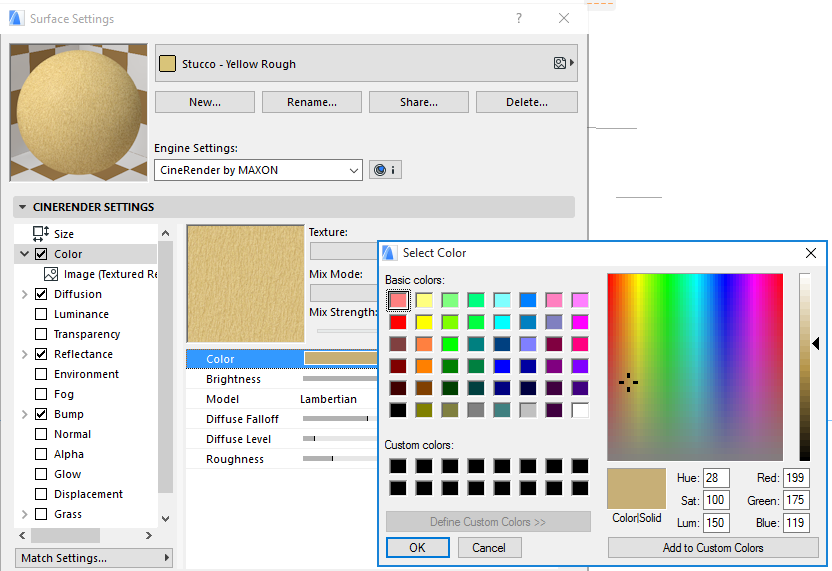
Many surface channels contain (apparently identical) color selection options. Once a color has been defined it can be brightened or darkened using the Brightness slider.
Click the Color swatch to access the Color picker.

If you want to create a more complicated surface, such as a checkered pattern that uses several colors, you can load a texture. The texture is layered above the color.
See Textures (CineRender Surfaces).
If you want to see the color only and not the texture, set the Mix Strength value to 0%.
See Mix Mode and Mix Strength (CineRender Surfaces).

Choose the illumination model for the surface: Lambertian or Oren-Nayar.
•For a shiny surface needing accurate highlights, choose Lambertian.
•For rough surfaces — like cloth, sand, concrete and plaster — choose Oren-Nayar.
Note: The Blinn model is now located in the Reflectance channel’s Type menu as Specular-Blinn (Legacy).
This value defines the falloff of brightness between the specular highlight (surface Normals point in the direction of the light source) and the regions in which the surface Normals have an angle of 90° to the light source, i.e., they do not reflect light from the object surface. The default value of 0% reflects a normal falloff behavior. The larger the value, the more uniform the brightness will be, up to the point of producing a comic-like look (uniform colors). If negative values are used, the 90° angle mentioned above will be reduced accordingly, which will produce correspondingly smaller regions from which light will be reflected.
Available only with Oren-Nayar shading.
Use this parameter to alter the general diffuse brightness that is reflected for the Oren-Nayar model (very similar effect to the above-described Brightness setting).
The default of 100% means normal diffuse reflection. Enter a lower value to reduce the amount of reflection.
Available only with Oren-Nayar shading.
Larger values will produce a correspondingly more diffuse light dispersion; the surface will become correspondingly darker and duller.
Smaller values will produce a light dispersion increasingly similar to the Lambert model.
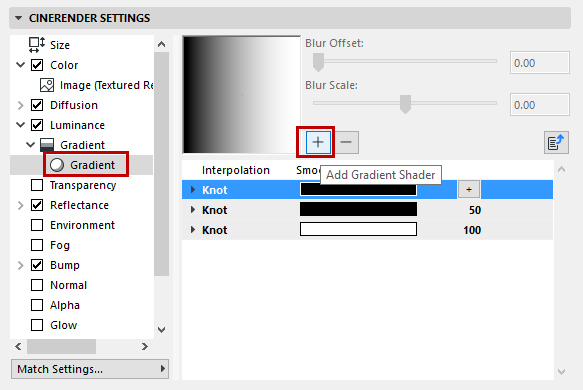
Every time you adjust a color gradient, you can play with its interpolation parameters.
•From the interpolation pop-up, set an interpolation type, which will be globally applied to each knot.
•The knots (or handles) below the gradient are used to set the color and position of the gradient.
•Add as many knots as needed for the interpolation, by clicking the Plus icon (Add Gradient Shader) at the top of the list. For each knot, you can set its color, intensity, position and bias (the horizontal distance that the curve is displaced between any two knots).

•If you select an existing knot and click Add Gradient Shader, it will duplicate the selected knot. Knots are automatically ordered from 0 to 100 based on their Position value.
Once a color has been defined it can be brightened or darkened using the Brightness control. Click the arrow at the right of the slider to increase the value past 100%: this increases brightness dramatically.This can be useful if the brightness of a Luminance channel, for example, is used in conjunction with Global Illumination to illuminate a scene, or if the shadows generated by a weak light source should be strengthened using the surface’s Color channel.
Note: Depending on the value of the Glass/Mirror Optimization parameter (CineRender Detailed Settings > Global Illumination > Details), GI will ignore all surfaces whose transparency or reflection Brightness value exceeds this optimization value.
See Glass/Mirror Optimization.
Texture
Here a texture or a 2D shader can be defined. If you load a texture or a 2D shader, it is placed on a layer above the color (i.e. the texture is placed on top of the color).