ARCHICAD Network Installation (Instructions for BIM Managers)
With a Commercial and certain Education licenses, GRAPHISOFT offers you the option of creating an Installation package that contains your company-standard settings.
Using this installation package, you can save time by installing ARCHICAD 21 at multiple workstations according to your customized, company-preferred configuration.
The following settings can be predefined in the network installation package:
•Work Environment settings;
•DXF/DWG Translators
•Project templates
To do this, choose the special installation option that automatically records your installation process and creates the installation package. The resulting install file can then be started on any number of client machines. This process is detailed below.
Note for Educational Institutions: If your ARCHICAD license is registered to an educational institution, you can use the Installation Package Creation process to create a recorded installation and simplify the installation of multiple identical copies of the program - even if you wish to use factory defaults instead of custom-defined settings.
Network Installation Step by Step
To create a custom installation package, follow these steps:
1.Complete a Standard Single Installation
The first step is to do a Standard installation of ARCHICAD on a single client machine.
Follow the instructions at “Install ARCHICAD 21: Single License” on page 39. Choose the “Typical” Setup.
Next, set up your preferred Work Environment/Template/DXF-DWG translators, as described below:
2.Customize Work Environment Settings
Start ARCHICAD, then use the dialog boxes at Options > Work Environment to set up your company standard Work Environment settings. Most such options are found in three dialog boxes of Company Standard Schemes: Data Safety & Integrity; Network and Update; and Special Folders.
Once you have set these options, save these settings as schemes, then save the schemes in a company-default profile. To save a profile, go to Options > Work Environment > Work Environment Profiles.
3.Customize Templates
Create and save any number of template files. Template files include links to libraries loaded through Library Manager (e.g. “Office Standard Library”). Templates can also include Project Preferences (e.g. Working Units, Zone calculation preferences), and such items as Master Layouts, Project Info, placed elements (e.g. Elevation markers, entire buildings).
Save each template using File > Save as... (ARCHICAD Template file *.tpl).
4.Customize DXF-DWG Translators
Use the DXF-DWG Translation Setup dialog box (File > Interoperability > DXF-DWG Translation Setup, to set up company-standard DXF/DWG Translators. Follow one of these two workflows:
•If you want users to have the customized Translator files downloaded to each local computer:
◦You will place the customized translator files into the proper sub-folder of your Defaults folder (as in Step 8 below).
•If you want users to access your DXF/DWG Translators from a central location:
◦From the Translation Setup dialog box, save the customized translators to a shared folder on a server. A DXF-DWG TranslatorList.xml file is also created, which is a list of references to these translators. You will add this xml file to your Defaults folder (as in Step 9 below.)
5.Quit ARCHICAD
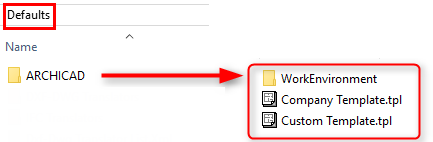
6.Create “Defaults” Folder
Create a temporary Defaults folder in any location.
Within this Defaults folder, create sub-folders and add your saved, customized defaults as described in the next steps.
7.Create Defaults/ARCHICAD sub-folder.
◦To the ARCHICAD sub-folder, add your saved “WorkEnvironment” folder and its contents.
|
Where to find saved WorkEnvironment folder: Users\<Username>\AppData\Roaming\Graphisoft\ARCHICAD-64 xx.0.0 yyy (Windows) ~/Library/Preferences/Graphisoft/AC-64 xx.0.0 yyy (Mac) where xx stands for the version number of ARCHICAD and yyy is the language version of ARCHICAD. |
◦Also to the ARCHICAD sub-folder, add your saved Template file(s) (extension .tpl).
8.Create Defaults/DXF-DWG Translators folder. (Do this if you want users to have DXF/DWG Translator files downloaded to each local computer. Otherwise, see step 9.)
◦To the DXF-DWG Translators sub-folder, add the contents of your saved Translator folders.
|
Where to find saved Translator folders: Users\<Username>\GRAPHISOFT\DXF-DWG Translators xx.0.0. yyy (Windows) ~/Library/<Username>/GRAPHISOFT/DXF-DWG Translators xx.0.0. yyy (Mac) |
9.Add the DXF/DWG Translator List.xml file to the Defaults folder. (Do this if want users to access your DXF/DWG Translators from a central location.)
|
Where to find the Translator List XML file: Users\<Username>\AppData\Roaming\Graphisoft\ARCHICAD-64 xx.0.0 yyy R1\Dxf-Dwg Preferences\ (Windows) ~/Library/Preferences/Graphisoft/AC-64 xx.0.0 yyy v1. (Mac) |
10.Uninstall ARCHICAD; Re-start Installation
Uninstall ARCHICAD from your computer, then run the Installer again.
Alternatively, run ARCHICAD Installer on the server or on another machine.
11.Start-up Presentation
After you insert the ARCHICAD DVD, or double-click on (extract) the ARCHICAD 21 Download folder, the start-up presentation will be launched.
12.Start Installation Wizard
Click on Install GRAPHISOFT ARCHICAD to start the ARCHICAD Installation Wizard.
13.Welcome Screen
Make sure that you close all running programs before you proceed with the installation.
Click the option for Install as BIM Manager.
Then click Next.

14.Choose License Type
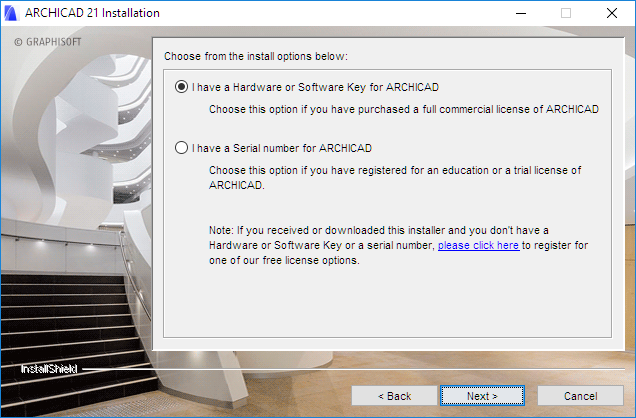
Click the option that corresponds to your license type: Hardware or Software Key for ARCHICAD, or a Serial Number (for Education and Trial Licenses).
Then click Next.
15. License Agreement
Read the license agreement carefully and accept it, then click Next.
16.Program Folder Selection
On this page, you can define the file path of the installation. As a rule, you should choose the path suggested by default, to simplify the installation of any future updates.
To confirm the file path, click Next.
17.Choose Setup Type
To prepare for Network installation, choose the option for Installation Package Creation.
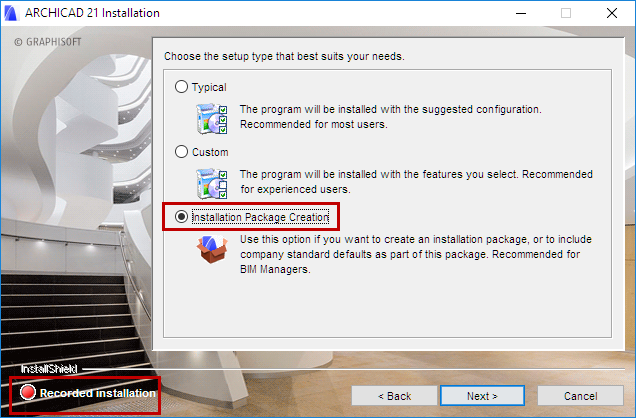
The screens of the Installation Wizard will now show the message “Recorded Installation.”
18.Choose Program Components
Select the features you wish to install.
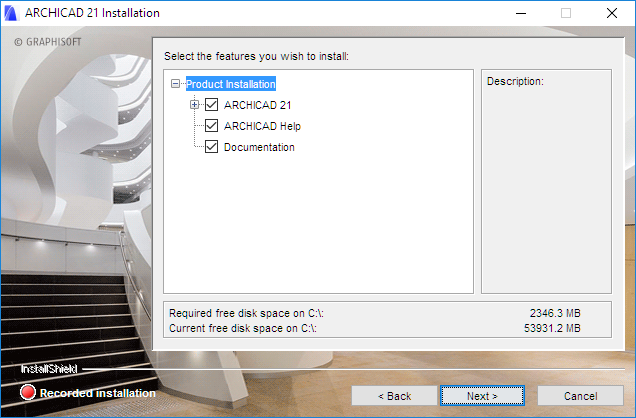
After you make your choice, click Next.
19.Install Company Standards
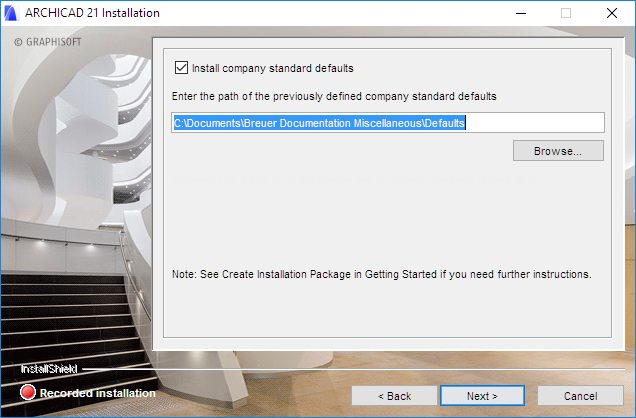
Check Install Company Standard Defaults, and enter the file path location of the Defaults folder (containing Work Environment/Translators/Templates) which you created earlier. (See Create Defaults Folder at Step 6 above.)
Click Next.
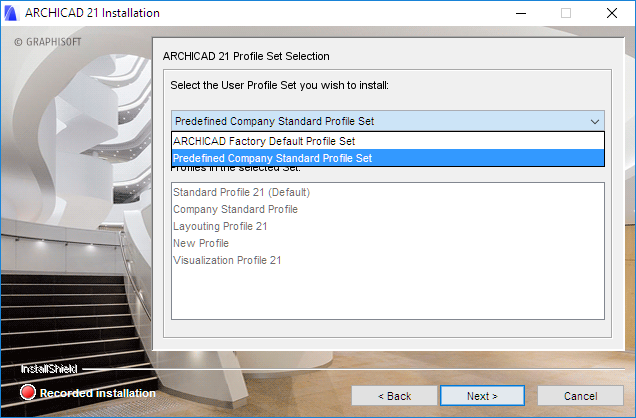
20.Install Customized Work Environment
Choose Predefined Company Standard Profile Set to include your customized Work Environment in the Installation Package.
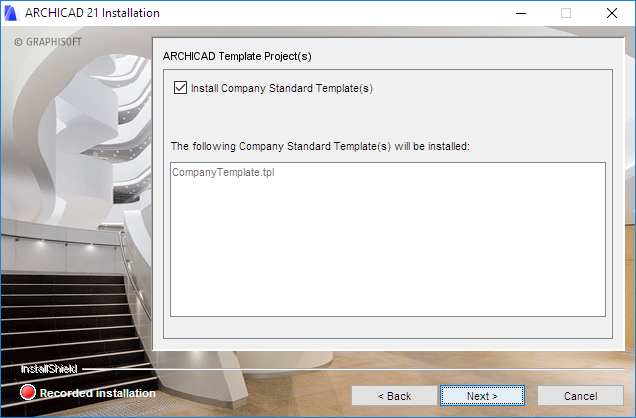
21.Install Company Standard Template(s)
Check this box to include your saved Template in the Installation Package.
22.Installation Summary
This screen summarizes your chosen configuration, so you can make any needed corrections to the installation settings.
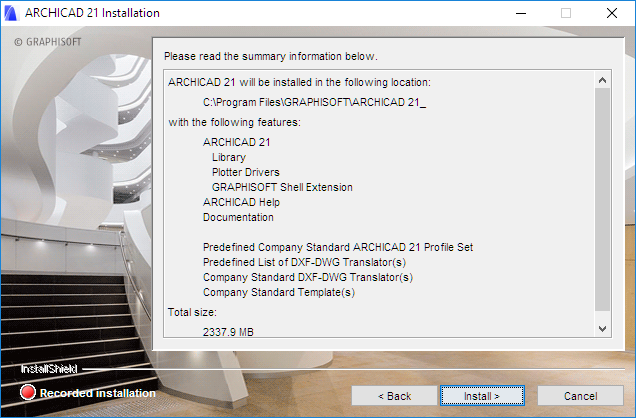
Click Install to begin installation.
23.Installation
Depending on your hardware, this process may take several minutes.
24.Import Work Environment
Do not import any older-version Work Environment; do not change the default choice.
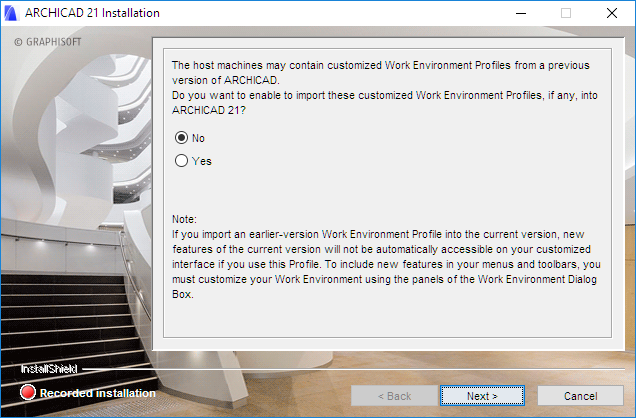
Click Next.
25.Shortcuts/Automatic Updates
Here you can create an “ARCHICAD 21” Desktop shortcut.
Review the setting to Enable ARCHICAD to Check for Updates automatically (checked by default).
Click Next.
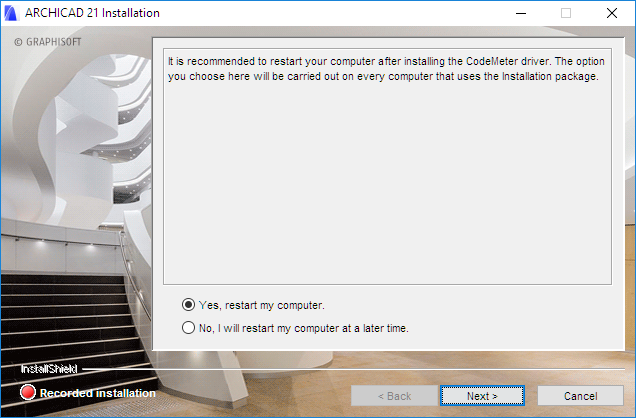
26.If the installation process includes installing CodeMeter, you are prompted to restart your computer now. If you click Yes (recommended), the restart will be carried out on every client computer that uses the install package.
27.Define File Path
Define a file path location for the Installation Package, then click Next to confirm.
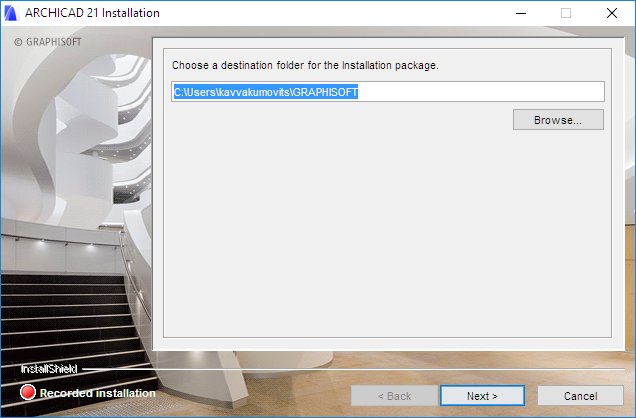
The Installation Package will now be written. Depending on your hardware, this process may take several minutes.
Click Finish to close the Installer. You may be prompted to restart your computer.
You have now created an Installation Package. Users who start this package on a client machine will not encounter any options in the Installation wizard, and the installation process will begin immediately.