Copy Cell Pattern in Curtain Wall
Curtain Wall Frame Intersections
Create Common Frame for Adjacent Curtain Walls
Frames are placed along the Grid when you create the Curtain Wall. If you move or delete a grid line, you move or delete the Frame. (In Curtain Wall Edit mode, you can place additional Frames independent of the Grid.)
In a multi-segment (Chained) Curtain Wall, a Frame is always placed at the place where two adjacent segments are joined. Such a Frame cannot be deleted.
You can define three types (“classes”) of Frames for any Curtain Wall: Boundary Frame; Mullion Frame; Transom Frame.
See Curtain Wall Settings: System Page: Member Placement Panel.
See Curtain Wall Settings: Frame Pages (Boundary, Mullion, Transom).
•Boundary Frames are placed along the Curtain Wall Boundary.
•Mullion and Transom Frames are placed along either the Columns or Rows of the grid lines.
See Curtain Wall Settings: System Page: Member Placement Panel.
For example, in this image, the Frames in the Boundary class are red; the Frames in the Mullion class (coinciding with the grid columns) are blue; and the Frames in the Transom class (coinciding with the grid rows) are green.
The Frames in each class are linked to the settings for each class, defined in Curtain Wall Settings.
See Curtain Wall Settings: Frame Pages (Boundary, Mullion, Transom).
When a Frame is selected in Edit mode, you can
•Open Frame Selection Settings and change them
•Drag, Mirror, Rotate or Multiply the Frame
•Delete the Frame
Note: Deleting a Frame is only possible if the two panels on either side of the Frame are both in the same plane. If the panels are not in the same plane, you must first delete the grid line which runs between them. On a non-planar Curtain Wall surface, deleting the grid line modifies the Curtain Wall geometry so that the panels are now in the same plane, and the Frame is deleted along with the grid line.
See also Multi-selection of Frames and Panels.
Available in 3D window.
A newly added Frame can be independent of the Grid, but the new Frame must be drawn so that its endpoints coincide with existing Frames.
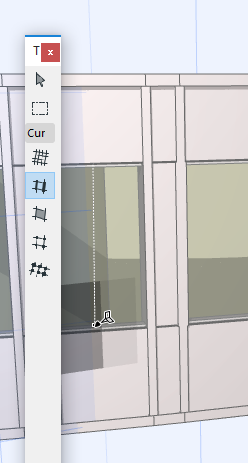
1.To add an additional Frame, enter Curtain Wall Edit mode.
2.Activate the Frame Tool.
3.Use the Info Box to define the Frame type and the Frame class whose parameters it should use (e.g. Mullion).

To set Custom parameters, open the Frame Settings page and adjust the parameters as needed. The Info Box will now reflect that the Frame Settings are Custom.

4.Draw a new Frame on the Curtain Wall in Edit mode.
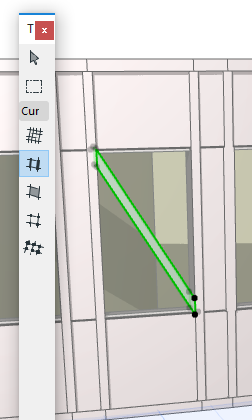
If you draw the Frame on a Grid line, then the Frame will be attached to the grid line. Moving the Grid will move the Frame.
If you draw a new Frame that crosses an existing grid line, the Frame will be segmented automatically where it crosses the grid line.
Copy Cell Pattern in Curtain Wall
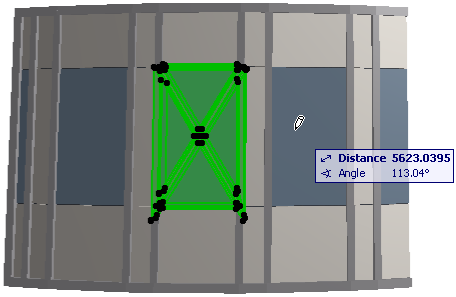
To copy the Frame pattern of any cell in the grid to another cell:
1.Make sure you are in Curtain Wall Edit mode, with the Frames visible.
2.Issue the Design > Modify Curtain Wall > Copy Cell Pattern command.
3.Click in the cell whose Frame pattern you wish to copy.
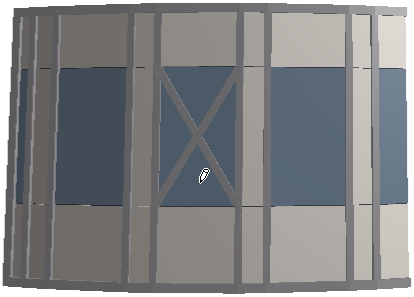
4.Click in the cell to which to copy the Frame pattern. The Frame pattern is duplicated.
Curtain Wall Frame Intersections
When two Frames meet in a Curtain Wall, the Frame with the higher intersection priority will cut the other one.
Note: While a Curtain Wall Frame does have a Building Material, the Building Material’s intersection priority is ignored in this case.
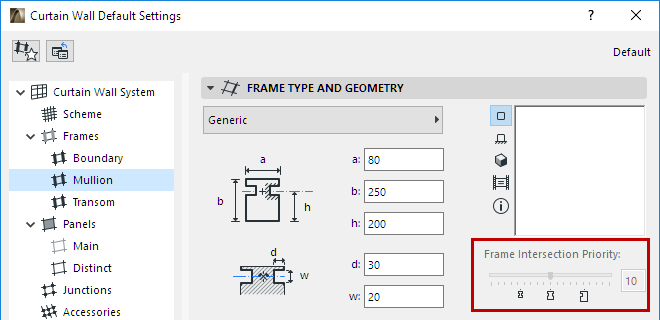
Frame Priorities are predefined for each Frame class in Curtain Wall Settings.
•Boundary Frames: Intersection level 15
•Mullion Frames: Intersection level 10
•Transom Frames: Intersection level 5
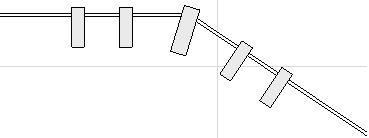
These values are not editable at the level of Frame classes. The slider shows the intersection levels of the built-in Frames (left to right: Transom - 5; Mullion - 10; Boundary - 15).
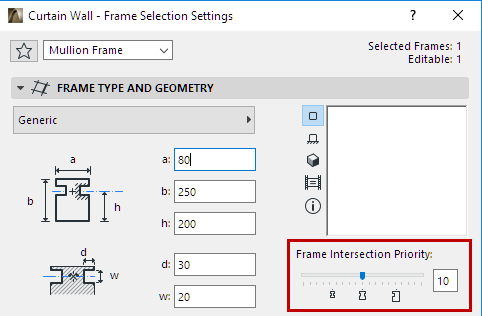
However, you can change the intersection priority of any single selected Frame. In Curtain Wall Edit mode, select the Frame whose intersection priority you want to change. Go to Frame Selection Settings and adjust the slider to the desired level. Changing the Frame’s intersection level - as when changing any other Frame parameter - will result in a Custom Frame.
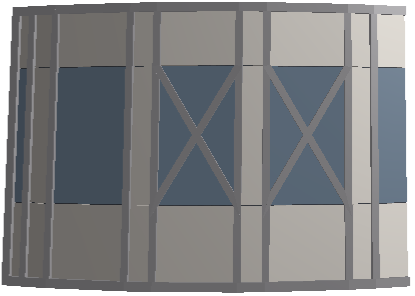
Create Common Frame for Adjacent Curtain Walls
If two adjacent Curtain Walls’ Frames coincide and overlap, use this command to clean up the join. (One of the two overlapping Frames will be transformed into a corner-like Frame, and the other will be transformed into an Invisible Frame.)
Select both Curtain Walls and use Design > Modify Curtain Wall > Create Common Frames.
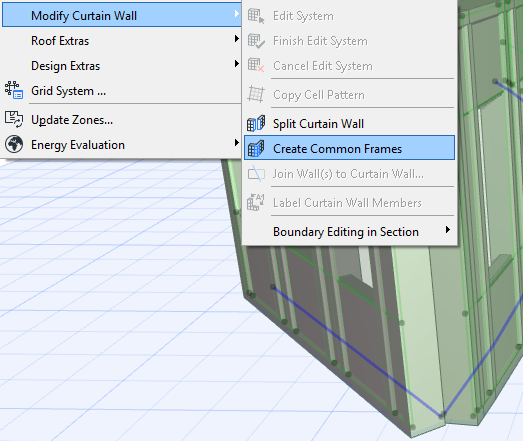
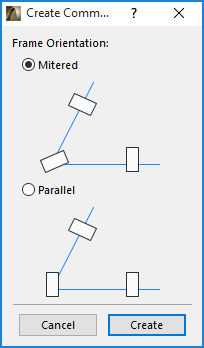
From the appearing dialog box, choose the preferred orientation for the common frame (mitered or parallel to an existing frame).
View the results: