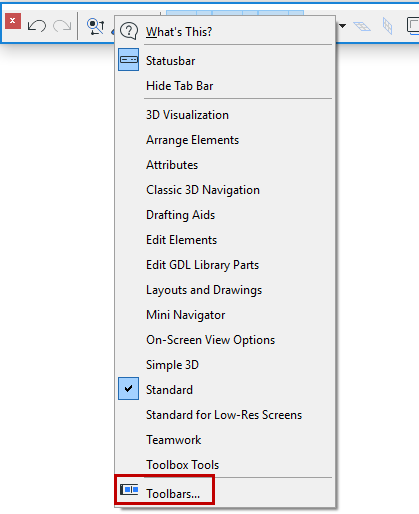
Toolbar Customization Dialog Box
Open this dialog box at Options > Work Environment > Toolbars
Or open any Toolbar’s context menu, then click on Toolbars.
Create New Toolbar
To create a new toolbar, use the New Toolbar command from the Toolbar Options pop-up menu.
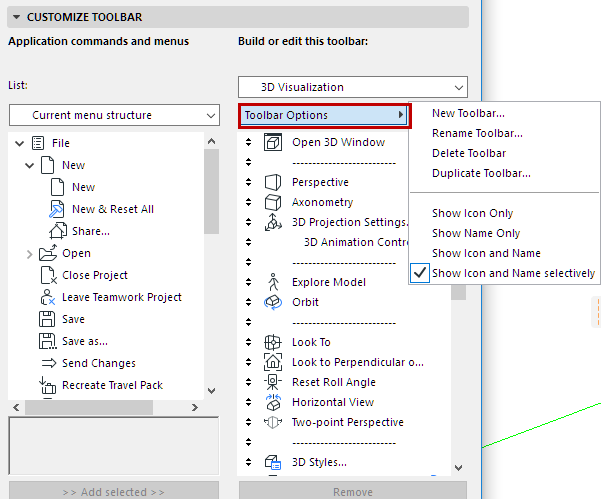
Display Command Icon and/or Name
From Toolbar Options, set a view mode for the selected toolbar: for every command in the toolbar, you can show its Icon, or its Name, or both Icon and Name. You can also choose “Icon and Name selectively”.
Note: Icon and Name Selectively means that the Icon will be shown for every command, but the name will be shown only selectively, depending on what you set in the Further Options panel.
See Further Options Panel, below.
Customize Toolbar
Add, remove and rearrange the menus and commands of any toolbar.
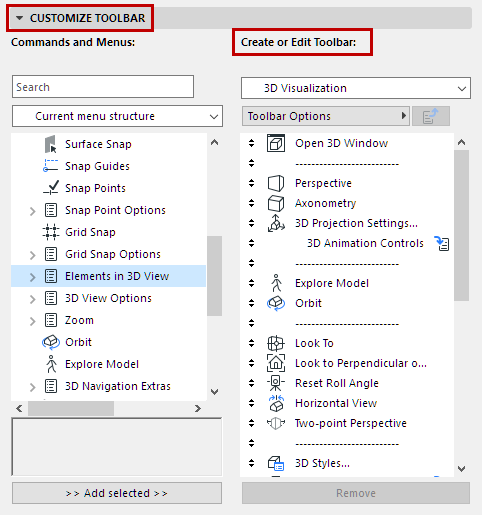
The interface is identical to the Menu Customization dialog.
The settings in this panel apply to selected commands individually.
•Show command name in case of “Selective” option: This checkbox is relevant only if you have chosen “Icon & Name Selectively” from Toolbar Options. In this case, select a command in the list for which you want to show both Icon and Name, then mark this checkbox.
Any command for which you do not check this box will be displayed with its Icon only.
•Sticky pop-up menu: This option is available only if you have placed a menu as an item in the toolbar and then selected it. Check this box to associate the selected pop-up with the previous item in the toolbar. The effect: the sticky menu will be displayed on the toolbar as a black pop-up arrow.
For example, the Tracker command on the Standard toolbar contains an associated (sticky) pop-up menu, represented by a black pop-up arrow, which in turn accesses Tracker-related commands.
![]()