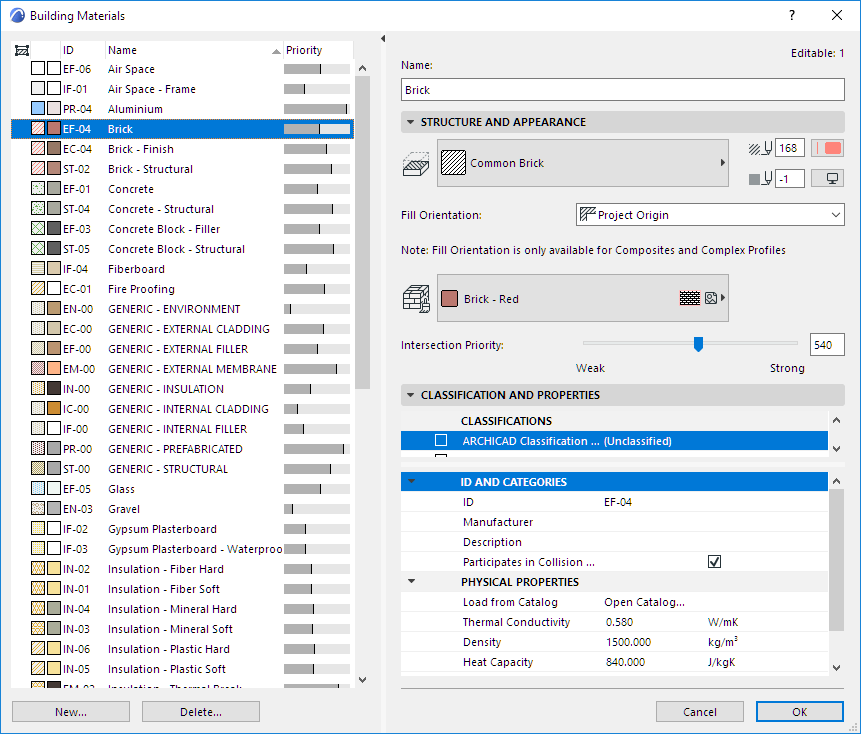
Use the Options > Element Attributes > Building Material dialog box to define and/or edit Building Material definitions. These include:
•Cut fill
•Cut fill pens (foreground/background)
•Intersection Priority
•Fill orientation (if used for a composite or complex element)
•Surface
•Classification and Properties, including Physical Properties
On the left side of the dialog box, the Building Materials predefined for your project are listed by Name and Intersection Priority.
•Sort the list by name or priority by clicking on either of these list headers.
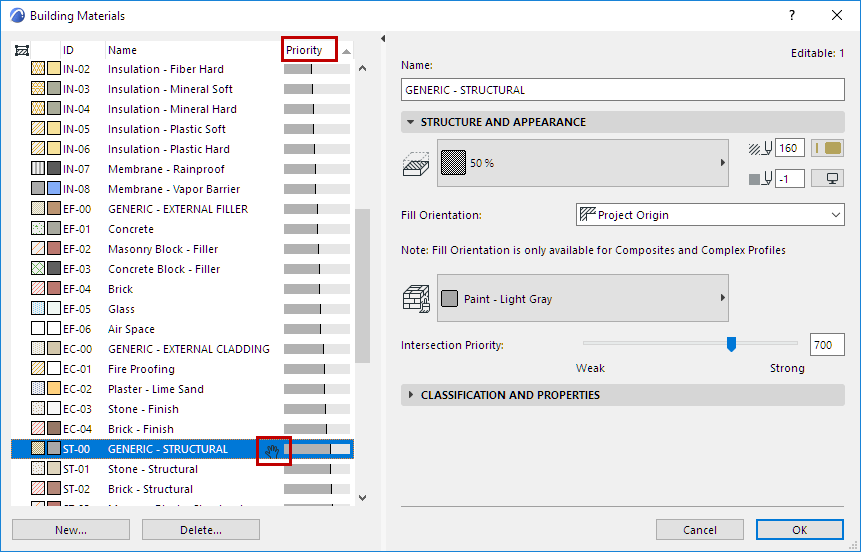
•If you have clicked the priority header to sort by priority, you can then edit the intersection priority of any selected item by dragging it up or down in the list.
•Any Building Materials used by elements that are selected in the current ARCHICAD view are listed with a “selected” icon at the left of the list and highlighted in green.
1.Select the Building Material(s) you wish to edit from the list.
2.Use the fields on the right side of the dialog box to edit the properties of the Building Material(s) selected in the list. You can select and edit multiple Building Materials simultaneously (in this case, you cannot edit their names).
Note: This function is also available in Attribute Manager: See Building Materials (Attribute Manager).
Structure and Appearance Panel

Cut Fill: Define a Cut Fill for this Building Material from the pop-up. The Fills you see here are those defined as “Cut Fills” in the Fills dialog box. (Only cut fills are available.)
Cut Fill Foreground Pen/Fill Background Pen: From the pen chooser pop-ups, define the foreground and background pen for this Building Material.
See also Line Elimination Between Model Elements.
Fill Orientation: This option affects the appearance of the cut fill pattern of Building Materials applied to composite elements and Complex Profiles only.
•Project Origin: The fill pattern is displayed so that the pattern originates at the Project Origin.
•Element Origin: The fill pattern is displayed so that the pattern aligns with the element’s direction.
•Fit to Skin: (Available only for symbol fills.) The pattern will be drawn so that it fits within the limits of the Skin Thickness.
Set Orientation of Vectorial or Symbol Fill Patterns
Symbol Fills as Skins of Composite Elements: Fit to Skin
Define Building Material Surface
Define a Surface for displaying this Building Material in 3D.
Note: It is possible to override a particular element Surface in its Settings dialog box (Model Panel), or by using the Surface override pop-up in the element’s Info Box.
There are two ways to change a Building Material’s intersection priority:
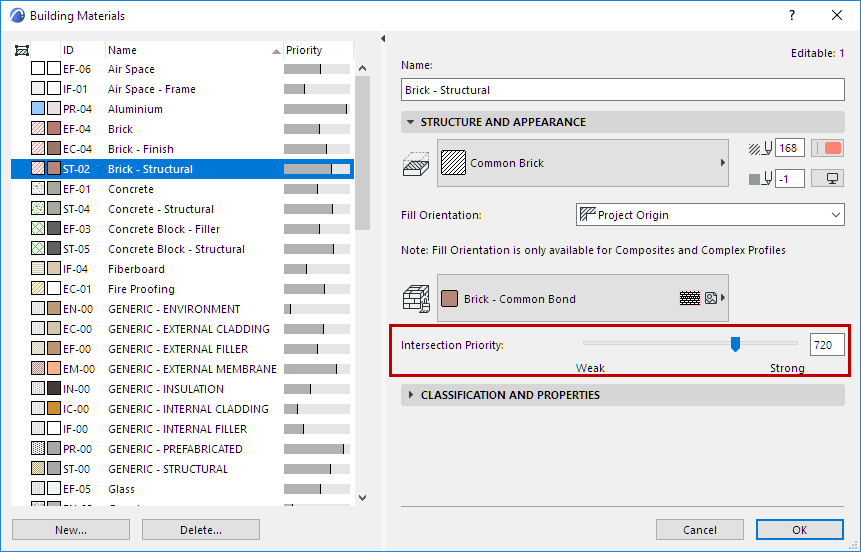
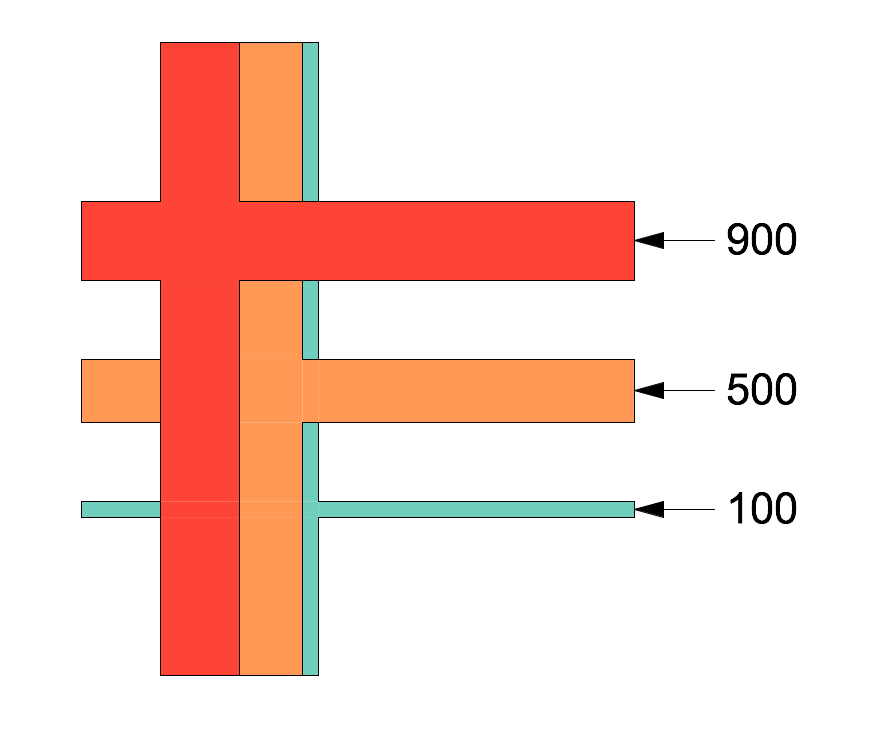
•Use the slider at right to adjust this Building Material’s relative priority in its intersections with other construction elements. (Expressed in numbers, an intersection priority can run from weak - a minimum of 0 - to strong - maximum of 999. This will affect the element’s intersections and display in model views.
See Basic Intersection Principles and Intersecting Elements with Identical Priorities.
•Another way to adjust priority is on the left side of the Building Material dialog box: If you have clicked the priority header to sort the list by priority, you can then edit the intersection priority of any selected item(s) by dragging it up or down in the list.
Be aware that Building Material definitions are global; any changes you make here will affect all project elements which use that Building Material – not just the selected elements!
If you want to adjust the priority in just one element of the project, you can create a duplicate Building Material with a different priority.
(See Create New or Duplicate Building Material, below.)
For general information on modeling intersections, see the topics at Element Intersections.
See Properties and Classification Systems.
ID and Categories
•ID: Assign an optional ID to this Building Material. Any character can be used, with no character number limit.
The ID field serves as a way to identify Building Materials in lists and labels. You can also Find & Select elements by using Building Material ID as a search criterion.
•Manufacturer: Optionally, enter a manufacturer name for this Building Material. You can add Manufacturer as a field to your Interactive Schedule, e.g. to list all Building Materials by manufacturer.
•Description: Optionally, enter a Description for this Building Material. You can add Description as a field to your Interactive Schedule.
•Participates in Collision Detection: This data is used in exporting elements to IFC format, and in ARCHICAD’s Collision Detection feature.
See Collision Detection.
These data are predefined for ARCHICAD Building Materials, but you can edit them directly.
•Load from Catalog: Access the built-in Material Catalog (click the Open Catalog button), and click the name of a material having the characteristics you need; its physical properties will then be applied to the Building Material you are editing.
For more information, see Material Catalog.
For the selected Building Material, enter data for its
•Thermal conductivity (in W/mK)
•Density
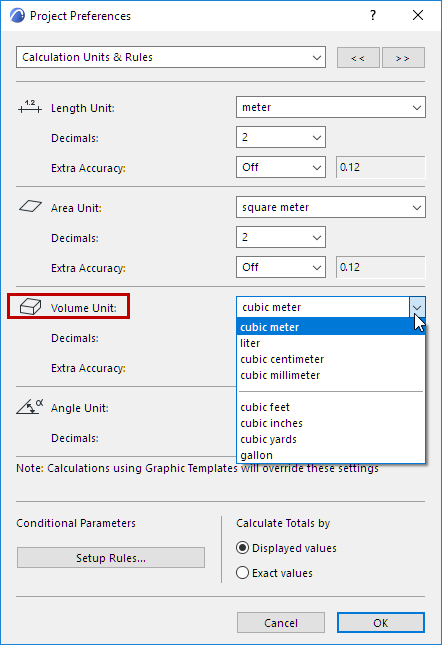
Note: The unit for the Density property is lb/cu ft if the volume Calculation unit is an imperial unit; or kg/m3 if the volume Calculation unit is a metric unit, as set in Project Preferences > Calculation Units & Rules.
•Heat capacity (in J/kgK)
•Embodied Energy (in MJ/kg, or megajoules per kilogram)
•Embodied Carbon
Note: The unit for the Embodied Carbon property is lbCO2/lb if the volume Calculation unit is an imperial unit; or kgCO2/kg if the volume Calculation unit is a metric unit, as set in Project Preferences > Calculation Units & Rules.
Create New or Duplicate Building Material
Click New at the bottom of the Building Materials dialog box.
In the appearing dialog box, choose whether to create an entirely new Building Material, or to duplicate the current one.
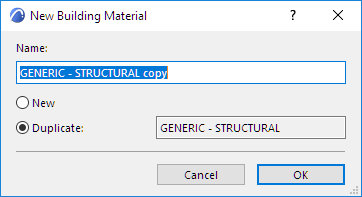
Give the new Building Material a Name, then click OK.
Adjust the settings for the new Building Material, then click OK to close the Building Material dialog box.
Delete Building Material