Grids can be defined separately for the Floor Plan and any individual Section/Elevation/IE, 3D Document, Detail/Worksheet, or Layout window. Note that, in Floor Plan window, the same Grid settings will be used for all Stories.
Note: You can also create, place and use custom local structural grids of different sizes and shapes using the Grid Tool.
See The Grid Tool.
Do one of the following:
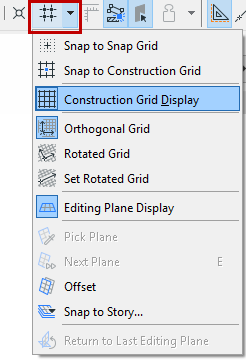
•Toggle the View > Construction Grid Display command
•Use the Standard Toolbar’s Grid pop-up menu

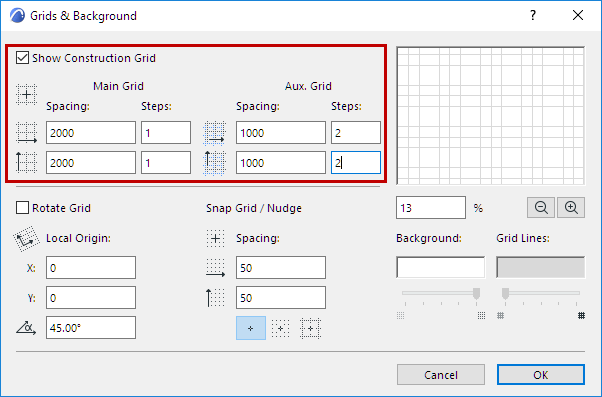
•Open View > Grid & Editing Plane Options > Grids & Background, and check Show Construction Grid.
Define Construction Grid and Auxiliary Grid
1.Open View > Grid & Editing Plane Options > Grids & Background.
2.Enter Spacing values to define the horizontal and vertical distances between grid lines.
Note: Spacing values also define the Nudge distance: use the Nudge shortcut to move elements by a predefined factor. (use Alt + Shift + an arrow key to move the element left, right, up or down). See Nudging Elements.

Add Optional Auxiliary Grid
The Auxiliary Grid can be used if you want to create periodic or stepped grids. For example, to indicate the thickness of concrete walls or foundation footings.
To use it, set separate Spacing and Steps values for the Main Grid and the Auxiliary Grid.
Step values define the number of times to display the grid line before displaying the Auxiliary grid line, in both the horizontal and vertical directions. If the “Steps” value for any of these grid lines is 0, those lines will not be displayed.
In this example, you display one main grid line (spacing 2000), followed by two Auxiliary grid lines (spacing 1000); then the pattern repeats.
Note: All the values in this dialog box are based on the current measurement units defined in Options > Project Preferences > Working Units.
View the preview of the Construction grid (both the Main grid lines and Auxiliary grid lines). Use the percentage and Zoom In/Zoom Out controls (below the preview window) for zooming in the preview window.
Note: The grid is automatically hidden if it would be too dense on the screen, that is, if the smallest distance between two adjacent grid lines would be smaller than 3 pixels.
Rotate Construction Grid
1.Go to the View > Grid and Editing Plane Options > Grids and Background dialog box.
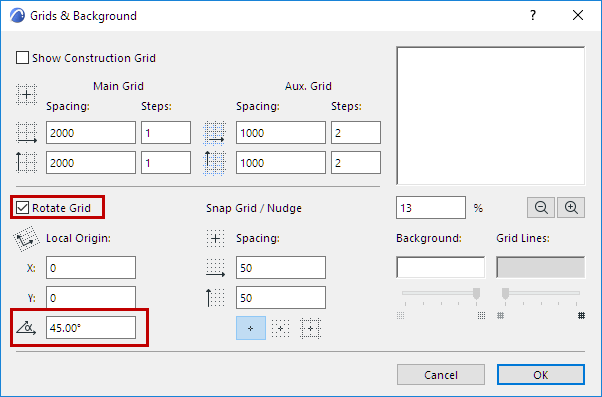
2.Check the Rotate Grid box.
3.Specify X and Y values to specify a Local Origin that is different from the Project Origin.
4.Define a Rotation Angle.

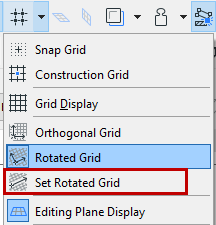
To define a rotated grid by hand: first, choose Set Rotated Grid from the Standard Toolbar, then draw a vector on screen or click on an existing straight segment: this vector will represent the rotated grid angle relative to the horizontal axis.

To display the rotated Construction Grid, make sure the Construction Grid is visible, then activate Rotated Grid button from one of the following locations:
•View > Grid & Editing Plane Options > Rotated Grid
•Use the Standard Toolbar’s Grid pop-up menu
•Open View > Grid & Editing Plane Options > Grids & Background, and check Rotate Grid.
Related Topics: