Set up a Column that consists of multiple segments, with a configurable “Join” component between them.
To create Column segments, use either the Settings dialog or graphical interactions. Both methods are described below.
Notes:
–Each segment has its own Classifications and Properties settings and its own Element ID. However, Category definitions (e.g. Renovation status) are inherited from the element level.
–Find & Select, Labels, Info Box, and Interactive Element Schedule fields can use segment-specific data
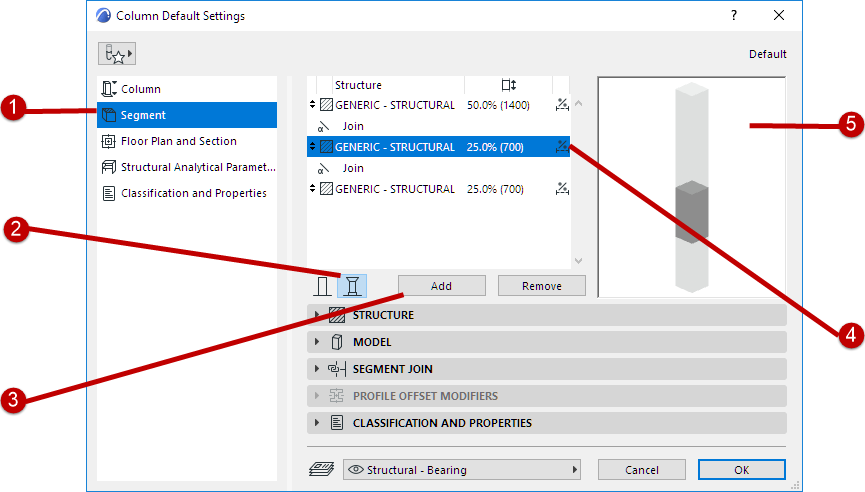
Use Column Settings
1.Open Column Settings and go to the Segment page.
2.Click the Multi-Segment column icon.
3.Click Add to add as many segments as needed.
–A “Join” component is automatically added between each segment.
4.View the Structure list to see segments and Joins. Select or multi-select to edit.
5.View the preview. The segment currently selected in the list is highlighted.
Multi-Segment Column
Create Graphically
1.Select a Column in the 3D window.
2.From the pet palette of the Column axis, choose Split Segment.
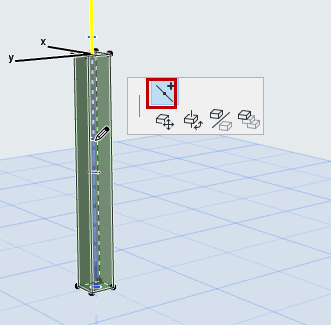
3.Click anywhere on the Column axis: the Column is split at that point into segments. Repeat to create more segments as needed.
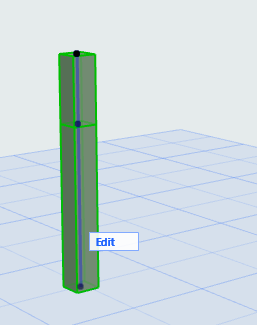
•To edit the segments individually and graphically, you can use Edit mode.
See Edit Mode for Multi-Segment Columns.
•To define attributes for each segment, use the Settings dialog.