Set Orientation
Use this function to rotate the entire view on your screen to a preferred position.
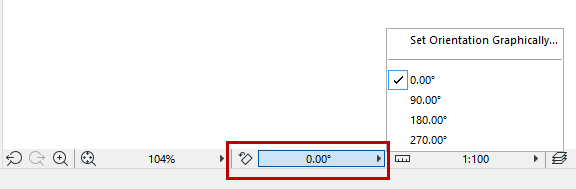
See Reset Orientation, below.
You can reorient the Floor Plan, Worksheet, Detail and 3D Document windows. The orientation value is saved as part of the “Zoom” value of every saved view, and on the published output created from that view.
Orienting the view does not rotate the project as such; the project coordinates remain unchanged. It just turns the window contents so that they are displayed at a more convenient angle on your monitor.
Rotate to Nearest Orthogonal Position
Reset Orientation
Set Orientation Graphically
- Click either the Set Orientation button, or Set Orientation
Graphically pop-up command.
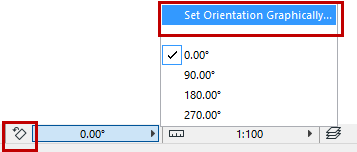
- On screen, draw a rotation vector with two clicks.
- Drag your mouse to rotate the screen contents to the desired angle, or enter a numerical rotation angle into the Tracker. Click a third time to complete.
The pair of arrows in the window’s lower left corner also indicates the rotation.
Rotate to Nearest Orthogonal Position
Zoom and Rotate
To rotate the view and zoom in or out at the same time:
- Click the Zoom icon from the bottom of your screen.
- Press Ctrl.
- Using three clicks, draw the zooming rectangle on screen at the
desired angle.
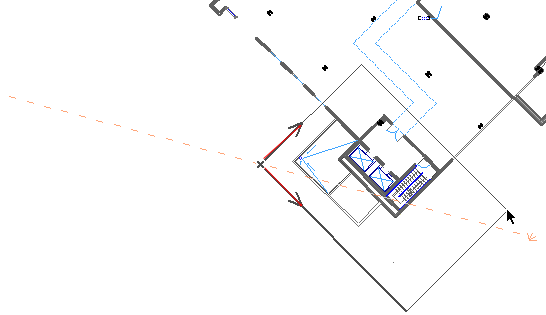
When you complete the rectangle with the third click, the view will zoom in/out and be rotated simultaneously.
Grids in Oriented View
The on-screen Grid, if it was orthogonal to begin with, remains orthogonal after the rotation. If it was a rotated Grid, that Grid will rotate along with the view, its project coordinates remaining unchanged after the rotation.
Text in Oriented View
Text blocks
The way a Text Block behaves in a rotated view is set in Text Tool Settings in the Text Block Formatting Panel.
Dimension text
Dimension text is automatically adjusted to ensure that it will remain easily legible regardless of the view’s orientation. (If you set a custom angle for dimension text, however, that angle will prevail.)
For dimensions whose text is set to “Horizontal” in Dimension Tool Settings, the text will remain horizontal with respect to the screen regardless of any rotation of the view.
Fill Area text
Will always be displayed horizontally on screen, regardless of the view’s orientation.
(If you set a custom angle for fill area text, however, that angle will prevail.)
Text of GDL Objects in Rotated View
GDL Object-type elements may contain text that is affected by a rotated orientation. For example, options for Text Orientation on Symbol include:
- Readable: As the view is rotated, the object text rotates too, but is flipped as necessary to ensure text readability.
- Align with Symbol: Text rotates together with the symbol, with no other adjustments.
- Always Horizontal: Text remains fixed in a horizontal position on screen, regardless of the view’s orientation.
Marker Text in Section/Elevation/Detail/Worksheet
In the Settings dialog box (Marker Panel), use the Marker Text Rotation parameter. This may include the following values, depending on the marker type:
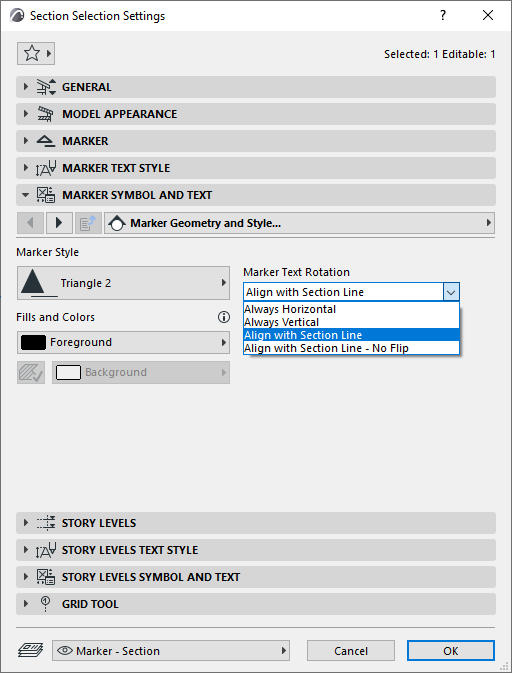
- Always Horizontal and Always Vertical values will display text horizontally/vertically on screen, regardless of the view’s orientation.
- Align with Section Line will keep the text lined up with the Section line, following any view rotation, and will flip the text if necessary to ensure readability.
- Align with Section Line - No Flip will keep the text lined up with the Section line, following any view rotation, without any “flip” adjustment for readability.
Text of Door/Window Markers
The text orientation parameter may include the following values, depending on the marker type:
- Standard: Text is always parallel to the wall, and is automatically readable (that is, flipped if necessary after rotation of the view).
- Align with Marker Line: Text remains fixed in line with the marker line and is automatically readable.
- Horizontal/Vertical: Width/Height/Sill/Fire Rating/Acoustic Rating texts are automatically readable.