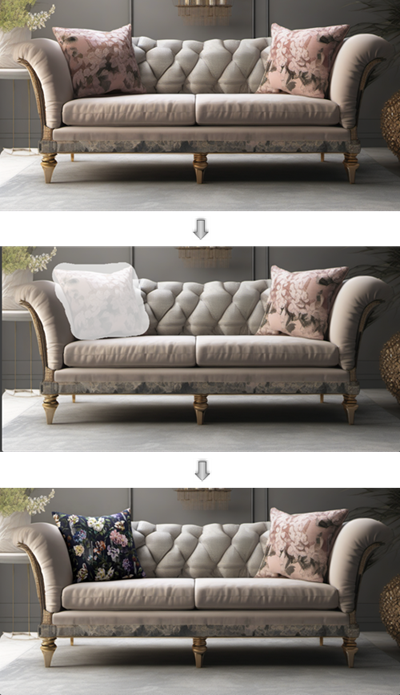
Edit an AI image with image masking
Use image masking to confine the edit operations to specific area. For most editing, masking is not needed, because the AI model can understand locations and directions within the model. The masking controls are useful primarily to change the material or texture of a specific portion of a drawing.
To edit an AI image with image masking:
- With an existing image to edit, click Draw Mask on the Edit tab of the AI Visualizer.
- In the Edit Instructions field, tell the AI Visualizer to add, modify, or remove objects under the mask, and detail the desired changes.
- If an image is needed to guide the edits, such as if a particular fabric swatch should be used, add the image.
- Set the Brush Size as needed.
- Use the cursor to draw a mask on the image of roughly the size and shape needed for the object being edited; an area of white pixels is drawn.
- Use the additional mask modes to refine the masked area:
- If the mask is too large or needs to be refined, click Erase Mask, adjust the brush size, and use the cursor to selectively erase part of the mask
- Select either "loose edit" if the edits should be loosely in the area of the mask, or "strict edit" to strictly limit edits to the masked pixels
- Optionally, invert the mask to make the edits everywhere except the masked area
- Clear the mask entirely to start over
- Click Generate.