
The 3D Document Settings dialog box is available from:
•the context menu of any 3D Document item listed in the Navigator
•the Settings button at the bottom of the Navigator Project map, if a 3D Document is selected
•the context menu of a 3D Document window
•the Document > Documenting Tools menu
For general information on this topic, see 3D Document.


Reference ID: An ID is assigned by default; you can change it by typing any other value into the field.
Name: Appears in the Navigator palette and the title bar of the 3D Document window.
•In 3D Document Default Settings, you can activate the Source View Name icon: this will automatically assign the source view as the name of the newly created 3D Document.
Note: This will only set the name of the source view at the time of creation; it will not automatically follow story name changes. Later, you can change it to any custom text.
Status: Define the link between the 3D Document and the Model.
•Auto-rebuild Model: Rebuild the 3D Document automatically every time it is opened or brought to the front of the screen, if the model has changed.
•Manual-rebuild Model: The 3D Document is rebuilt from the model only by using the View > Refresh > Rebuild from Model command. (The same command is available from the 3D Document window’s context menu, and from the Project Map item’s context menu.)
Note: There is no Drawing-type 3D Document.
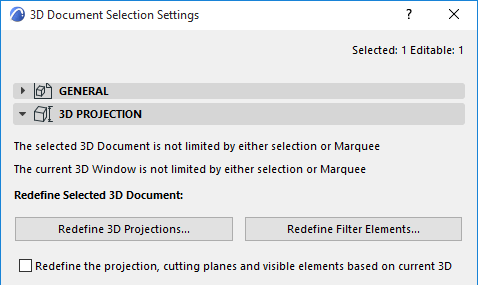
3D Document 3D Projection Panel
This panel is only available for a selected 3D Document that is based on the 3D window.
This panel provides information on:
•the 3D window source of the selected 3D Document (is it limited by selection/marquee, or not?); and
•the current 3D window (is it limited by selection/marquee, or not?)

Use the next three controls to redefine the selected 3D Document:
3D Document Floor Plan Projection Panel
This panel contains options for 3D Documents based on a Floor Plan Projection.

Source View: Shows the name of this 3D Document’s Source Floor Plan view.
Direction: Choose an option to define which direction to project the view from the cut plane:
•Reflected Ceiling: “Upward” projection from the cut plane. Will display the mirror image of the overhead part of the model.
Define the extent of the projection: for example, show up to 1 Story above.
Optionally, define a positive or negative offset from the projection’s story limit.

•Floor Plan: “Downward” projection from the cut plane (down to the floor): for example, show down to 1 Story down.
Optionally, define a positive (upwards) or negative (downwards) offset from the projection’s story limit.

Cut Plane Height: Define the height of the cut plane from which to create the Floor Plan Projection. Cut Plane Height is measured from the Floor Plan story that is the source of the 3D Document.
Selection/Marquee Information: The dialog box provides information on the Floor Plan source of the selected 3D Floor Plan Document. It indicates whether a marquee or selection was present on the Floor Plan at the time the 3D Document was generated: this limited the content of the resulting 3D Document.
Note: The Floor Plan source window is not necessarily the same as the currently open Floor Plan window.
If you have checked the Redefine box below, you are given information on whether the resulting, redefined 3D Document will be cropped, or whether it will show the entire model.

3D Document Model Appearance Panel
See Model Appearance (Section-Type Views).
Important: These settings apply to the 3D Document and are independent of its source window.
Hidden Edges
Check to display the edges of elements that are otherwise hidden in this view.
Set Line Type and Line pen for the Hidden Edges.
Show on Cut Plane: Controls the visibility of hidden lines that would fall in line with the cut plane or the display range boundaries.
Element Contours at 3D Document Boundary (for 3D Document based on the Floor Plan)
Check to add a contour line where elements are cut by the 3D Document boundary.
Optionally override the line type and color.