If you have customized and saved multiple schemes, you may want to store and apply them together: in this case, combine any of the schemes into a Profile, and store the Profile under its own name. Using the ArchiCAD interface, you can export and import Profiles to use on other computers.
For details on configuring and applying profiles, see Profile Options.
Notes about Profiles:
•Profiles themselves do not contain settings; they are just a collection of schemes.
•A profile does not have to contain all six scheme possibilities.
•Once you start working, you don’t have to apply entire profiles at once; you can apply schemes one by one.
•You can save a Custom scheme as part of a profile, but the Custom scheme will be given a name when the profile is created.
•Schemes named “Custom” cannot be exported.
Define and Store a New Profile
To assemble any combination of schemes into a profile, go to Options > Work Environment and click “Work Environment Profiles” (the top item in the list at the left.) This opens the Profile Options dialog page.
See Profile Options for details.
1.Go to Options > Work Environment and click “Work Environment Profiles” (the top item in the list at the left.) This opens the Profile Options dialog page.
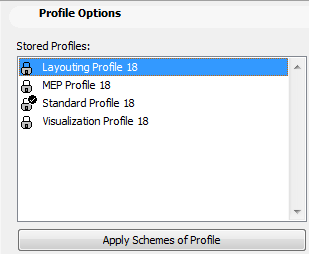
2.From the list of Stored Profiles, choose the desired Profile. Double-click to apply the profile, or click the Apply Schemes of Profile button.
3.Click OK to close the Work Environment dialog box.
ArchiCAD is shipped with three default Profiles: Standard, Visualization and Layouting. When you first start ArchiCAD, the default Work Environment Profile is set to Standard.
These predefined profiles are designed to get you up and running with ArchiCAD. Naturally, you or your office CAD manager can reconfigure these profiles as needed.
•The Standard profile is designed to reflect the workflow in common architectural practice. Menus, commands, palette layout, and toolbar visibility are optimized to give you easy access to the tools and functions you need to build up your Virtual Building. The Standard toolbar and Mini-Navigator toolbar (for easy switching between windows) are visible, and your Toolbox displays each tool individually.
•The Layouting Profile places commonly used layout-related and publishing commands within reach. The Layout Book menu now appears, the Toolbox is minimized to show only the Documenting tools, and the Navigator/Organizer is located at the left edge of the screen. Two specialized toolbars are now visible: “Layouts & Drawings”, and “Standard for Layouting”.
•The Visualization Profile is useful when you reach the stage of setting up and creating output from 3D images, such as Fly-Throughs and PhotoRenderings. The 3D Visualization menu now appears, so that all commands related to the 3D window, 3D navigation and 3D output are collected in a single menu. The 3D Visualization toolbar provides quick access to many of these same commands. In this profile, the Navigator is not displayed, and the Toolbox displays only Selection and Design tools.