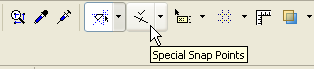
Special Snap Points on Temporary Vector
Special Snap Points are temporary hotspots that appear at particular intervals (defined by you) on elements, to help you place and draw new elements more accurately.
To activate Special Snap Points:
1.Click the Special Snap Point toggle on the Standard toolbar, or in the View menu.
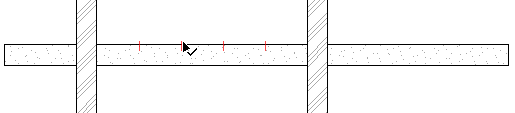
2.Hover your cursor over the element on which you want to see the Special Snap Points.
3.The Snap Points appear. Their number and position depend on the options set by you.
See Define Special Snap Points, below.
4.The Snap Points act as a temporary hotspot - you can snap to them with your cursor. You can start drawing new elements from these points or use them for editing other elements in relation to them.
5. Special Snap Points will disappear after about 5 seconds.
Note: Although Special Snap Points will disappear on their own after a set interval by default, you can opt to have the snap points remain visible until you either place an element or change to another view or story: disable the “Autohide Special Snap points” checkbox in Options > Work Environment > On-Screen Options.
To define division points and custom distances:
1.Click the Special Snap Values drop-down menu from the Standard Toolbar.
(The same commands are available from View > Special Snap Options > Set Special Snap Values menu command.)
These controls are also available as commands in the Control Box.
Note: The Control Box is not visible by default. To show it, choose its name from the Window > Palettes menu.
See Control Box.
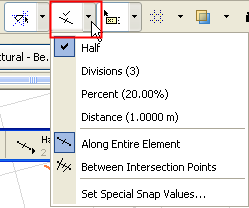
2.Choose the intervals at which to place your special snap points:
•Half: Divides an edge into two equal parts.
•Division: Divides an edge into the set number of segments. (Range: 3-20)
•Percentage: Divides an edge into two parts according to the set percentage.
•Distance: Divides an edge into segments that are the set distance apart.
Distances and percentages are always calculated from the endpoint that is closest to the cursor.
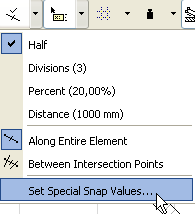
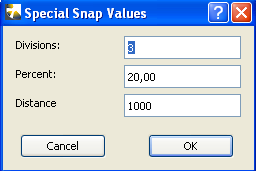
3.Define the values for your divisions, percentage, and/or distance by clicking the Set Special Snap Values command from this drop-down menu.
In the Standard Toolbar or the View menu, toggle the Special Snap Points command to “Off.”
To customize the color of your Special Snap Points, use the control in Options > Work Environment > On-Screen Options.
From the Special Snap Points menu in the Standard Toolbar (or the View menu), choose one of two options for setting your Special Snap Points:
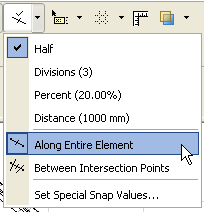
•Along Entire Element (snap points appear at the defined intervals along the whole element, even if it is intersected by other elements)

•Between Intersection Points (snap points are placed on the chosen element only from one intersection point to the next.