Structure and Landing (StairMaker)
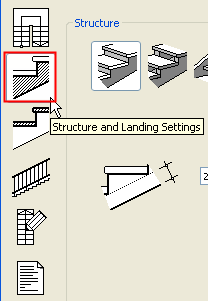
Note: This tab page is part of the StairMaker editing window. To access it, activate the ArchiCAD Stair tool, open Stair Tool Settings, and click the Create Stair or Edit this Stair command. Choose a standard stair type. From the appearing stair editing window, click the Stair Structure button (second from top) from among the six buttons at the left.
For detailed information on each control in this tab page, see Stair Structure & Landing Tab Page.
The Stair Structure is set on the second tab page of the stair editing window. The content of this tab page changes according to the construction type of the stair.
In the Structure section, you can choose among five ways to model the stair in 3D and edit the related parameters.
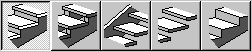
The following 3D alternatives are offered:
•Solid Stair with Treads:
•Stair with Carriages:
•Stair with Stringers:
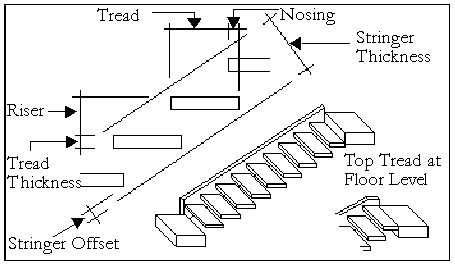
•Treads only:

•Solid Stair:
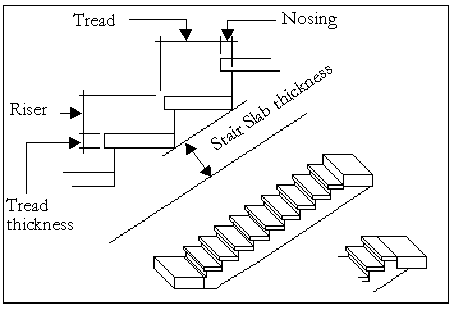
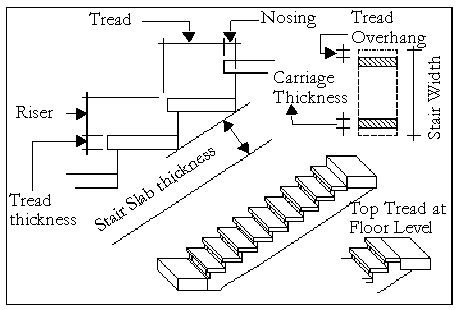
The upper and lower slabs should be set to exactly join the Floor Plan Symbol within ArchiCAD, no matter which 3D alternative is selected in StairMaker, and even if a top tread at floor level is added to the stair.
Note: When the stair construction is changed, the fields for treads and nosing may change as well, according to the current construction options.
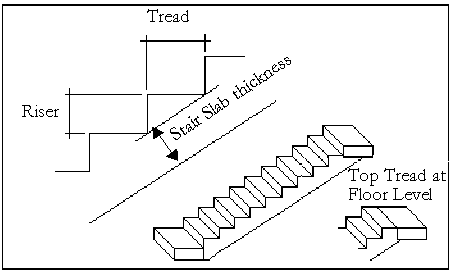
The parameters of the stair’s structure vary according to the selected type. These changes will also appear in the stair geometry tab page and in the parameters of the stair.
In the bottom left section of the window, you can customize both the upper and lower structural and subfloor + finish thicknesses.
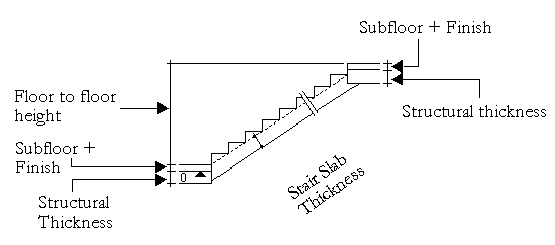
StairMaker automatically adjusts the stair parameters to these slab specifications.
StairMaker automatically adjusts the stair height by referring to the top elevation of the connecting bottom floor slab as zero. If you use a separate slab for modeling the subfloor + finish in ArchiCAD, you only need to enter the thickness of this slab in the corresponding fields. When you place the stair in ArchiCAD, the positioning height in the Object Settings dialog box can be set to zero.
If you do not use any separate slab for subfloor + finish in your design, set the subfloor + finish thickness to zero.
You can set up the landing thickness of those stairs that have one or more landings in the editable text fields in the Landing section of the Structure tab page.
StairMaker makes clean intersections at the bottom of the stair between the runs and landings if you click the Clean Intersections button at the bottom of the Landing section. The following dialog box will appear:
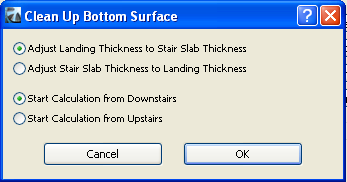
StairMaker cleans up these intersections by changing the thickness values of either the landing or the run. Select the desired option in the dialog box.
Using the other set of radio buttons, you can choose whether the length of the landing is modified along the upper or the lower run.
StairMaker recalculates the parameters with the new values, and the 2D symbol of the stair will be updated.
If the stair type has two landings, your options affect the lower landing and StairMaker will apply them automatically on the upper one.
In the Attributes section of the Structure tab page, you can define the pencolor used for the Stair’s contour and the Surfaces of each of the Stair’s sides in the 3D Window and PhotoRendering.