You can edit all instances of a placed Hotlink by editing it at its source.You can also edit and/or replace individual instances. Both workflows are described below.
Edit All Instances of a Hotlinked Module
To edit the elements of all the instances of a placed module, the easiest way is to edit the Hotlink Source file.
In Hotlink Manager (File > External Content > Hotlink Manager), choose the desired source file from the Hotlink Sources list. Then click “Open in Separate ArchiCAD.”
Another ArchiCAD opens on your machine, with the source file. Edit the file as needed, then save it.
Hint: If you want to see the Floor Plan context of the placed module while editing its source in the second ArchiCAD, use the “Trace” function. (See View Context of Hotlinked Module while Editing Module Content.)
Return to the first (host) project. Go to File > External Content > Hotlink Manager. In the Hotlink Source list, note that the Status of the edited module’s Hotlink Source now reads Modified. (If needed, click Refresh Status to get the latest status messages.)
Click Update to update all placed instances of the hotlink. This action is carried out once you click OK to close the Hotlink Manager dialog box.
Note: In Teamwork, you must reserve Hotlink Sources in the Hotlink Manager to be able to update.
Change/Replace Single Instance of a Placed Module
Use this workflow to replace a placed Module instance with another Module.
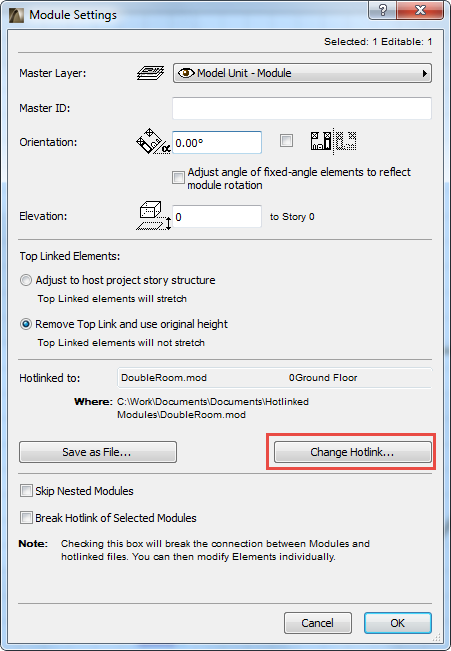
For example, suppose your project contains instances of two Modules, A and B, each of which is a different bathroom layout. You can change any instance of Module A to Module B: Select Module A, then use the Change Hotlink button in Module Settings to replace it with Module B.
If no instances of Module B have been placed yet in the project, you can still use Change Hotlink to browse for the hotlink source file you need.
Save and Edit Module Instance
Another way to edit the content of Module A:
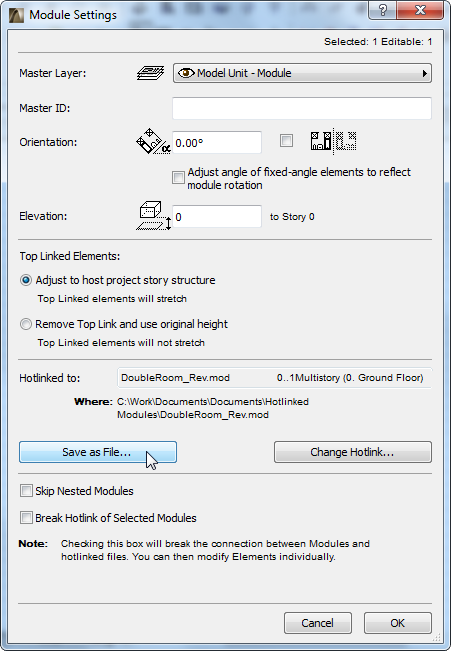
1.Select Module A, then use Save as File... from Module Settings to create a new version, named Module C.
2.Edit Module C file in a separate ArchiCAD.
3.Use Change Hotlink to replace Module A with Module C.
Edit Module in Place: Break Link, Edit Elements, Replace Hotlink
Another way to edit a module is to break its hotlink, then edit it, and replace the previous hotlink with the newly edited module.
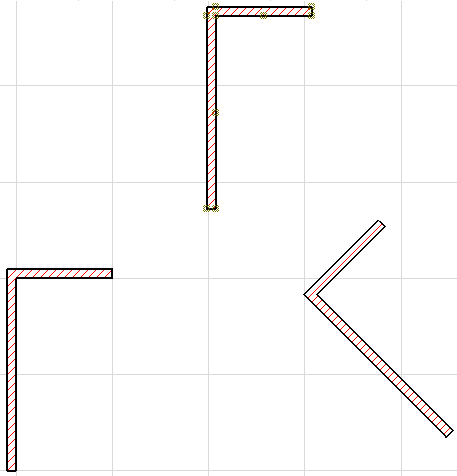
1.Select the module to edit on the Floor Plan.
2.Choose File > External Content > Hotlinked Module Settings.
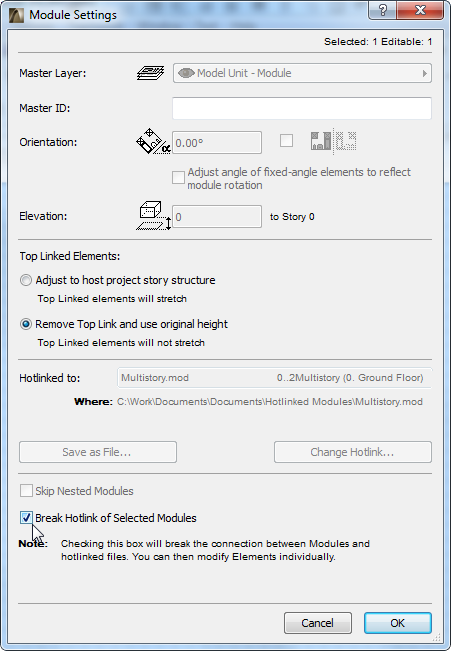
3.In Module Settings, check the Break Hotlink of Selected Modules box, and click OK to close the dialog box.
Note: In Teamwork, the Break Hotlink function is not available. Instead, you can Explode the Hotlinked Module. (See Explode Hotlinked Module Instance in Teamwork.)
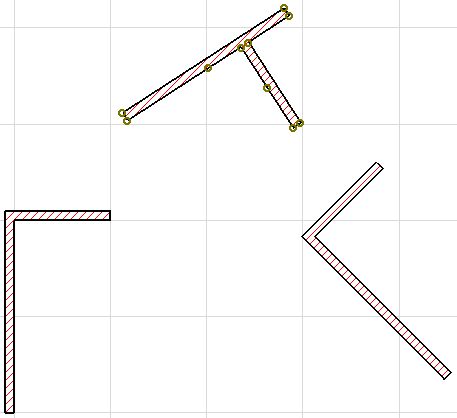
4.Edit the elements as needed. (Use Edit > Grouping > Suspend Groups to enable editing.)
5.Select the elements again and choose File > External Content > Save Selection as Module.
6.Give the new module file a unique name.
Note: If you choose the old name of the module file, you will overwrite the previous source file and thereby overwrite all placed instances of the module file, not just the selected module.
7.Click Save. Place the new, edited Hotlinked module.
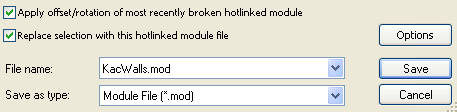
Note: By checking Replace selection with this hotlinked module file in the Save Hotlinked Module dialog box, the new, edited Hotlinked module is placed automatically.
Apply Offset and Rotation of Edited Module
When several instances of a module have been placed with different rotation and offset values, and you edit the source file after breaking its hotlink, a relocation effect occurs when you save the modified source file.
To correct this:
Follow the steps listed above to break the hotlink and edit it.
When saving the edited selection as a module in the Save Selection as Module dialog box (see step 5 above):
Check both the Replace selection with this hotlinked module file and Apply offset/rotation of most recently broken hotlinked module boxes. Click the Save button.
The placed module instances keep their relative locations.