
The Stair tool is used to place stair type library parts into the Project.
Place and edit these GDL object-type stairs using the Stair Settings dialog box.
For more information, see Stairs (Predefined Stair Objects).
Also, custom stairs placed with the StairMaker function can be - in part - edited from the Stair Settings dialog box.
The panels of the Stair Tool Settings dialog box are similar to those of other Library Part elements.
See Settings of Library Part Elements.
These settings apply to stair objects placed directly from the Stair Settings dialog box, similarly to other objects.
Stair Preview and Positioning Panel
Settings in the Stair Preview and Positioning Panel are identical to those in the Object Preview and Positioning Panel.
For Stairs only, an additional control is also available on its Preview and Positioning panel. If the available stair objects in the loaded library do not fit your needs, you can use the Create New Stair command of the StairMaker add-on (loaded with ArchiCAD) to customize and place another stair type.
Click the button above the preview to access the Create Stair command.
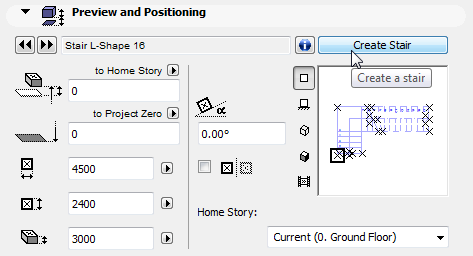
Note: You can also access this function using the File > Libraries and Objects > New With > StairMaker command.
For more information on the Create New Stair command, see StairMaker Add-On.
Use either the Custom Settings graphical interface or the All Parameters list to set stair parameters.
Click the upper black arrow to pop-up the parameter categories:

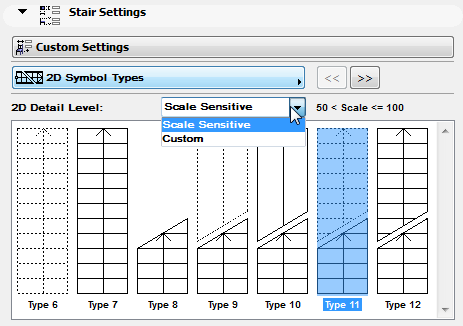
2D Symbol Types: Choose one of the available 2D Symbol types using the sketches for assistance. The range of choices depends on whether you have chosen “Scale Sensitive” or “Custom” as the 2D Detail Level option.
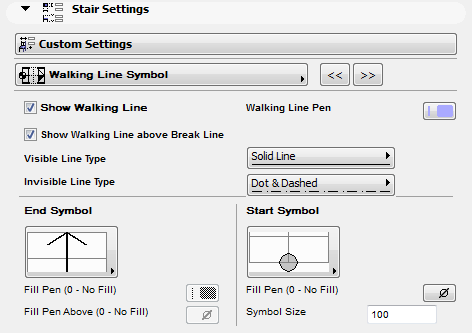
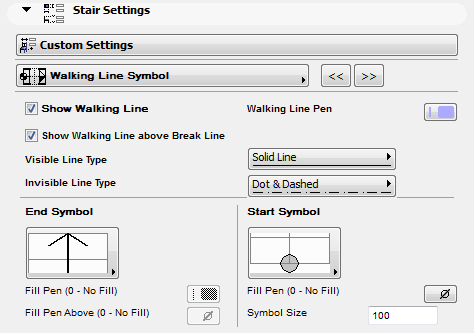
On the Walking Line Symbol page, you can choose an arrow head and start symbol for the 2D Symbol of your Stair.
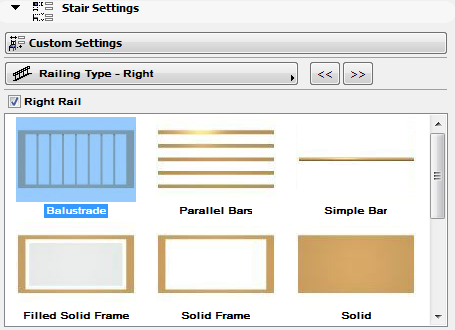
In the next two tab pages you can chose from the wide range of available Railing Types independently for the left and right sides of the stair.
For StairMaker Stairs, this panel is called “2D Display and 3D Attributes.”
See below.
In the next tab page, choose 2D Symbol Attributes for the chosen 2D Symbol:
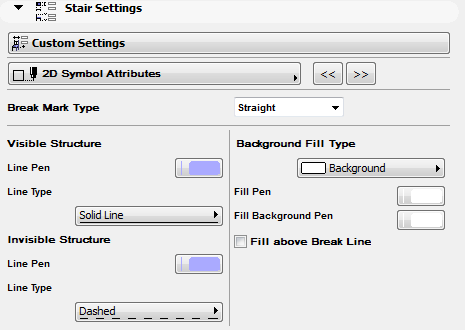
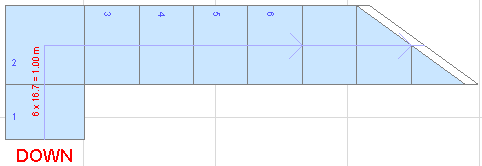
The Visible Structure is the part of the Stair below the Break Mark. The Invisible Structure is the part of the Stair above the Break Mark, or any part of the structure that is hidden.
Choose a Background Fill for the body of the stair’s 2D symbol.
The Up & Down, Numbering tab page provides options for placing standard textual items on your stair:
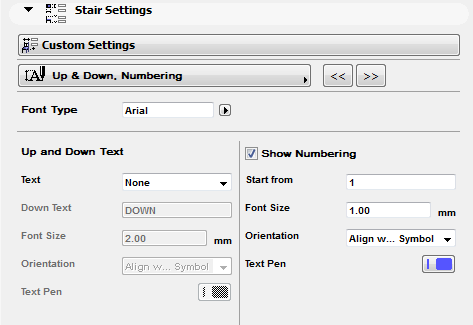
Set the Orientation to Readable if you want texts to be readable from the bottom and from the right, independent of the Stair’s position.
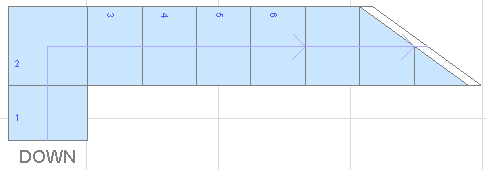
Show Numbering will number all the treads in the stair. You can set the number with which to start the numbering, as well as text size and pen.
Up and Down Text gives you the option of displaying the words “Up” or “Down” at the beginning of the walking line.
In the Rise and Run, Description tab page:
If you check Rise and Run Text, the Stair will display the number of Rises and the number of Treads together with their dimensions. Use the Format parameter to choose between different standards to display Rise and Run Text. Choose Custom Text to enter any text. Enter Text Size and Text Pen for the Rise and Run Text.
The Description option allows you to place any text along with the Stair.
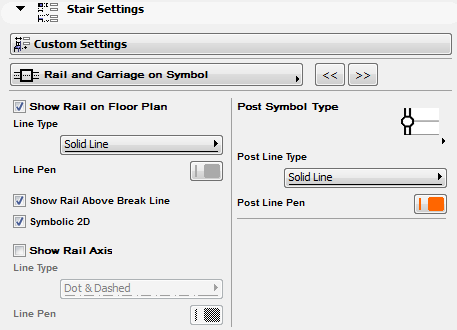
The next tab page, Rail and Carriage on Symbol, allows you to turn the symbolic display of railings and carriages on and off. With railings, you can display the rail axis in addition to or instead of the railing.
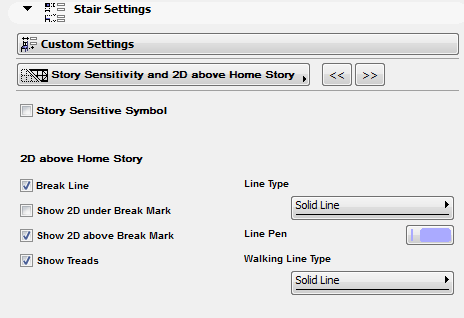
The Story Sensitivity and 2D Above Home Story tab page controls the appearance of the stair on stories above and below the stair’s Home Story.
Note: Stairs are shown on remote stories according to the options set in the Show on Stories control, in the Floor Plan and Section panel of this dialog box. If this control is set to “Home Story Only,” then the options affecting the stair’s Story Sensitive display are irrelevant.
Story Sensitive Symbol: Check this box if you want to set different display options for the stair on remote stories. (If this box is unchecked, then the stair appears on all stories in a uniform manner.)
2D Above Home Story: Check the boxes to determine which parts of the Stair should be displayed on stories above its Home Story:
•Breakline: Show or hide breakline
•Show 2D Under Break Mark
•Show 2D Above Break Mark
•Show Treads
Choose a Line Type, Line Pen and Walking Line Type to set the appearance of the Stair’s lines on stories above its Home Story.
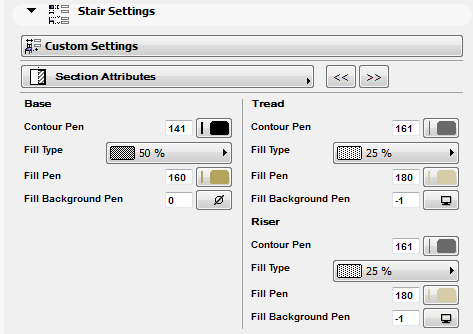
On the Section Attributes page, you will set separate parameters for the stair base and for the tread.
Stair Floor Plan and Section Panel
Floor Plan and Section panel of Stairs are quite similar to those presented for Objects.
For information, see Object Tool Settings.
For more information, see Object/Lamp Model Panel.
Stair Listing and Labeling Panel
For more information, see Listing and Labeling Panels.
Stair Tags and Categories Panel