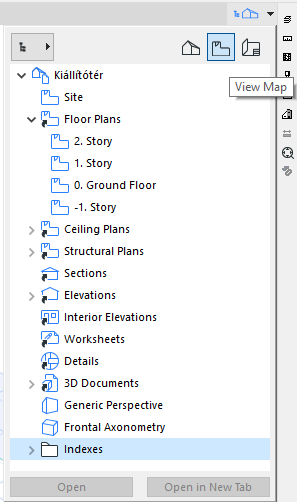
The second map of the Navigator is the View Map: the list of saved Views in your project.
Views can be created within the active project or imported from other ARCHICAD projects.
Note: The Pop-up Navigator replicates many of the functions of the Navigator Palette familiar from older versions of ARCHICAD. The Navigator Palette (and the Organizer) remain available at Window > Palettes. For details on their specific functions, see Navigator Palette and Organizer Palette.
What is a View?
A View is a stored version of a Viewpoint; each view is defined by its adjustable View Settings that you configure for a particular purpose as you construct your Virtual Building.
The project’s views are listed in the Navigator View Map. In both the Navigator and Tab Bar, a view’s icon has a blue outline.

![]()
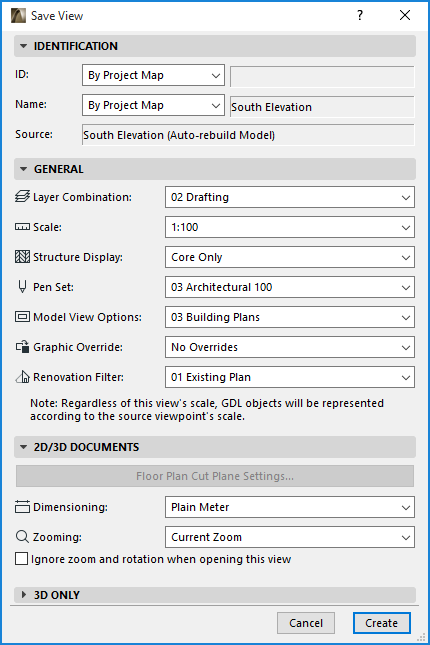
Once you save the view, it will store the combination of the following settings:
•Partial Structure Display
•Pen Set
•Model View Options Combination
•Graphic Override
•Renovation Filter
•Floor Plan Cut Plane
•Dimensions
•Zoom and Rotation
•Image Settings (for 3D Window views): these include 3D projection settings (including zooming), filtered elements in 3D, 3D Style, 3D cutting planes, 3D Cutaway and PhotoRendering Settings.
•Existing selection (3D only)
To set up a new view, open a project window (Floor Plan, Section/Elevation/IE, 3D Document, Detail, Worksheet, 3D, Interactive Schedule, or List) and adjust any or all of its settings as needed.
It is convenient to use the Quick Options controls of the bottom scrollbar.
See Quick Options Bar.
Even if the project content changes, the settings of your saved views - will remain unchanged unless you expressly modify them.
Note: You can create a dynamic connection between project viewpoints and views if you clone a folder.
For more information, see Clone a Folder in the View Map.
To save a view, do one of the following:
•Click Save View from the tab’s context menu
•Click Save Current View from the viewpoint’s context menu in the Pop-up Navigator
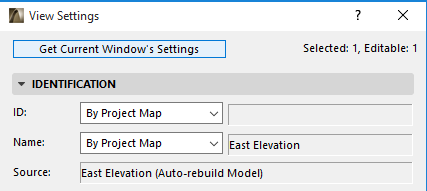
The View Settings Dialog Box appears, allowing you to modify the settings before saving the view. Click Create to save the view.


Notice that the tab bar icon (blue) now indicates that the tab is a saved view.

•Use the Save View and Place on Layout command
See Save View and Place on Layout.
•In the View Settings Dialog Box, click Get Current Window’s Settings to overwrite the original view settings with those of the active window.

Related Topics
Save as View from Tab Bar
Use this command to save an open view with its current settings, without overwriting previous view settings.
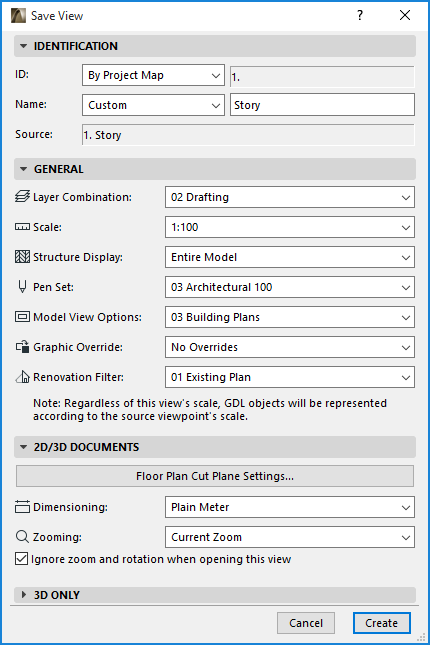
1.With a view open, use the Save as View command to open View Settings.
2.Adjust the settings and give it a new name, then click Create.

