
1.Activate a Route tool from toolbox: Duct Route, Cable Carrier Route, or Pipe Route.
2.Reference line is at the center of route segments by default. Enter an offset or adjust alignment in the Info Box as needed. (see also Edit segment - alignment and offset)
Note: To see the reference line in 2D views: turn on MEP Reference Lines at View > On-Screen View Options.
3.In Floor Plan, Section or 3D window: Click in series to define the segments and nodes of the Route polygon.
•Each click represents a node, which connects the adjacent segments.
•Press Backspace to delete the last placed segment
4.To complete the Route, click a second time at the end of the final segment.
The result is a single Route element.
Elbows and transitions are automatically generated at each node.
Note: When ending a route element on a terminal, accessory or equipment, use the up and down arrow keys to see alternative paths to connect the route. (See Place Terminal, Accessory, or Equipment)
Show Open Connections and ends
To see open ends and open connections in 2D views, turn on Open MEP Connections at View > On-Screen View Options.
Change Route parameter on the fly
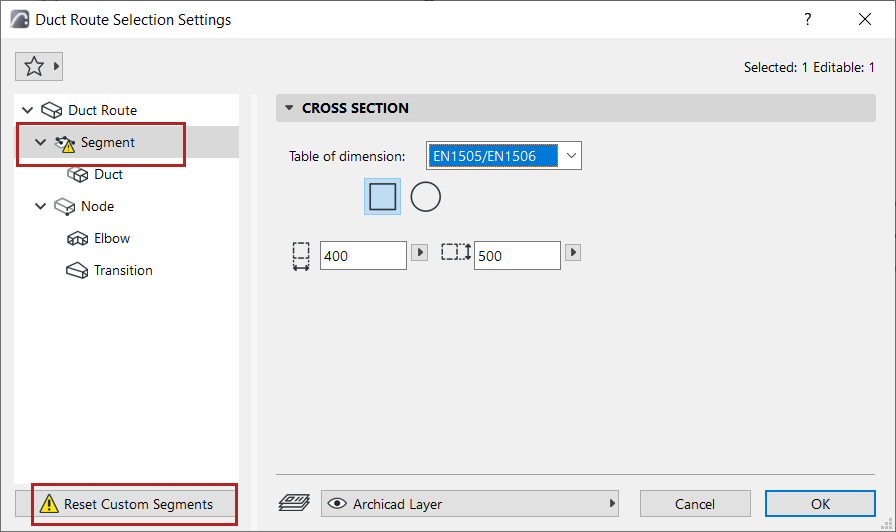
Once you start placing a route element, you can change its cross-section in the Tracker.
![]()
Because you have changed the segment’s default parameter value, it is shown in the settings dialog as “custom”.
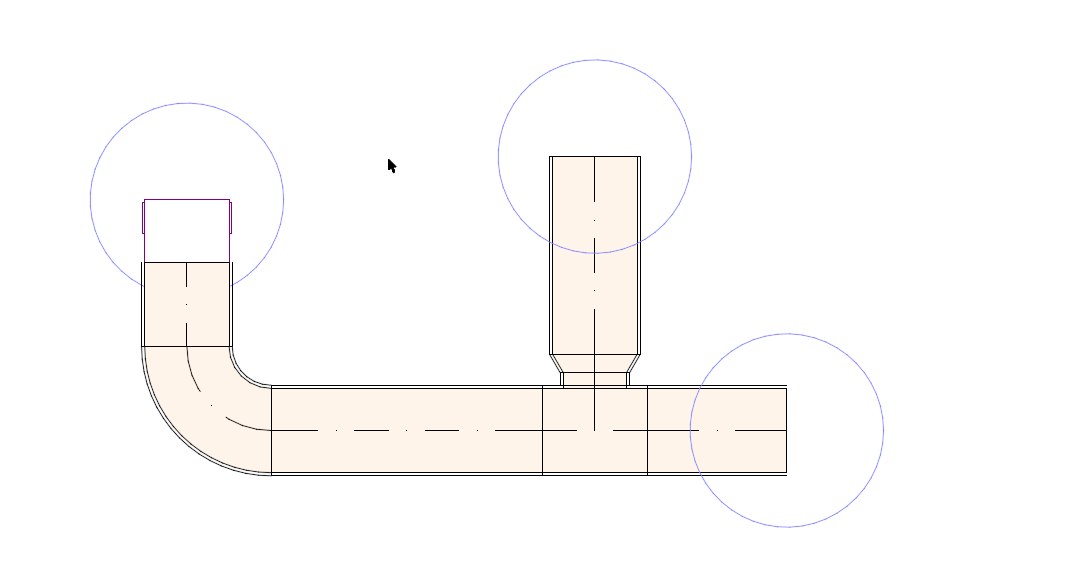
Add Branch to Route Element
A branch is created when you route a duct or pipe to the side of another duct/pipe. The branch is generated automatically, and the original route is split into multiple route elements.
You can’t place a branch element manually.
Add Duct take-off
Use the take-off tool to place a take-off element, then connect a duct to it. A transition element is created automatically.
Merge Routes
Routes will merge if:
•An end node of one Route element is connected to the end node of another
•A branch is deleted (remaining Routes will be merged together)
•A branch end node is moved, disconnecting the former branch
Place Route with Magic Wand
Use the Magic Wand to place a route with a single click, based on an existing polyline or polygon.
1.Draw a line or polyline.
2.Choose an MEP tool (Duct, Pipe or Cable Carrier).
3.Press the Spacebar to activate the Magic Wand, then click on the polyline or polygon.
Flexible Duct and Flexible Pipe Segments
Use these tools to easily create a flexible geometry using spline-type input. Click the port of an existing route element to connect it, or double-click to end input.
The flexible duct or pipe will not add transitions at the ends, and connections having different dimensions must be solved in the route.
See also Edit Route graphically.