AI Visualizer: Edit tab
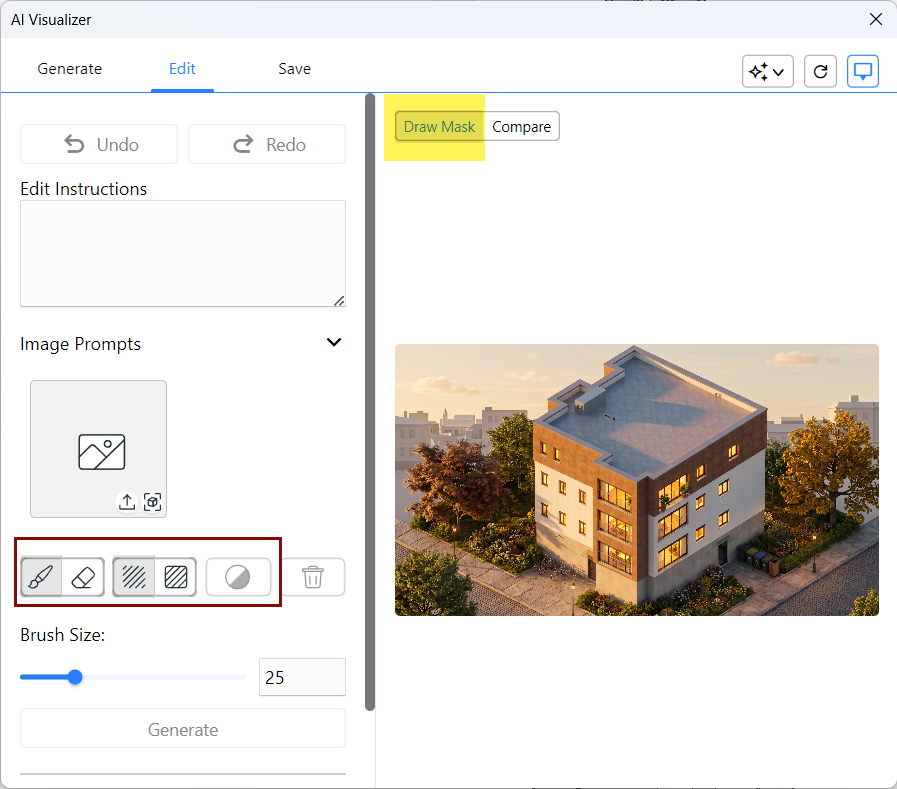
The Edit tab allows you to make detailed edits to an existing image. To edit an image, you can provide text instructions for what changes to make, provide an additional image prompt, draw a mask in the image area if you need to direct AI to change a very specific area, remove the background to create an image prop, and improve the details in the current image.
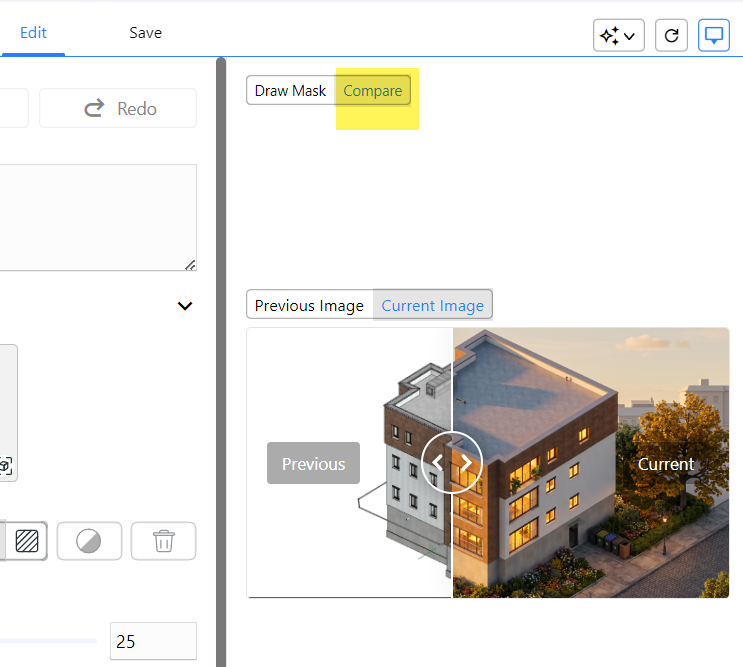
Above the image pane, there are two modes: Draw Mask and Compare. You can conduct most editing operations in either mode, but to use image masking, select Draw Mask.
Use Compare mode to toggle between the previous image and current image, or drag the arrow to show part of both images.
| Parameter | Description |
| Undo/Redo | Undo or redo the most recent edits |
| Edit Instructions | Enter a set of instructions in natural language for the
AI model to use when editing the task. These should generally include verbs, such as
add, move, zoom, change (such as the view or drawing style), or replace (such as a
color, pattern or the seasonal setting), and so on. Prompts can also be semantic
(what object needs to change) and can refer to locations in the image (where to make
the change). Multiple instructions can be entered within a single paragraph, to be
completed at once. Generally, the edit instructions can change objects in the image without needing a mask. If the instructions say "Add blue curtains to the window," the AI model can identify the window and carry out the instructions. However, in some cases, such as where there are repeated drawing elements, only some of which need to be edited (for example a curtain wall with different colored panels), the mask is useful to identify which specific objects to change. |
| Image Prompts |
Optionally, add an image source from Archicad or an imported image file to provide information for the edit operation; the source image displays here. If you want to edit an existing image, you can import it here and edit it without first completing any steps on the Generate tab; the imported image serves as the current image. Otherwise, you can use the image to provide input such as specific materials and colors to be used in editing. To import an image, click the upload button and select the desired image file. To use the current Archicad view: set the desired view and click the view snapshot button. To clear the image, click the X. Note: This option is used in combination with text instructions
and the other settings to influence how the image is edited. An instruction of at
least one word is required.
|
| Masking controls |
Draw a mask on the existing image and make edits only within the specified area. See also: Edit an AI image with image masking.  Loose Edit: Generally defines the area of the mask edits, but changes may occur outside the masked pixels. This mode is especially useful for cast reflections or shadows. |
| Brush size | Sets the brush size for drawing a mask over the image or erasing a portion of a mask. Either click on the number and enter a value, or drag to set the desired brush size in pixels. |
| Generate | Generates the edits |
| Remove Background | Removes the image background and replaces it with a transparent alpha channel. If a mask is used, this removes everything outside the mask. This is useful for creating image props, textures, and bitmap objects. |


