Create a Multi-Segment Beam
Set up a Beam that consists of multiple segments, with a configurable “Join” component between them.
To create Beam segments, use either the Settings dialog or graphical interactions. Both methods are described below.
Note:
- Each segment has its own Classifications and Properties settings and its own Element ID. However, Category definitions (e.g. Renovation status) are inherited from the element level.
- Find & Select, Labels, Info Box, Interactive Element Schedule fields and Dimensions/Labels can use segment-specific data
Use Beam Settings
- Open Beam Settings and go to the Segment page.
- Click the Multi-Segment beam icon.
- Click Add to add as many segments as needed.
- View the Structure list to see segments and Joins. Select or multi-select to edit.
- View the preview. The segment currently selected in the list is highlighted.
Figure 1. Multi-Segment Beam 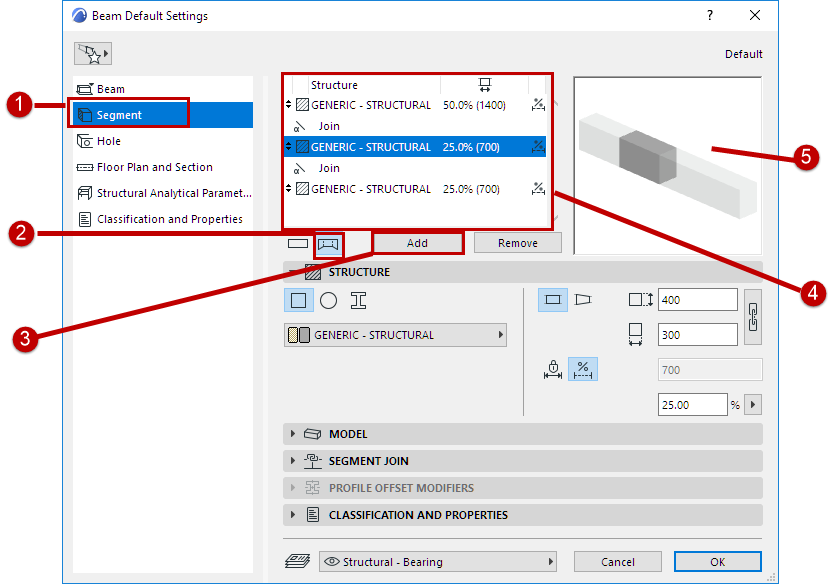
Create Graphically
- Select a Beam in the 3D window.
- From the pet palette of the Beam axis, choose Split Segment.
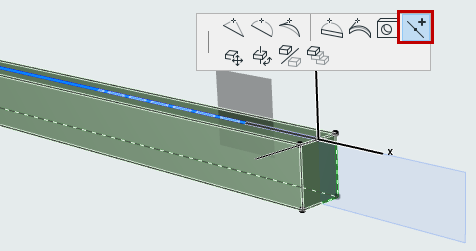
- Click anywhere on the Beam axis: The Beam is split at that point into segments. Repeat to create more segments as needed.
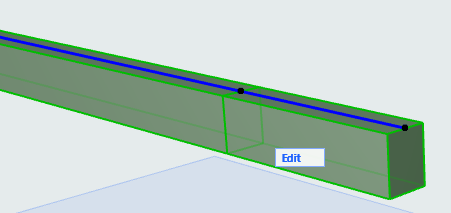
- You can adjust segment length graphically by dragging the Joins:
See Rotate Join Angle.
- To edit the segments individually and graphically, you can use Edit mode.
- To define attributes for each segment, use the Settings dialog.