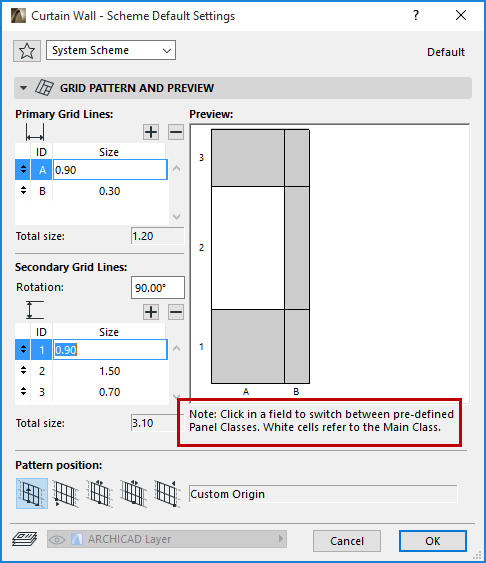
Panels are the flat surfaces - generally glazed - of the Curtain Wall. Panels are automatically placed between Frames and onto the Base Surface. When creating a Curtain Wall, you can define the parameters for two predefined classes of panels in Curtain Wall Scheme Settings.
The Curtain Wall’s two predefined classes of Panels are called Main and Distinct. To define the arrangement of the different classes of panels within your Curtain Wall, toggle them by clicking the panel pattern in the Preview window of the Curtain Wall Scheme Settings dialog box: click any panel to switch its class from Main (white) to Distinct (gray) or vice-versa.
See Curtain Wall Settings: Scheme Page.
The properties of the Main and Distinct classes of panels (type, surface, width) are defined in the respective dialog boxes of Curtain Wall Settings. If you change any property of the Main or Distinct Panel classes for a selected Curtain Wall, then every panel in that class will change to reflect these changed settings.
See Curtain Wall Settings: Panel Settings (Main, Distinct).
Most of your Curtain Wall panels will be “fixed” glazed surfaces. However, you can insert object-type Panels which serve as Door or Window openings.
See Place a Door- or Window-Type Panel.
Customize an Individual Panel
When a Panel is selected in Edit mode, you can
•Open Panel Selection Settings and change them
•Delete the Panel
•Edit its parameters
Select the Panel(s) you want to edit.
See also Multi-selection of Panels and Frames.
Click the Panel tool to enter Panel Selection Settings.
Make the needed changes. Note that as soon as you make any changes in this dialog box, the “Class” field at the top changes to “Custom Panel.” This means you have broken the link between the selected Panel(s) and the class to which it earlier belonged.
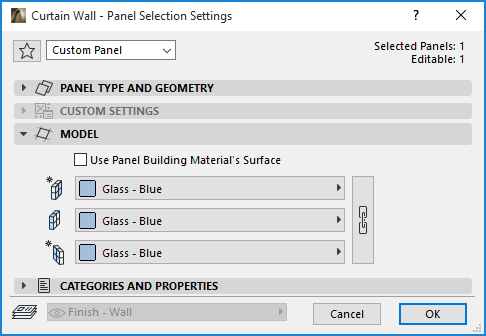
Click OK to leave the dialog box and apply changes to the selected Panel(s).
For details on this dialog box, see Curtain Wall Settings: Panel Settings (Main, Distinct).
Place a Door- or Window-Type Panel
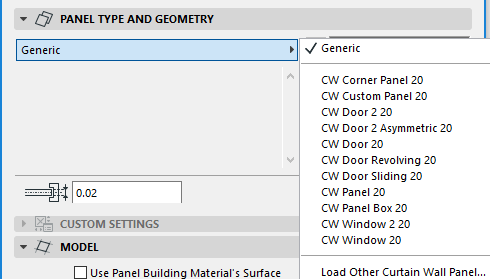
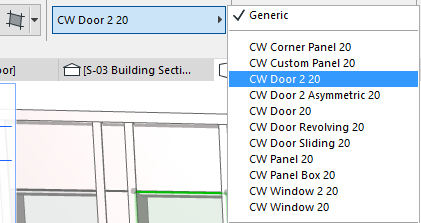
You can place a GDL-based panel which behaves like a window or a door. Some of these are predefined in ARCHICAD and are listed in the Type pop-up list in the Panel Type and Geometry panel:
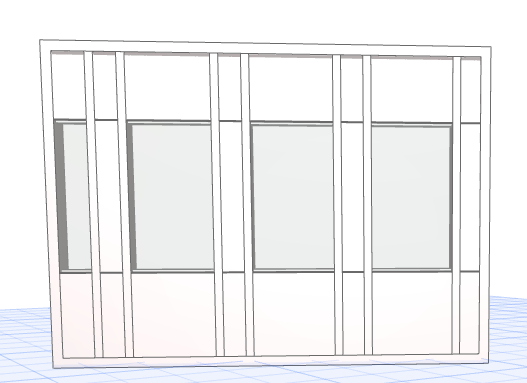
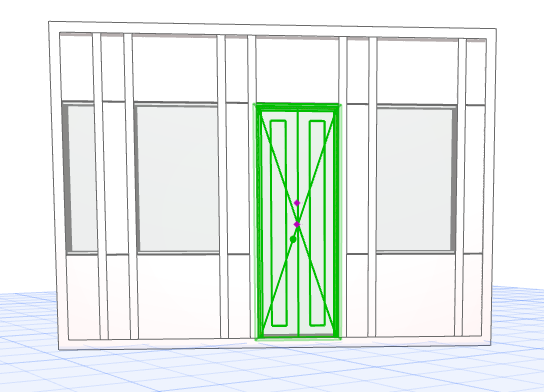
For example, suppose you have a Curtain Wall like the following one, and wish to place a door-type panel into it:
Select the Curtain Wall and go into Edit mode.
Now select the existing panels that you want to replace with a door-type panel. (Only rectangular panels will work.)
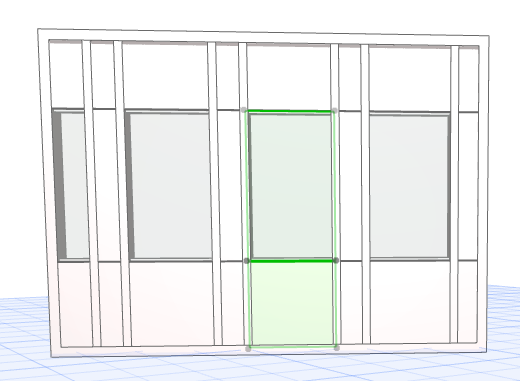
However, since you want to replace the two selected panels with just one door panel, first “merge” the selected panels by deleting the Frame between them.
To delete the Frame, turn off the panel display so that you can see the Frames better.
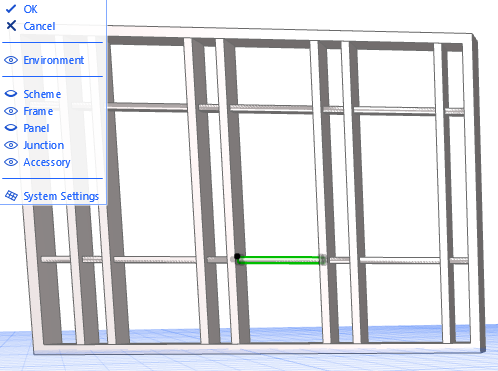
Then select the unneeded Frame which divides the two panels.
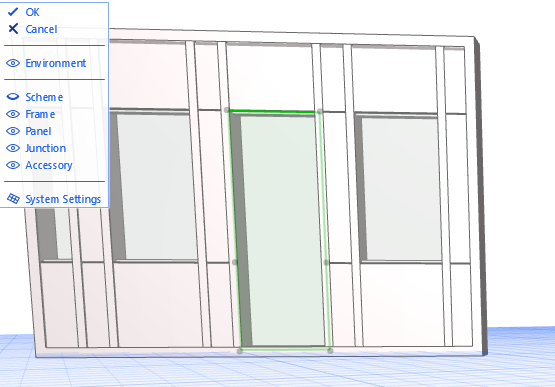
Delete this Frame. Turn the panel display back on (click the eye icon back open next to “Panel” in the list controlling Edit mode display) and notice that the two panels selected earlier have been merged into a single panel. Now select this panel.
In the Info Box, select the desired Object Type.
The selected panel is now replaced with a door-type panel, which you can open and close like other GDL doors. This newly placed panel is in neither the Main nor Distinct class; it is “custom.”
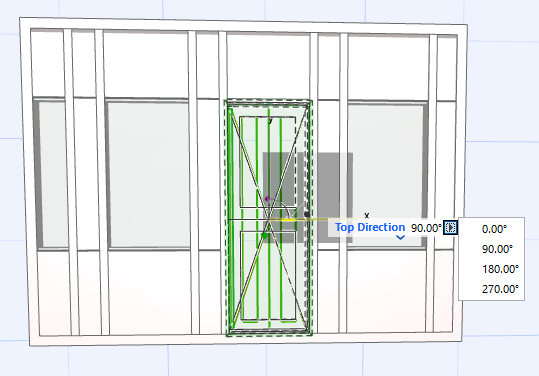
Note that this door-type Panel object has an editable parameter called “Top Direction.” This lets you redefine the “top” of the door by 90 degree increments in case you later free-rotate the Curtain Wall and the “top” of the door changes its position.