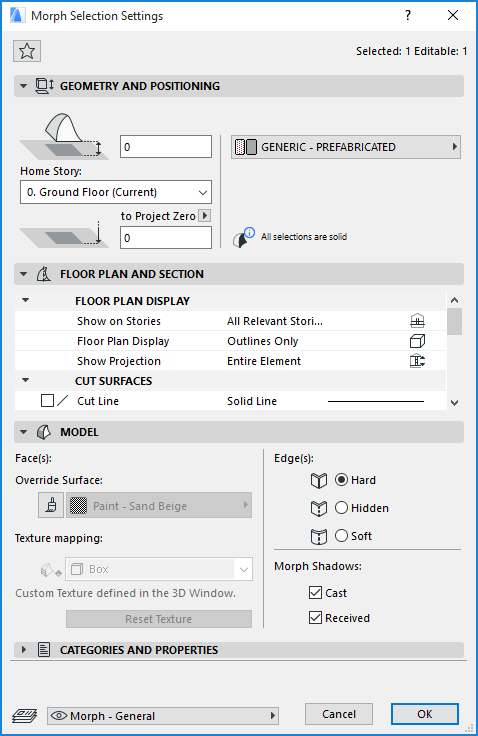
For a description of generic settings common to all tools in the Toolbox, see Working in Tool Settings Dialog Boxes.
For general information on how to create and edit Morphs, see Morphs.
Morph Default Settings enable you to set parameters for Morphs to be created.
Morph Selection Settings vary depending on whether you have selected
•the entire Morph, or
•one or more of its sub-elements (faces and/or edges),
•or a combination thereof.
See also Morph Selection.
Settings are shown for the last-selected face or edge, but when you change the options, they are applied to all selected faces and/or edges.
Morph Selection Settings: Entire Morphs
If you have selected the entire Morph, all controls of Morph Settings are available:

Exception: Texture Mapping (either Box or Planar) can only be modified for selected individual faces. For a Morph as a whole, the texture mapping is always “Box.”
Morph Selection Settings: Faces and/or Edges
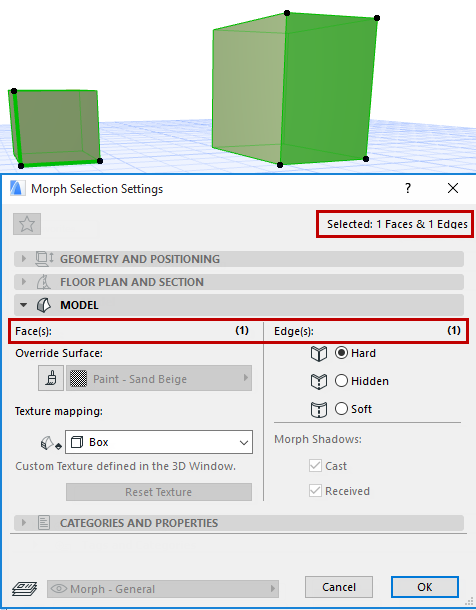
Use sub-element selection to select any combination of particular edges and faces from any number of Morphs to edit them.
In this case, only the Model panel is available, and the only available controls are Override Surface and Texture mapping (if any faces are selected) and Edge Type (if any edges are selected).
The rest of the controls (Morph Shadows) are gray, because these options can be applied here only to the Morph as a whole, not to its selected sub-elements.
Settings are shown for the last-selected face or edge, but when you change the options, they are applied to all selected faces and/or edges.
The numbers of editable faces and editable edges, if any, are shown in the Model Panel as well as in the Info Box.
Morph Selection Settings: Whole Morph plus Faces and/or Edges
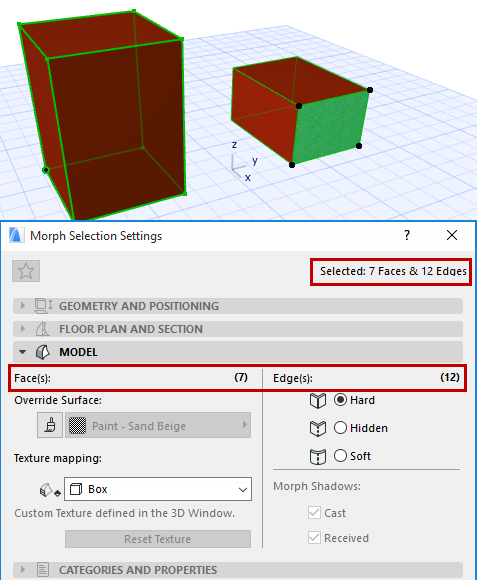
If you have selected an entire Morph plus any additional faces or edges, you will be able to edit sub-element options only: all the sub-elements of the entire Morph, plus the additional selected sub-elements.
Again, only the Model Panel of Morph Selection Settings is available, and only the Face Surface, Texture Mapping, and Edge Type can be edited. The total number of editable items is shown in the Model Panel as well as in the Info Box.
Morph Geometry and Positioning Panel
Note: The controls of this panel are available only in Default Morph Settings, or if you have selected one or more entire Morph elements (no sub-elements).
Bottom Offset to Home Story: Enter a value here for the Morph’s elevation from the Home Story.
This point is distinguished by a highlighted hotspot on the selected Morph; this is the Morph’s bottommost point.
Home Story
Choose one of the following Home Story settings:
•Current: The Morph’s Home Story will be the Current Story.
•Select Home Story: Choose a story to which to link the Morph. Click Select Story to bring up the full list of stories in the project, if they are not all shown in the list.
The Morph’s bottommost point is physically linked to its Home Story. If you later modify the Home Story’s position (e.g. redefine the floor level), the Morph will change its position.
Bottom Elevation [to Reference level]: Set the height of the Morph’s lowest point as measured from the Reference level (by default, this Reference level is Project Zero). Click the pop-up arrow to change the Reference level, if needed.
Note: Reference levels are defined at Options > Project Preferences > Reference Levels.
Note: The Bottom Elevation shows the current elevation of the Morph’s lowest point. Thus, this value serves as a calculation tool only, not a link. If you change the position of a Reference level, the Morph will not change its position.
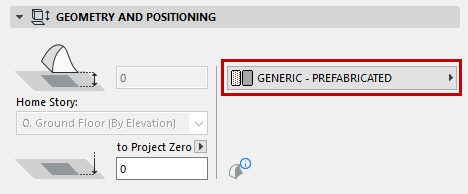
Building Material: Use the pop-up to choose a Building Material for the Morph.
Morph Floor Plan and Section Panel
Floor Plan Display
Note: The controls of this panel are available only in Default Morph Settings, or if you have selected one or more entire Morph elements (no sub-elements).
Show on Stories: Choose an option to define which stories will display the Morph.
•Home Story only: The Morph will be displayed and editable on its Home Story only.
•Home story plus one story up and/or down
•All Stories: The outline of the entire Morph will be displayed (using its uncut and overhead line settings) on every story of the project, with overhead attributes.
•All relevant stories: The Morph will be displayed and editable on each story it intersects.
•Custom: Choose this option if you wish to show the Morph on any other combination of stories. The Show on Stories: Custom Settings dialog box appears, where you can set separate story display options for the roof’s outline and its fill.
For more information, see Show On Stories.
Floor Plan Display: Choose an option to define the Morph’s display on the Floor Plan.
•Projected: shows cut part of element’s 3D model, plus its uncut (downward) part.
•Projected with Overhead: shows cut part of element’s 3D model (i.e, as cut at the level of the Floor Plan Cut Plane), plus the element’s overhead part (i.e. the part of the element that is above the Floor Plan Cut Plane.
•Cut Only: displays only the cut part, as cut with the Floor Plan Cut Plane.
Two additional abstract display options are available:
•Outlines Only: the entire element’s outline is shown using its uncut attributes. The line type will vary depending on the Morph’s location with respect to the Floor Plan Cut Plane:
-Morphs fully beneath the cut plane will be displayed with their full contour, with uncut lines
-Morphs fully above the cut plane will be displayed with their full contour, with overhead lines
-Morphs that are partly above, partly beneath the cut plane will be displayed with their full contour, and uncut lines.
•Overhead All: the entire element’s outline is shown using its overhead attributes.
Show Projection: This pop-up contains three options. (These are available only when the Floor Plan Display option is set to one of the “Projected” options.)
•to Floor Plan Range: Choose to show the element on a range of stories (the current story, plus a given number of stories above and below it.)
If you choose this option, then you can set the desired range (i.e. the number of stories on which to show this element in either direction) in Floor Plan Cut Plane Settings.
•to Absolute Display Limit: Set a fixed lower limit (by default, this is Project Zero), then show all parts of the element above this limit.
If you choose this option, then go to Floor Plan Cut Plane Settings to set the Absolute Display Limit for this element.
•Entire Element: All visible parts of the element will be displayed.
For details, see Floor Plan Cut Plane Settings Dialog Box.
Cut Surfaces: In this section, set the attributes displayed for cut surfaces both in Section and on the Floor Plan.
•Define the cut line type and pen.
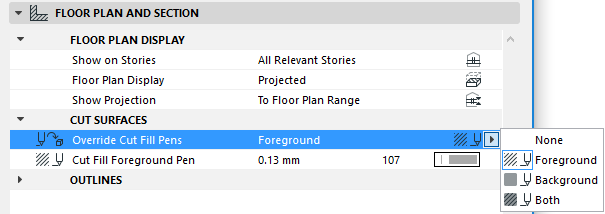
•If needed, override the fill foreground/background pens of this element (defined by default in the Building Material). To do this, choose Foreground, Background or Both from the Override Cut Fill Pens pop-up to access the respective controls.
Outlines:
•Outline Contour Display: Adds an outline contour around the morph element in Floor Plan/Section/3DD even if edges are hidden or soft.
Use the following settings to define line types and pen colors to element outlines that fall above (Overhead) and/or below (Uncut) the Floor Plan Cut Plane.
•Overhead Lines will be displayed if the Floor Plan Display pop-up is set to “Projected with Overhead” or “Overhead All”.
•Uncut Lines will be displayed if the Floor Plan Display pop-up is set to “Projected” or “Outlines Only.”
Cover Fills: Check this box to display a cover fill using the fill and pen settings chosen here.
•Choose a fill type from the pop-up palette.
Note: Only those Fills defined as Cover Fills in Options > Element Attributes > Fill Types are available here.
•Use Fill from Surface: Check this box if you want your cover fill to resemble the element’s top surface (vectorial 3D hatch), either as defined in the Building Material or (if the override is on) its top surface override
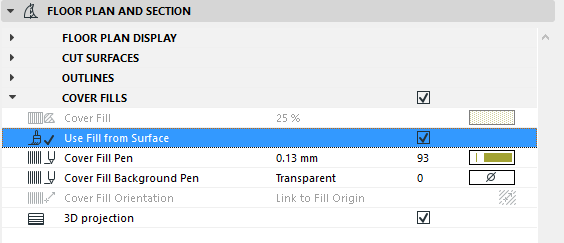
•Choose pencolors for the cover fill pattern and for its background.
Cover Fill Orientation: This control defines the orientation of the fill pattern. Select the control, then choose an orientation definition from the pop-up opened with the black arrow:
•Link to Project Origin: The fill pattern will start at the Project Origin, and the part of the pattern that falls within the Fill’s boundary will be displayed. No fill handle appears.
•Link to Fill Origin: If you choose this option, then the cover fill will show a fill handle when you place the roof on the Floor Plan. You can then manipulate the fill orientation by selecting and moving the fill handle. (Use the “Move Sub-Element” command from the pet palette.)
Note: Fill handles are only displayed if you have enabled View > On-Screen View Options > Fill Handles; and make sure that the 3D Projection checkbox (below) is turned off.
•Distorted: This option will distort the cover fill, simulating the 3D view of a curved surface on the Floor Plan.
For examples of each option, see Fill Orientation Methods.
•3D Projection: Check this box to display the Cover Fill as derived from its 3D Projection. (If you check this option, the “Cover Fill Orientation” options above are not available.)
This panel affects the 3D display of the Morph.
Note: If you have selected one or more Morph sub-elements (faces and/or edges), then the only available controls are Face Surface, Texture Mapping and Edge Type.
You can apply custom settings to one or more Morph faces or edges by using the Custom Face Settings or Custom Edge Settings commands of the pet palette.
See Transforming Morphs: Custom Face Settings.
Override Surfaces: Click the toggle button if you wish to override the surface assigned to all faces of this Morph (in its Building Material).
See also Override Surfaces With Surface Painter.
Note: The override surface, if it is a vectorial hatching, can also be applied as a cover fill for the Morph (by checking the “Use Fill from Surface” box in Floor Plan and Section panel of Morph Settings). Moreover, if the cover fill has a customized fill origin (via Link to Fill Origin option), the 3D Model will reflect that fill orientation too.
See Transforming Morphs: Custom Face Settings and Morph Edge Type: Hard, Hidden, Soft.
If you have customized any of the Morph’s surfaces (in the Custom Face Settings or Custom Edge Settings dialog boxes), a yellow “custom” icon appears alongside the surface/edge control in Morph Settings, indicating that one or more edge surfaces or types have been changed from the general setting.
See Custom Morph Surface: Feedback in Morph Settings, and Change Edge Type.
•Texture Mapping: This control (either Box or Planar) can only be modified for selected individual faces. (See Transforming Morphs: Custom Face Settings.) For a Morph as a whole, the texture mapping is always “Box” and cannot be edited.
See Morph Texture Mapping and Alignment.
•Edges: Choose an option for displaying all Edges of the Morph.
See also Morph Edge Type: Hard, Hidden, Soft and Change Edge Type.
•Morph Shadows: Check one or both boxes to display shadows either cast by the Morph and/or received on the Morph (shadows cast by other elements). Effects are visible whenever shadows are used (e.g. Rendering, 3D window).
Morph Categories and Properties Panel
Note: The controls of this panel are available only in Default Morph Settings, or if you have selected one or more entire Morph elements (no sub-elements).