
Share a Teamwork Project in ArchiCAD
The process of creating a new Teamwork Project is called “Share.” This involves opening a solo ArchiCAD Project file (.pln), then using the Share command to add it to a BIM Server.
Other users with access to the server will then be able to work on this shared project in Teamwork mode.
To share a project, you must have Project Administrator or Server Administrator status.
Note: User Status is assigned by the Server Administrator in BIM Server Manager.
See Manage Users on the BIM Server.
Follow these steps to share a Teamwork Project:
1.Open a solo ArchiCAD Project file (.pln).
2.Use the Share command (Teamwork > Project > Share or File > New > Share)
Enter your User name and Password, then click OK.
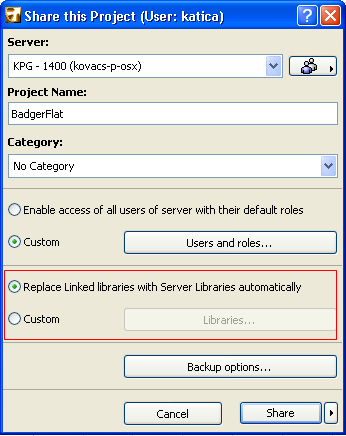
3.The Share this Project dialog box appears.
This list displays all BIM Servers to which your computer is connected. (An automatic server-identification process, called “Discovery,” will locate all the BIM Servers on your LAN.) Choose a server on which you have Project (or Server) Administrator status.
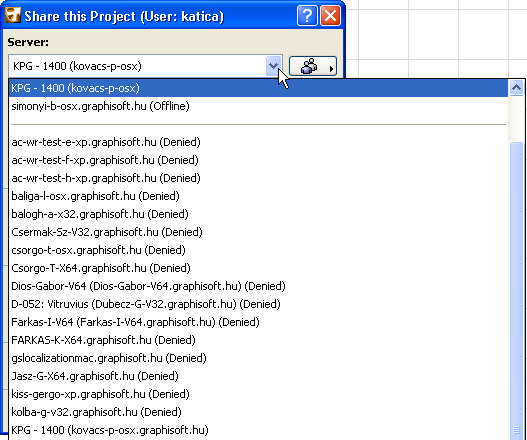
If you do not find the server you need in this list, or if for some reason the “Discovery” function is not locating the servers in your LAN, choose the Add More BIM Servers command at the bottom of the list. In the appearing dialog box, you have several ways of adding servers:
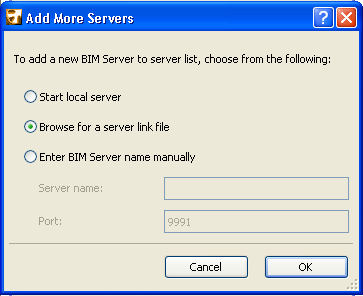
1.Start Local BIM Server: This starts up the BIM Server (if any) that is installed on your machine.
2.Browse for a server link file: If your Server Administrator has created a Server Link File (with extension .twlink) and sent it to you, browse for this file and click OK.
See Create Server Link for Client.
That server will now be added to your server pop-up list. This way, you do not have to enter any information by hand in order to locate the needed server.
3.Enter BIM Server Manually: Enter the name of the server (its IP address and model port) you wish to add.
Project Name and Category
In the Share this Project dialog box, enter the name of the Teamwork Project.
Optionally, choose a project category, or define a New Category.
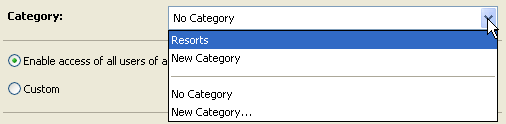
Note: Project categories can also be defined in Project Settings.
See BIM Server Manager: Custom Properties.
Users and Roles for this Project
Enable access of all users of [server name] with their default roles: This option means that everyone on the server’s user list will be able to access this project with their default roles.
See Manage Users on the BIM Server.

Custom Users and Roles: To add or remove users or change their roles on this project, click Custom, then the Users and Roles button to bring up this dialog box:
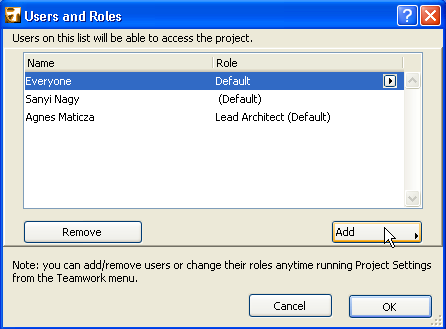
For details on these controls, see Assign Users and Roles to Teamwork Project.
After the project is shared, you can still modify the project’s user list, and the users’ roles, by using the identical Users and Roles panel from Project Settings.
These options define what to do with the linked libraries of the solo project you are about to share.
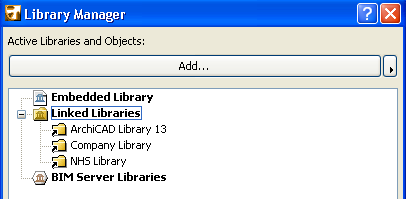
Every solo ArchiCAD project includes folders for the Embedded Library, Linked Libraries and BIM Server Libraries:
But once the project is shared as a Teamwork project, the Linked Libraries are no longer available as such.
Thus, as part of the Share project, you must decide how to convert the linked libraries for use by the Teamwork Project. (The BIM Server Libraries of the solo project, as well as the Embedded Library, remain unchanged even after the project is shared.)
Your choices will take effect after you click Share.
The default option is to Replace Linked Libraries with BIM Server Libraries automatically. Libraries from the BIM Server will replace any identically named linked libraries.
If no identically named library exists on the BIM Server, then the linked library will be uploaded to the BIM Server.
The Custom options enable you to either upload your linked libraries, replace them with BIM Server libraries, or disregard them.
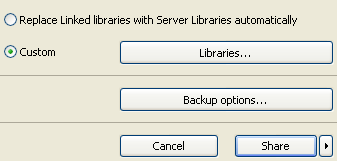
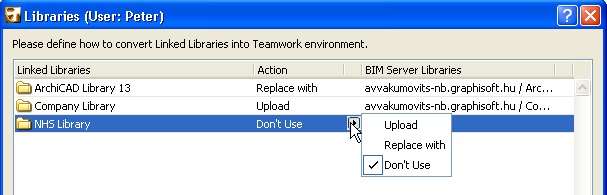
Click Custom, then Libraries, to open the Library Conversion dialog box.
The current solo project’s Linked Libraries are shown in the left column.
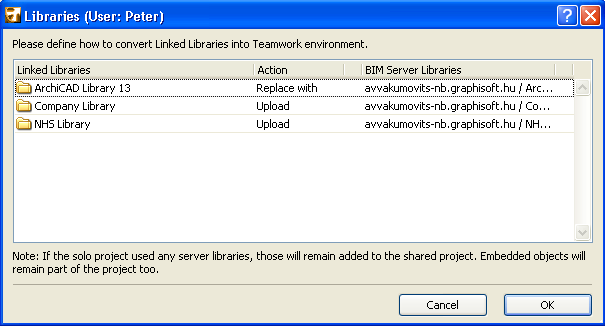
For each linked library you select in this list, choose one of three possible Actions, from the Action pop-up:
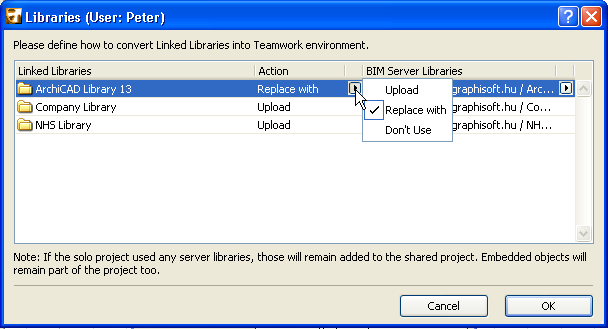
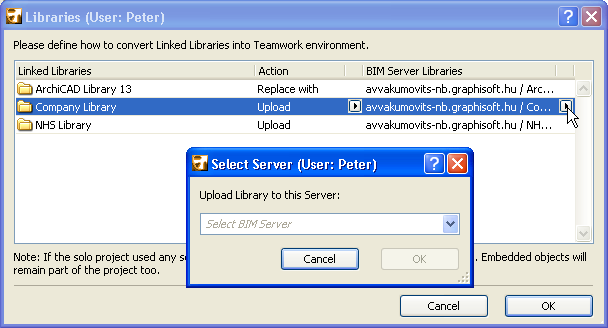
1.Upload: Upload this linked library to a BIM Server. You can choose any server (to which you have access) as the destination for the selected linked library.
To choose a different server than the one shown by default, click Different Server from the pop-up, then choose the server you need.
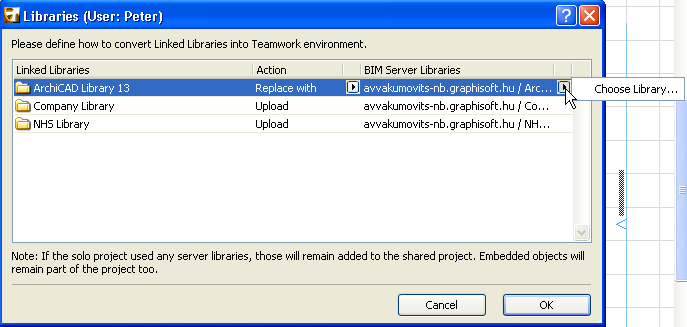
2.Replace with: Use this option to replace the selected linked library (in the left column) with the BIM Server Library (in the right column).
“Replace with” is the default option if there is a library on the BIM Server that has the same name as the selected linked library, but you can choose any other library (to which you have access) to use instead of the selected linked library.
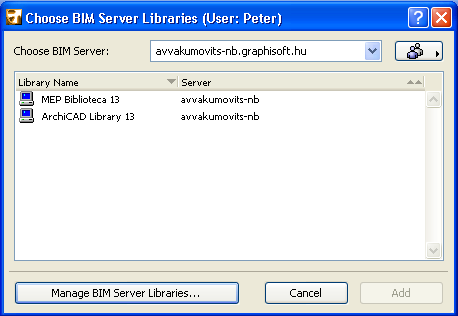
To choose a different library, click Choose Library from the pop-up, then choose the server and the library you need.
3.Don’t Use: This will remove the selected linked library from the project. (The linked library will not be loaded to any BIM Server during the Share process.)
Click OK to return to the Share This Project dialog box.
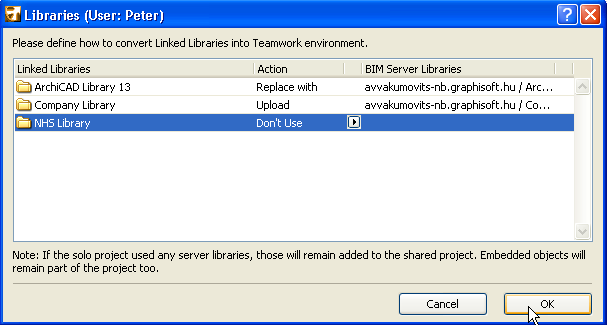
Your library conversion choices will take effect after you click Share.
If you do not want to open the shared project right away, use the Share without Joining option from the Share button’s pop-up.
Click Backup Options to access the Project Backup Schedule dialog box.
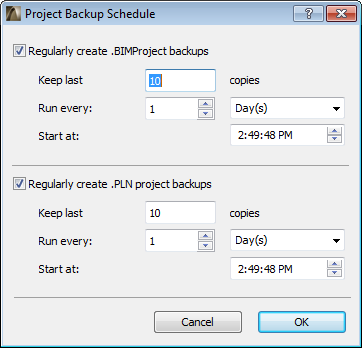
These controls are also accessible from the Project Settings dialog box.
Share
Click Share. The newly shared project will be opened now.