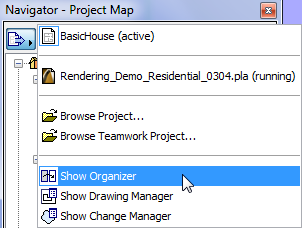
The Organizer is related to the Navigator and is opened from the Navigator. It houses essentially the same controls, but has a double-tree structure to make it easier to move and copy views and layouts from one map to the other.
Display the Organizer
To display the Organizer, choose Window > Palettes > Organizer, or the Show Organizer command from the Project Chooser at top left of the Navigator.

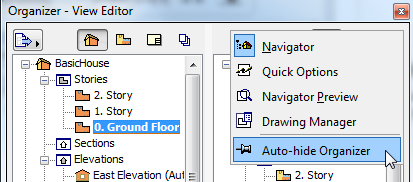
Auto-Hide Organizer
Both Navigator and Organizer Palettes have an Auto-Hide feature: if you turn this on, you can use the Navigator/Organizer as usual, but once you click outside the palette, it will disappear.
The Auto-Hide command is found in the Navigator/Organizer palette’s context menu (right-click in the gray area at the top of either palette.)
Organizer Modes
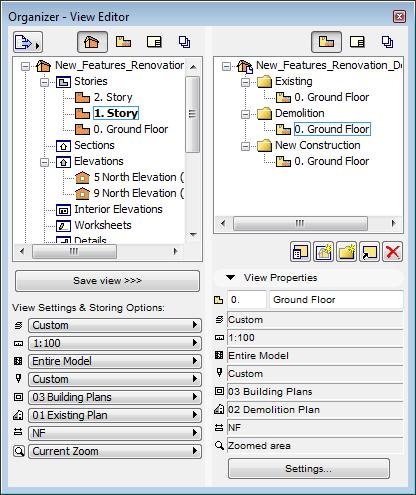
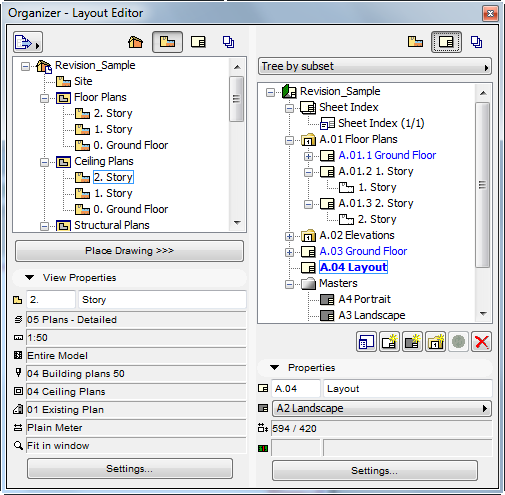
Click the desired map icons on both sides of the Organizer to bring up one of the three modes of the Organizer:

Depending on the mode of the Organizer Palette, you can add or copy the appropriate item (view or layout) to the right-side tree structure (view map, layout map or publishing set.)
•View Editor mode (Project Map on the left, View Map on the right): Save views by selecting a viewpoint from the Project Map and clicking Save view, or drag and drop it into the View Map.
•Layout Editor mode (Layout Map on the right): Place Drawings onto Layouts in the Layout Book by selecting a view from the Project or View Map (on the left), then clicking Place Drawing, or drag and drop it onto a Layout (on the right).
•Publisher (Publisher on the Right): To add a view or layout (on the left) to a Publisher set (on the right), select a view or layout and click Add Shortcut.
If you select a Subset in the Layout Map, the Add Shortcut button will create a folder in the Publisher Set which corresponds to that Subset: if you change or add items in the original subset, the Publisher Set folder will reflect these changes automatically. However, if you drag and drop a Subset into the Publishing Set, a folder is created, but this folder is not linked to any subsequent modifications to the Subset.
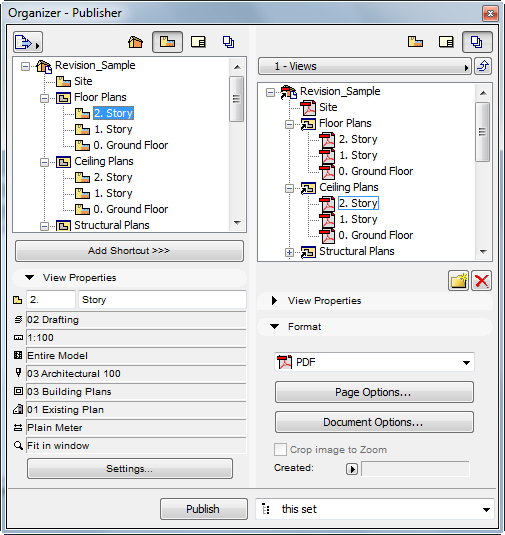
Note that the Project Map is available only on the left side. Certain combinations are not possible, and ArchiCAD will always adjust to one of the three possible Organizer modes. (For example, if you choose the Publisher on the right, then the left side will switch from Project Map to View Map, because you cannot place items directly from the Project Map to the Publisher.)
If you have the same map shown on both sides of the Organizer Palette, the Copy Shortcut button will duplicate the selected item on both sides (since both trees represent a single identical map).
It is possible to display an external ArchiCAD project’s tree structure in the Organizer and copy any of its views or Layouts into the active project.
See External Projects in the Navigator.
View Settings and Storing Options (at bottom of Project Map of Organizer)
Use these pop-up buttons to change the settings of the selected viewpoint in the Project Map. The following settings can be changed in this section:
•Layer Combination
See Layer Combinations.
•Scale
See Scale.
•Pen Set
See Pens & Colors.
•Model View Options Combination
See Model View Options Combinations.
•Dimensions
•Zoom
See Zoom.