MacOS: Enable Full Disk Access
Mandatory when installing on a Mac
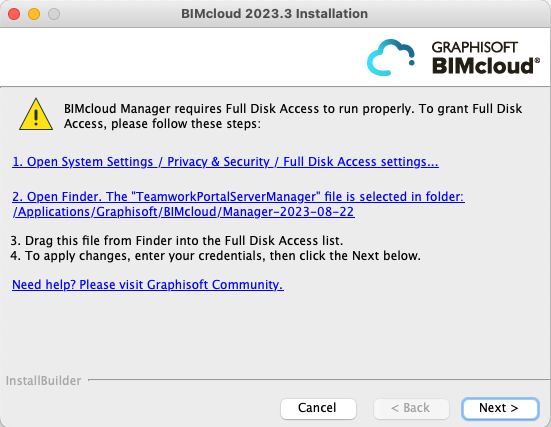
After you install or update a BIMcloud component on a Mac, an extra dialog will pop up: for BIMcloud to run properly, you must first enable Full Disk Access in macOS settings.
The reason: from time to time, Apple enhances the security features of macOS to protect customers better. Thus, when you install an application (such as BIMcloud) on macOS, it can’t function until you provide explicit permission for the app to access the required folders and data on your computer. This is called “enable full disk access”.
The appearing dialog walks you through the steps.

- Click the first link to open System Settings/ Privacy & Security/ Full Disk Access.
- Click the second link to open the Finder. The BIMcloud component (for example, TeamworkPortalServerManager) is already selected for you.
- Drag the selected file into the Full Disk Access list
- When prompted, enter your credentials to apply the changes.
- Click Next to continue.
What to do if you did not enable Full Disk Access
For BIMcloud to function, you have to enable Full Disk Access for each installed BIMcloud component. If you skipped this step, BIMcloud will not function.
To resolve this, start the BIMcloud installer again. On the first installation page, choose “Repair component” and select the component to repair. Follow the steps to enable Full Disk Access.
See this Community site article for details.